I've been at this floor and stair shellacking business since the wee hours of December 13th. Aren't I finished by now?
Well, maybe. Not quite sure.
You see, one thing I always liked about the shellac finish on my upper staircase is the effect it gives, not so much surface-shiny-glossy, but that the wood is somehow under water, and you could reach down into the clear finish and touch the warm golden surface an inch or two below.
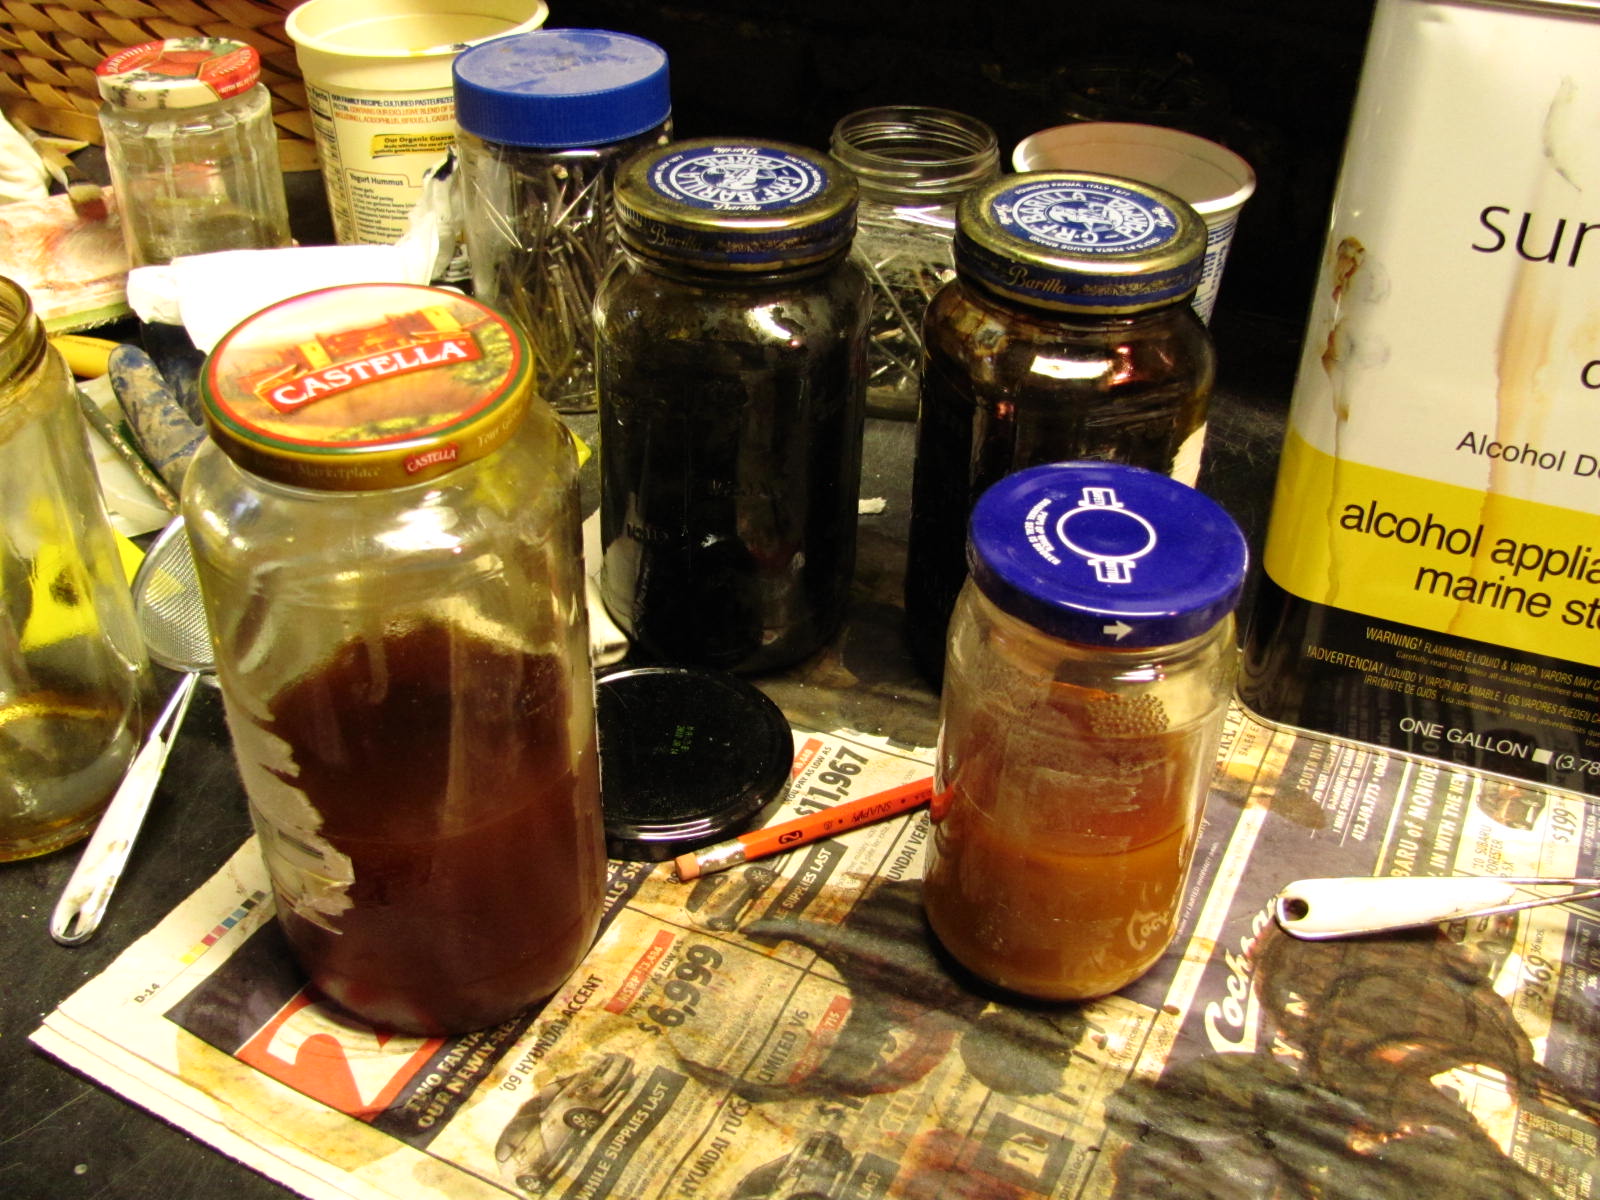
In October and November of 2010 it took me about ten coats of 1.5 pound cut Kusmi #1 buttonlac to achieve that, and regardless of color issues, when it came to the 2nd floor hallway floor and the main stairs down to the 1st floor, my resolution was to keep on adding coats of the untinted buttonlac until that's what I got.
Have I?
Well, I can say that watching the grain emerge more and more with each coat has been almost a poetic experience. It's felt like each floorboard was a rough gem I was polishing, each with its own distinctive beauties, and I've been laboring to bring those beauties to light.
So has that been accomplished?
Maybe first I should say something about how I've been going about this project. I have to laugh about all the stuff I bought eons ago to make the job easier and didn't use. Like the lambswool pad and the three-part screw-in mop handle. Ha. Can you imagine me keeping any sort of control with that rig in my little L-shaped hall? With my lousy eyesight? Not to mention how much shellac it'd soak up and waste! Instead, I chose to follow the advice given on a post here by Ralph the Woodworking Guy. That is, I followed him as regards the sanding and wiping-down prep work, and especially as to the use of the 1" fine brush. Two or three years ago I bought several good, if not luxurious, artist's brushes of various sizes just for the shellac work, and I had a nice 1" model right at hand.
Well. Early into the first coat (the one that should have been untinted-- sob!), I discovered what a blinking long time a 1" brush requires and how little shellac it actually carries to the surface. Yeah, Mr. Ralph was probably working with skinny modern 2-1/4" floorboards. Mine measure nearly 4" in breadth. So I moved to a 2" brush of the same type and haven't looked back.
I think I'm getting better at the application, keeping the brush well-filled and making long, smooth strokes. Ralph's recommendation is good, to do it floorboard by floorboard. Works well in maintaining the all-essential wet edge, and the joints make a good boundary at the sides. Though given how I filled the cracks with sliced-down strips of old disused floorboards, my floor is pretty tight and a little overlap was inevitable. (*smiles*) Standing up, you can't really see where the filler strips are, unless you're purposely looking for them.
I assuredly did not use the 2.5 pound cut he advises. Yeah, I guess that'd give you good build in three coats, but I know myself and my brushing abilities. I left enough weird streaks on the upper staircase with a 1.5 pound cut to try that.
No, this time I took to heart something said in a comment on The Prairie Box blog. There Mr. (or Ms.) Anonymous recommended more coats in a 1-pound cut for quicker application and drying, and ultimately for a stronger, more durable floor. Well, anybody who's successfully shellacked a floor in a house with "3 brutal cats" with claws is worth listening to. I've also heeded his (or her) advice about the increased and increasing waiting times between coats. For the upper stairs I only waited an hour or so between each coat. And of course, I let myself and the four animals (brutal, with claws!) onto the finish way too soon. Not going to make that mistake again!
Which is why it's over three weeks since I started this project, I've worked pretty steadily on it, barring four or so days at Christmas, and only today have I finished applying the sixteenth coat of shellac.
Yeah, ten-plus-six. Sixteenth. Hey, that would have been ten or so coats at a 1.5 pound cut, right?
But for whatever reason, I haven't yet achieved the "under water" effect I'm looking for. I'm judging by the shellac's finish on a certain large piece of soft/open grain on one particular floorboard, and it doesn't look limpid and even with the hard grain next to it, it looks mottled and glisten-y. What can be wrong?
Nothing, maybe, except different wood on the T&G boards than on the upper treads. It's all yellow pine, but the treads are more close-grained. And-- this is the kicker-- I don't have any artificial lights shining obliquely on the upper stairs, as I do in the hallway. The fact that I couldn't get the effect I wanted was bugging me, so I took a light and shone it on the stair treads. Yeah, in the stairwell I get some of the same glistening effect, though there I can't see it.
Which is why I'm saying Enough with sixteen coats. On the hallway at least. On the main stairs I really have glisten where I want limpidity, and I was thinking they were going to need four more coats, at least.
But maybe not. I was on the Shellac.net FAQ page earlier this evening and it said something about rubbing-out. Rubbing out? On researching this, I find that that's what I really need to do to even out the finish and get the effect I want. I think. I've heard you don't want to make it too glossy, or every last (claw) scratch will show and scream.
Maybe I'll first experiment with rubbing out the main stair treads. They look dull the way they are, whereas the overall effect in the hallway is just fine. Very likely it won't gain me a thing to coat the main stair treads any more, and it might be counterproductive.
So can I say the shellacking on the stairs and hallway floor is done?
Maybe. I'm not sure. Because "everybody" says that dewaxed shellac is what you really need on top to shed water, and I have a nice can of Zinsser SealCoat I can use. Or I can dewax some of the Kusmi. But I recall Ron at Shellac.net telling me that the Kusmi #1 buttonlac is fine and hard for floors just as it is. And really, once it'd had time to cure on the upper stairs it had no trouble resisting the wet snow the cable guys tracked in last January. The water beaded right up. And if I lay down a coat of dewaxed shellac, isn't there the likelihood that it'd just get rubbed off in the polishing process?
If I'm going to do the dewaxed, I need to get it applied tomorrow. I definitely want to give the finish a good week or more to cure before I allow shoe and pet traffic on it, let alone think of rubbing it out. And as it is the foam insulation people may well be coming to deal with the attic late next week. So time is at a premium.
So is it soup yet? Yes. No. Give it several more days to simmer. But it's getting there!
Showing posts with label wood floor. Show all posts
Thursday, January 5, 2012
Sunday, January 1, 2012
Dark Reflections
Two or three weeks ago I promised to post pictures of the 2nd floor hallway floor shellacking I was finally, finally getting done. Here they are, with commentary (including a great deal of whingeing and wailing):
The work commenced a little around a quarter to one AM on the 13th. First step was to float a fresh coat of mahogany-tinted shellac over the stairs to the 3rd floor that I did a year ago October. I made the mistake back then of letting the animals with their capers and their claws back onto the finish too soon, and in several places they'd scratched the treads to the bare wood:
What you see above is actually after I took some plain, untinted Kusmi #1 shellac to it and rubbed some of the worst of the scratches out. Here the upper stairs are with the fresh coat:
Now, I wouldn't take the evidence of my Canon PowerShot SX120 camera to convict a cockroach. It knows nothing of accurate color-rendering, and it's useless for depicting degrees of sheen. But this photo does testify true, first that the scratches were colored in, which is good, and second, that the color of the top shellac coat is too damn dark.
All this is what I get for failing to look for the scratchpad where I wrote down the proportions of mahogany and walnut dye to shellac a year ago. As it happens, it wasn't actually up in my study where I thought I'd left it; no, that notepad has to be in the avalanche that is currently my guest bedroom, where I dumped everything before I started repainting the study in late August. In any event, I didn't even try to look for the recipe when I mixed up the latest batch. Instead I used a formula inverse to that I used to mix the walnut shellac for the trim in March (meaning, mostly mahogany with a smidge of walnut instead of vice-versa). And even with that, I used less dye than the formula called for. I thought it'd match.
So my first mistake was laying on that shellac at night, under insufficient light. It wasn't till I got to the bottom treads down at the hallway that I noticed how dark the new color was, and how I'd merrily killed the golden-brown color I'd loved so much in those steps.
My next mistake was not drawing the obvious conclusion from the effect of the new shellac on the upper stairs. No, I was so keen to get things moving that I went ahead and used it on the floor. You'd think when I saw how reddish and dark it was on the first floorboards in the back of the closet, I'd dip a rag in the jar of alcohol, wipe it off, then go dilute the mix with more shellac and alcohol and start over.
But no, I had to keep going.
You'd think I'd remember that the first coat on the study stairs looked like this:
But somehow I thought it'd be All Right and marched-- I mean, brushed-- on.
This is where I left it around 3:30 in the morning on the 13th. The camera with the flash makes it look more finished than it is.
But this isn't exactly accurate, either:
Since then, it's hit me that I made another mistake: I forgot that with fully-stripped and sanded wood with no patina, the first colored coat sets up so much better if an untinted coat is laid on first. So even though I knew good and well by the next evening that what I had was too dark, in the following days I still had to lay on two or three more coats of mahogany-tinted shellac, though not half as strong, so the color wouldn't be just a watered-down burgundy red.
The next two days, the 13th and 14th, I finished the first coat on the hallway and brought it down the stairs.
And if I thought looked watered-wine color up in the hallway, did it ever go red on the main stairs!
My friend Frieda* came by about the time I finished up the bottom tread. She thought it looked "beautiful." I'm trying really hard to take her word for it and so make the best of it. Wiping it down and starting over wasn't an object once I got to this point-- too much damage to the walnut-shellacked risers and stringers. I'll follow up with a post or two on how it looks now, two weeks later, with the caveat that my crummy camera is not to be trusted . . . And I'll promise to buck up and not whinge any more. Really.
The work commenced a little around a quarter to one AM on the 13th. First step was to float a fresh coat of mahogany-tinted shellac over the stairs to the 3rd floor that I did a year ago October. I made the mistake back then of letting the animals with their capers and their claws back onto the finish too soon, and in several places they'd scratched the treads to the bare wood:
With cat and dog scratches |
Too dark and red |
All this is what I get for failing to look for the scratchpad where I wrote down the proportions of mahogany and walnut dye to shellac a year ago. As it happens, it wasn't actually up in my study where I thought I'd left it; no, that notepad has to be in the avalanche that is currently my guest bedroom, where I dumped everything before I started repainting the study in late August. In any event, I didn't even try to look for the recipe when I mixed up the latest batch. Instead I used a formula inverse to that I used to mix the walnut shellac for the trim in March (meaning, mostly mahogany with a smidge of walnut instead of vice-versa). And even with that, I used less dye than the formula called for. I thought it'd match.
So my first mistake was laying on that shellac at night, under insufficient light. It wasn't till I got to the bottom treads down at the hallway that I noticed how dark the new color was, and how I'd merrily killed the golden-brown color I'd loved so much in those steps.
This I loved. Too late now. |
But no, I had to keep going.
You'd think I'd remember that the first coat on the study stairs looked like this:
But somehow I thought it'd be All Right and marched-- I mean, brushed-- on.
This is where I left it around 3:30 in the morning on the 13th. The camera with the flash makes it look more finished than it is.
But this isn't exactly accurate, either:
Since then, it's hit me that I made another mistake: I forgot that with fully-stripped and sanded wood with no patina, the first colored coat sets up so much better if an untinted coat is laid on first. So even though I knew good and well by the next evening that what I had was too dark, in the following days I still had to lay on two or three more coats of mahogany-tinted shellac, though not half as strong, so the color wouldn't be just a watered-down burgundy red.
The next two days, the 13th and 14th, I finished the first coat on the hallway and brought it down the stairs.
The second stage starts at the bathroom door |
Then on in front of the upper stairs |
Did this in 3 stages, to have a dry place to perch on |
My friend Frieda* came by about the time I finished up the bottom tread. She thought it looked "beautiful." I'm trying really hard to take her word for it and so make the best of it. Wiping it down and starting over wasn't an object once I got to this point-- too much damage to the walnut-shellacked risers and stringers. I'll follow up with a post or two on how it looks now, two weeks later, with the caveat that my crummy camera is not to be trusted . . . And I'll promise to buck up and not whinge any more. Really.
Labels:
2nd floor hall,
frustration,
perversity,
shellac,
stairs,
wood floor
Tuesday, December 13, 2011
Announcement
Yes, it's as late as the date stamp says.
But I simply had to announce that after a long Monday of sanding, steaming out dents, more sanding, more steaming out dents, a whole lot of vacuuming and dusting, a wipe-down with denatured alcohol, and, oh yes, a little more steaming out of dents followed by more sanding and vacuuming, I finally got things in order with my 2nd floor hall and the main stairs to get some mahogany-tinted shellac onto the hall floor.
Ta-daaaaahhhhh!!
Only "some," because I began by applying a repair coat to the stairs to the 3rd floor, and I didn't start that till after 1:00 AM. I then proceeded to lay a first coat onto half the hall. Only half, because my upstairs hall is L-shaped and I can't levitate and I don't want lap marks at the midpoints of the longest boards. Besides, it was past 3:30 by the time I finished the first leg of the L, and if I get called in to teach in the morning that's rapidly approaching, I'm going to be a big slice of burnt toast as it is.
But after all this time, I thought it was only right for me to mark the occasion. Pictures and commentary to follow.
Thursday, December 8, 2011
Heading in the Right Direction
12:45 AM
Here I am in the front room, contesting possession of the sofa bed with a very determined dog.
Yes, I've finally, finally made the long-awaited move downstairs to keep me and the animals off the staircases and 2nd hall floor until they're refinished and cured. No, I haven't finally, finally got any new shellac on the staircases and/or the 2nd floor hall floor.
I have vacuumed the whole lot, and used a dental pick to clean the cat hair out of the joints between the treads and risers of the set to the 3rd storey. Those were wiped down with a damp washcloth and dried off, then I went over them lightly with 220-grit sandpaper. Then wiped them off with a tack rag, then with the damp washcloth again.
The cardboard and brown paper is off the hallway floor, and I see I have a darker strip at the bedroom door where the bare boards weren't covered all these months, as well as residue on the floor from the painter's tape I stuck the paper down with. I gave those places a bit of a sanding, and it seems to be evening out.
The joints to the steps down to the 1st floor I haven't defuzzed yet. It was rising midnight and I felt it was a good point to leave it. Still had to pull out and make the bed. And go down and get ready for bed in the basement bathroom for a change. And try to convince the dog to let me into the bed at all.
The fun thing will be sleeping with all the electric candles around this room. And the glare from the neighbors' Christmas lights outside.
Not to mention the cats making noise trying to find a way around the barriers I've erected in all the stairhall openings. Never mind. I'll deal with that in the morning.
Labels:
2nd floor hall,
cats,
dog,
prep work,
shellac,
wood floor
Friday, December 10, 2010
Back at It
I'm too tired to say anything clever at the moment, but I thought I'd report that for the last two days, after an hiatus of what? two or three weeks, I'm back at the hallway sanding.
And I suppose it's going reasonably well. The rough sanding still isn't done, but at least I can tell the difference between what I've worked on and what I haven't.
I've been using the belt sander; it's the only effective way to get things started, my floor's in such bad shape. The biggest difficulty has been keeping the damn cord out of the way. They say to drape it round your neck, but that's only going to work if you loop it round once or twice. Which could get interesting if the sander got away from you.
Ergo, I didn't get the best use out of it yesterday, which led me to believe I was going to have to do a lot of additional filling, where the soft parts of the wood have worn away. But where I was working today, I was able to hang the belt sander cord off the newel post, and got a lot more done with it. Smoothed down some floorboards I was sure would have to be filled, and I think they're still structurally sound . . .
I'm still not sure how far I can take that. If I decide I'd better not sand the boards down until they're absolutely clean, which will look worse: shellacking over the remaining dirt, or shellacking over the wood filler? I've noticed that the latter actually looks darker than the wood around it once you've got a few coats on. And if I don't fill those areas, what will that mean for wearabilty? But if I don't, will the filler necessarily stay in?
I haven't made too much of a mess of the floor, though some of the adjacent vertical woodwork now bears marks of where I let the belt sander get rather too close.
And I suppose it's going reasonably well. The rough sanding still isn't done, but at least I can tell the difference between what I've worked on and what I haven't.
I've been using the belt sander; it's the only effective way to get things started, my floor's in such bad shape. The biggest difficulty has been keeping the damn cord out of the way. They say to drape it round your neck, but that's only going to work if you loop it round once or twice. Which could get interesting if the sander got away from you.
Ergo, I didn't get the best use out of it yesterday, which led me to believe I was going to have to do a lot of additional filling, where the soft parts of the wood have worn away. But where I was working today, I was able to hang the belt sander cord off the newel post, and got a lot more done with it. Smoothed down some floorboards I was sure would have to be filled, and I think they're still structurally sound . . .
I reflect as I work that I have no method. I mean, sometimes I use 80-grit belts and they work well enough. But sometimes they don't, and I go to 60-grit belts. And sometimes I can manage the 60-grit belts just fine, and sometimes they leave skid marks in the wood and I have to go back to the 80. A professional would be able to use a given tool or technique the same way all the time. Me, I'm no professional. I have no method.
But I've figured out how to track the belt, so that's an advance.
The rough sanding isn't totally done, but as I said, I'm tired. I'm using muscles I forgot I had. I need to cut more sandpaper for the mouse sander, and rip some more filler strips for floor cracks. Yes, there are some I didn't fill last April and know now I should have.
Labels:
2nd floor hall,
decisions,
equipment,
sanding,
wood floor
Saturday, July 31, 2010
Some Finish Decisions. I Think.
Early last week, after the previous post, I'd made a decision on what I was going to do about my shellac. I was going to buy a great big gallon of the Zinsser Bullseye Amber at the blue and gray store, tint it with the aniline dyes I've mixed, and use it on all my floors and trim. The buttonlac I'd save for a few furniture pieces I have to do.
But Tuesday afternoon I showed up at Lowe's, and the Bullseye shellac can didn't say what the pound cut was. And there's this other shellac product Zinsser has called SealCoat, and it's 100% dewaxed. Meaning the other kind isn't. But the SealCoat can didn't list the pound cut, either. And the kid behind the paint counter hadn't a clue. I wasn't about to blow upwards of $25 on the wrong thing, so after getting the scissors I needed to cut sandpaper, I went home and did some research on line.
OK, Bullseye is still 3-pound cut, and SealCoat is 2-pound. Hmm. If wax is not that great, maybe I can just tint the SealCoat and put on three coats of that, with a couple of thinned-down coats of polyurethane over it?
Did some more research.
And ended up back on the Shellac.net site, where I'm reading about the buttonlac I already have, and it says this:
"Buttonlac is a unique shellac product preferred by restorers and those looking for a very protective shellac finish. It is superb for French polishing due to its hardness. Button Shellacs are prepared by the hand made process of heating the seedlac in a cotton tube. The resin secretes through the pores of the cloth and the molten shellac is formed into buttons. The processing heat polymerizes the resin, resulting in a very tough & moisture resistant finishing material. Button Shellac is preferred for finishing floors and interior woodwork."
Oh. Floors and interior woodwork. I do seem to recall having a phone conversation to this effect with Ron at Shellac.net. Just about a year ago, it was. I shot him off an email Tuesday evening, full of questions about poly over shellac, could I get the right tint with the red mahogany and dark walnut dyes I already have, what if my dog peed on a shellacked floor, etc., etc. A few minutes later, I got impatient and called him.
He said yes, I wanted to leave the wax in the Kusmi #1 I'd mixed. Yeah, I could do poly over the shellac . . . if I laid on a coat of the dewaxed kind first . . . and if I really don't mind losing the repairability of the shellac finish. Up to me. As to the dyes, he didn't think I'd need to lay in a supply of golden oak or anything of the sort. Just try a very little bit of red mahogany, and the natural tone of the yellow pine would supply the gold. And if I ran out of the buttons for the floors, he could have more to me in three days.
That put me firmly back in the do-it-myself buttonlac camp. On Wednesday I sanded down some original yellow pine floorboards (what was left of them after I'd sliced them for gap-filler strips) and on Thursday I tinted up some of the Kusmi #1 mix with a wee bit of the mahogany dye (we're talking 1/4 teaspoon in 3/8 cup of 1.5 pound cut shellac-- is that 1/72?). Over the next two days I brushed on six (count 'em, 6) coats of this mixture on three different old floorboard remnants, and I think I have a reasonably good tone for my hall floor and stair treads. (Note that the piece shown above is fully-coated only on the left. Otherwise we have a 6-5-4-3-2-1 sample). Ron was right-- the yellow in the boards was enough. Some might think six coats is too much, but I like the easy way the 1.5 lb. cut goes on and everything I've read tells me that several thin coats will hold up better than fewer thicker ones. I tried splashing some water on it and it beaded right up.
(Two boards have shellac only at the ends; I was reserving the rest in case I needed to test other tones. Yeah,
there's a stripe of build-up next to the bare or less-coated wood. I've read I can avert that by starting to brush the shellac on about an inch or so away from the end of the workpiece, continue to the other end, then quickly brush back all the way to the first end, picking up and evening out that first deposit of finish on the way. Should work if I can keep the tread shellac off the stair stringers in the process.)
All this led to a decision: Instead of successively coating the 3rd floor stairs, 2nd floor hall, and the main stairs (which had long been my assumption), I would now start on the 3rd floor stairs alone. I'll give them five or six coats of shellac only, then live with them for awhile and see what the dog, cats, and I do to them. If I think they still need a layer of polyurethane over, I can repair any damage to the shellac and go from there. Meanwhile, I can be working on the hall floor and the stairs down to the 1st floor.
But today, I had a brainstorm. You know how I've been stressing over how to keep the animals off the work? I already had figured out that I can use my tension-sprung baby gate to exclude them from the 2nd floor when I'm doing the stairs to the 3rd. But I was looking down the stairs to the 1st floor today, and I said to myself, "You know, if you replaced the balusters to the stairwell first, you could put that gate at the bottom of the stairs between the wall and the newel post, and do the upstairs hall and maybe even some of the steps below without the cats and dog in the way."
Hmm. But that means mixing up the dark shellac for the woodwork in the stairhall and refinishing all that first.
What of it? A lot of it is vertical surfaces, and maybe it'd be better to have that done before I do the floors.
So tonight I mixed up another jar of button shellac, a pint and a half of 2-pound cut Kusmi #2. It's still getting shaken and dissolved. This batch I plan to keep more of, as this time I won't be trying fruitlessly to get rid of the wax!
Labels:
2nd floor hall,
advice,
cats,
decisions,
dog,
shellac,
stairs,
wood floor,
woodwork
Sunday, July 25, 2010
It's Always Something
I'm trying to make progress on my floor refinishing, I really am.
This past week I mixed a quantity of Kusmi #1 shellac buttons in denatured alcohol, enough to make three cups of 2-pound cut shellac (that's the biggest jar I had). Three days to let the lac dissolve, then filter it and the aniline dyes yesterday or today, and I'd be ready to start mixing up color samples.
But once the buttons were dissolved, I noticed an orangey cloudy substance floating in the bottom of the jar. And though I tried filtering it out through heavy t-shirt fabric, whatever it was went right on through. Looked it up online last night, and it appears that's the wax that naturally occurs in shellac. I also learned that it's good to get rid of it, since the less wax, the better water resistance.
Yesterday I decanted the waxiest part into another jar. But this evening I saw that what was left is pretty waxy still. The websites tell me to siphon the good part off, but I'm not schooled in such mysteries. Doesn't that involve sticking a tube into it and sucking it up and trying not to get it in your mouth? Sounds like a dubious procedure to me.
As it is, I think I have half or less left of what I originally mixed, and I'm contemplately committing sacrilege and letting the Zinsser people take care of it. I know what they say about getting better quality control and freshness if you mix up your own shellac, and I also know what other people say about Zinsser having perfectly good quality control, you just have to make sure you look at the top of the can and make sure it's from a recent batch. I do know that I sampled the can of Zinsser amber shellac I bought in May last year, brushing a swatch on a piece of Plexiglas, and it set up right away.
If I give in and use the commercial shellac, it may be because I'll need more of it than I can mix on my own with what I have. For some reason, when I ordered the lac buttons I got three different kinds, none of which are enough to do the whole job, floors, trim, doors, and all. Gary at the Old Crackhouse says the various lac colors don't show up that different as applied, but I'd prefer not to make the experiment.
Meanwhile, what I have left of the Kusmi is settling some more.
Got the walnut and mahogany aniline dyes filtered. That's done, at least. Had some sediment stuck on the bottom of the jars after I was done. I'm hoping that took care of a lot of the particles that wouldn't remain in suspension, and isn't a sign I've waited too long to use the dyes. (Mixed them two months ago yesterday.) Not sure what would happen if I had; I dipped a piece of pine wood into the mahogany dye and it took it and dried like it's supposed to. Whatever I use for my basic shellac, it will be cut and tinted with the aniline, so the color will go on in layers, vs. dyeing the wood itself.
The next thing on the list was to sand down some discarded pieces of floorboard to emulate the real thing, to test colors. The sandpaper sheets you can get to go on the Black & Decker mouse sander are too blinking expensive, so I purchased rolls of fuzzy-backed 60 and 80 grit paper from these guys. Works great, but I have to use an old sheet as a template and cut each piece to size. No problem, except I can't find the scissors I use for that, anywhere. It's a old pair I inherited from my grandfather, and last I saw them, I'd discovered I'd left them out in the garden all winter. I thought I put them someplace safe, but if so, they're safe from me! And my other utility scissors refuse to work.
So until I can cut sandpaper, I can't do any sanding and the work is at a standstill.
Actually, I'm on for round three of chemotherapy tomorrow, so there's a standstill of its own. Temporary, I hope. I've been stinking tired these past few days, but I hope that's from the heat.
Saturday, April 17, 2010
I Don't Think So
Well, I was at it again late this evening and early morning, doing more planing, and filling more cracks in my hallway floor with skinny little wood shims.
Yeah, I said I was done the other day. That's what I said.
Put it down to perfectionism. Put it down to my having lived with and scrutinized the floor the past few days. But I've sliced off a few more strips, slathered them with wood glue, and rubber-mallet-rammed them into the increasingly-narrow cracks.
Or maybe you can put it down to my facing reality. Maybe I've finally accepted that there's no way I can do two stages of sanding, mix up and apply the filler for the remaining small cracks and sand it down, get the aniline dye and the lac buttons to dissolve and do the necessary color experiments, and apply three coats of finish (also figuring out how to restrict my four animals from the job site) in time to have the floor all finished before the 21st.
No. I don't think so.
So I may as well do as good a job at this stage as possible.
We'll have fun with shellac in June.
Wednesday, April 14, 2010
Patina
Three-four years ago, when I first pulled up the rug from my 2nd floor hall, it struck me for the first time that I live in an old house.
Of course I've always "known" that--intellectually. It's just that with the beige carpet and the beige trim and the beige wallpaper it didn't feel any age in particular. This, despite the POs-1's attempt at applied-gingerbread Victorianizing. The house's age and character was so muffled up and cocooned.
But as soon as I saw that dark shellacked pine floor, even with all the paint drips on it, I began to have a feeling for the house as something that had seen nearly one hundred years. I was taken with an almost visceral sense of the living that has gone on here in that time. It was a little like freeing the ghosts, in a good way.
So now the floor is stripped, the wider gaps are filled with shim strips cut from original floorboard material, and tonight's project was to finish removing the fifty or sixty 8d (2-1/2") and 5p (1-3/4") common nails the previous owners felt compelled to drive into the floorboards. Around me was more evidence of their work, in the 1/2" gouges left by the carpet pad staples. But I'm afraid I added my own bit of history to the floor . . . I did my best not to wreak destruction getting the screwdriver tip (yeah, a regular screwdriver) under the nailheads, but sometimes bits of the wood came up with the nail, anyway.
Well. Not as bad as what I did the other day with the five-in-one tool, and oh, I hope the sanding will remove the evidence here!
But who needs perfect? People pay thousands of dollars for that authentic "distressed" look, and here I was creating my own for free.
(Pause for hollow laugh.)
In some cases, the nails were too small to pry up. Those I rammed in with a nail set. In two or three cases, the heads on the bigger nails came off; those shanks got countersunk, too.
Now that the nails are up and out (or down and in), I find myself walking over the floor monitoring the squeak. It squeaked before, didn't it? Sure, it did. It's just the voice of an old house that I hadn't really noticed before. We're not talking the scream of the family banshee at 3:00 in the morning; just the familiar signal that a person is treading there.
What I was checking for was any sign that anything was dangerously loose now that the surface nails are gone. No, everything seems nice and tight (maybe the shims help!). Wonder what those nails were put there for in the first place?
After this, I took my grandfather's old hand plane (now sharpened) and planed down the parts of the shim strips that stuck above the floor surface. I am no expert at planing. So I'll state the obvious: Planing rewards the bold. That is, make good long strokes and keep going. It's the short, tentative strokes that leave the gouges.
I have a bit of cupping on my floorboards, so I expect to have to take it down with the rough sanding. Which should get rid of any inadvertant "antiquing effects" my planing has left.
I still think it would be really great if I could get the floor refinished before I go into the hospital the 22nd. Depends greatly on whether I do my shellac color tests and hit on the right color in time.
Tuesday, April 6, 2010
A Decided Lack of Enthusiasm
I don't like having to notch out around the roofing nails some previous owner saw fit to use to hammer in the tongues instead of proper square flooring nails. Inevitably, at least some of the filler strip cracks away.
I don't like the fact that no matter how many gaps I've filled in, I seem to have just as many yet to do. Or at least, the more I fill, the more I feel compelled to fill. The ones that seemed narrow enough to let alone look pretty wide after all.
On the other hand . . . it's good to have the old floorboards to match and rip.
And the table saw to rip them on.
And I'm grateful for the discovery-- which I made last Friday, oh, duh-- that the work goes a lot faster when I do it in the daylight, instead of trying to juggle my old shop light to see to clean out the gaps.
And I am making progress, really I am. By the time the local hardware store gets around to sharpening the blade on my grandfather's plane (they've only had it for the past week, ye gods), maybe all the filler strips will be done and dry.
Monday, March 15, 2010
Bits and Pieces
The other day I tried scoring the thin filler strips with a utility knife to split them in half lengthwise. Uh, no. Wood grain is wood grain and it splits where it will. But a scrap wood board set next to the table saw fence allowed me to cut the strips in two, as long as I started them from one end and finished them from the other, to keep my fingers away from the blade. And yes, I use that plastic guard thing that came with the saw.
Or not, if I've miscalculated the fit. Then I have to pry the piece out, wipe it off with a wet rag, then use the plane to remove whatever I need to. Or maybe that's time to select a different size.
Then I take the next smaller size, cut it to the right length, and do it all over again. And again, until the crack is too narrow to accept anymore wood strip. I'm trying to butt the pieces closely but not too snugly end to end with each other. If you don't look at it too closely . . .
It's fiddly work, but I think the final effect will be very pleasing. I made some good progress Friday night, and even more last night and early this morning. What hampers me the most is the cramped conditions of my hall. What with miscellaneous tools (contained and loose), wood strips, glue, wet rags, vacuum cleaners and yards and yards of extension cords, it's hard to get at the gaps that need filled.
So each evening I do what I can, clean up the mess completely, go to bed, and start the process over the next day.
It's coming along.
Thursday, March 11, 2010
A Girl's Gotta Do What a Girl's Gotta Do. Well, Mostly
One salutary (Attention! Irony alert!) effect of facing possible cancer is that it focusses one's mind on what's important and on what one can let go. Including when it comes to floor renovations in a 2nd floor hall.
Would it be ideal if I could rip strips of old flooring as long as each individual crack and taper them perfectly to fit, end to end? Yes.
Is it essential that I rip strips of old flooring as long as each individual crack and taper them perfectly to fit, end to end? No.
Could I fill each crack with different widths of wood, depending on how big the gap is? Yes.
And once the floor is shellacked, is anyone going to notice that the strips aren't continuous-- other than me, that is? Not at all.
I have some old floorboards, handily nailed up as blocking around the doorway to my bedroom. So what's stopping me from slicing off what I need from there?
So Monday afternoon I pried one off and hied me and it down to the basement workshop and the table saw, where I cut a selection of filler strip widths. And did not to slice my fingers.
And after I got home from choir practice, I nailed the now-slenderized floorboard-blocking back into place.
Would it be ideal if I could rip strips of old flooring as long as each individual crack and taper them perfectly to fit, end to end? Yes.
Is it essential that I rip strips of old flooring as long as each individual crack and taper them perfectly to fit, end to end? No.
Could I fill each crack with different widths of wood, depending on how big the gap is? Yes.
And once the floor is shellacked, is anyone going to notice that the strips aren't continuous-- other than me, that is? Not at all.
So Monday afternoon I pried one off and hied me and it down to the basement workshop and the table saw, where I cut a selection of filler strip widths. And did not to slice my fingers.
Tuesday evening I was very naughty. I took one of the wood strips, one that had come from the groove edge of the board, and determined that, once cut to length, it would be perfect for my widest gap, just outside the bathroom door. And it was, for about half its length. But then the crack narrowed and the piece wouldn't fit. I got out my grandfather's plane (which I'm sure needed sharpening) and went to work on it. And went to work on it. Around 8:15 PM I felt overwhelmingly frustrated and sleepy and decided to lie down on the bed for just a little rest. And, since it was cool in the house, why don't I just pull the quilt up over me?
You guessed it. I conked out and fell asleep. Until nearly 8:00 Wednesday morning. In my workclothes. With lights blazing upstairs and down. Poor dog didn't get his evening constitutional and nobody got fed.
Much as I hate losing the income, I was glad I didn't get called in to work that day. I wasn't looking forward to tackling that filler strip again, but it had to be done. Besides, I got nearly twelve hours of sleep. What was my excuse?
It took some more planing. And some sanding. And more than a little doing other things that did need to be done, like cleaning out part of the back garden. And finally, at nearly 2:00 AM last night-- ta-da! I fitted my first wood filler strip in a crack in my 2nd floor hall floor. Used Tite-Bond wood glue, and I'l leave it to dry 24 hours. The websites say to glue the piece only on one side, to allow for movement. I tried, but it didn't seem like enough. On my head be it.
But here it is. Looks real purty, don't it? That slight rise at the end is over one of the nails. It'll come level when I sand the floor.
I would have done more, but first I have to figure out the best way to split the 7/8" thick slices lenghwise. That'll give me more strips per board and keep my hall from feeling like a bed of nails while I'm waiting for the glue to dry.
Subscribe to:
Posts (Atom)