Showing posts with label refinishing. Show all posts

Saturday, January 7, 2012

Getting Sorted

Yeah.  Really.  It's really a little past four in the morning.

I've been down the basement till just a little bit ago, sorting out trim.  I needed to dig out every piece that goes back into the stairhall on both floors, so they can be shellacked prior to remounting.  While I was at it, I filled holes and cracks and gouges with Zar wood filler.

I'd likely still be at it, except I was so clever Wednesday afternoon when I went to the hardware store in New Brighton and bought only a 4 ounce container of the filler.  I didn't want it to dry out like my pint pot of it did.  Well, that plan worked.  It didn't dry out in the plastic pot.  No.  I ran out first.  And way before I'd gone through all the trim pieces, I can tell you.  And lot of those big nail holes will need a second application.  So I know what I'm going to be doing before the hardware store closes at 2:00 PM.

All this wood filling will mean sanding, of course.  I didn't mean to do much if any, really:  The Howard's Western Wood Doctor Refinisher leaves the wood with a nice, smooth surface.  But the Bosch orbital sander really helps; it was making short work of cleaning up a patch on a piece of really messed-up closet trim (the previous owners had obviously taken it down and cracked it at some point and I'd had to do my best to glue and clamp it back together).  But I saw I'd left a really big place unfilled, and had to glop the stuff in again and set the piece aside again.

The biggest problem with sanding is removing too much of the patina.  The final finish comes up so much better if it's left on.  with it.  But it'll help if I give every last piece a sealer coat of untinted buttonlac first.  Unlike what I forgot to do on the hallway floor.

But no shellacking got done this work session.  It was more like this:  Take a piece from the stack.  Wipe it.  Fill it.  Sort it into its own separate stack by room and/or which door or window it belongs to.  Run out of filler. Put the woodwork all back neatly, with the dining room and living room trim at the back, since it'll go in last.  Cogitate whether I should set any particular order for shellacking the 2nd and 1st floor hall trim, so all the pieces in each "suite" of trim for each door and window will be available as I want them for remounting.  Tell myself, good grief, look at the hour, you can think about that later!

Like after I run up to New Brighton tomorrow-- I mean, later today-- for more wood filler.

Tuesday, April 12, 2011

Actual Work Getting Done

Shellac dries fast.  This is good.
Really.  The shellac work I'm doing in my stairhall is actually starting to look like something.  I may actually be on my way to getting this done.  

And that's scary.

(That was a joke.  I think.)

The inner casings on the five 2nd floor hall doorways are all done, including the casing to my bedroom door that I had to take down to mend.  That also has primer on the bedroom side.  The blotchiness problem I solved thanks to some advice I dug up the other night on the Internet-- A forum suggested cutting down the amount of tint in the shellac and let the application of successive layers build up the color.  I was just upstairs, and was getting a little worried that maybe I've got it a fuzz too dark, but it's not as dusky as it originally was, and we're talking at night under only a 60 watt lightbulb.

The flash makes it look brighter than it really is
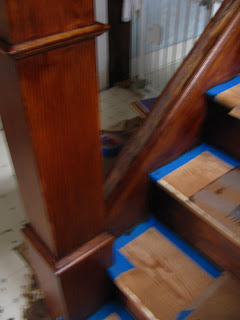
The stair rail and shoe are done as well.  I really like the way the bannister came out.  I've figured out that if I start shellacking the piece well short of the top, work in the length between the initial wet area and the top with a dryer brush, then keep stroking upward (or in one direction only, if working flat) into the wet area, I can minimize the blotches and keep the finish uniform.  It worked on the bannister, I think.

The balusters are done as well.  They were theoretically mostly done last summer with the two coats I gave them then, but I saw that my intended three coats wasn't going to give the tone and sheen to match the stairrail and shoe.  They have five coats of shellac on them now; six on the outside faces.

Now I have to lay on more coats of shellac to the shoe and rail fillets.  They're laid out on my workbench downstairs, waiting the next time I have available.  But first I have to strip (waaaaagghh!) the cap to the 1st floor newel post.  I didn't have enough light in my workshop, and didn't notice till it was too late that a wide brown-black line of walnut-mahogany shellac was accumulating all around the bottom edge.  Yuck.  Strip it off and start again.

Stairs to 3rd floor study
The top newel post is done-- I think-- and today I got a second coat on the risers to the 3rd floor and on the main stair stringer on the stair rail side.  (I ran out of the right tint of shellac after that, and the main stair risers and the opposite stringer had to wait till I could mix up more.)

Last evening my friend Hannah* and her husband Steve* were going to come over to help me reassemble and rehang the casing to the bedroom door.  They couldn't fit it into their schedule as it turned out.  And now that I've remembered that I really want to get the finish on the hall floor before that trim goes back up, I see it's just as well.

Guess what-- this trim isn't that dark. Stoopy camera!
But in anticipation of getting the bedroom door hung, I shellacked its stop moulding, though I haven't touched it for any door else.  So this afternoon I took a piece of that stop upstairs to make sure I was getting the shellac-white primer divide on the casings right.  I stood the piece up against the closed door to the guest bedroom, flat against the shellacked jamb.  And, oh, my!  Wow.  It actually looked like something!  Like real work getting done!  Like maybe sometime before the Mayan calendar runs out my house might get out of my head and into reality!

That's scary.

Wednesday, March 30, 2011

Trumpets (But with Mutes)

Yesterday, Tuesday, 29 March 2011, was a momentous day here at the Sows' Ear.  For on that day, after half a week of taping and masking, I finally laid on the first coats of shellac on the woodwork of my 2nd and 1st floor halls.

(Can I get a dish of applesauce here?)

This is the first week I've had evenings off since the end of January, when I started working front desk at Dick & Harry's Tax Service.*  Initially I was merely going to wipe everything down and do the shellacking Later.  But it hits me that dust has a tendency to resettle, especially with four furry animals in the house.  So some finish application was in order.

Started with a clear coat of Kusmi #2 on the doorway to the 3rd floor and to the former entryway downstairs.  I'd noticed on samples I'd made that the tinted shellac shows up better when it goes on over a clear coat instead of wood that's clean sanded.  

Doorway to Study stairs, 2nd floor

On this 2nd floor doorway you can see where the paint soaked in behind where the old stop moulding used to be.  I tried sanding it out, but it was too deep. Will the tinted shellac cover that?  I hope so.

Here's the doorway between the 1st floor hall and the front room partly clearcoated.  The camera makes the color look more intense and orange than it was.

Old entry door, 1st floor
Then the same untinted Kusmi #2 on the sanded sill between the 1st floor hall and the living room.

Cased opening sill

My initial idea was that I'd let these coats dry overnight and do the tinted shellac today.  But I'd forgotten how quickly shellac dries.  So what the heck, why not?

Started at the top, with the risers of the stairs to the 3rd floor.  These still have patina on them, and didn't need an initial clear coat.

3rd floor stair risers, partially done


  Then the rest of the risers, the casing, and the bottom end of the stringer.
1st coat shellac, 2nd floor hall


 Then the hall side of the door casings to the guest bedroom, the bathroom, and the hall closet.

And the curved baseboard and the 2x frame around the 2nd floor hall window.

Since I was rolling with it, I proceeded to do the upstairs newel post, the oak stair bannister and shoe, the 1st floor newel, the frame around the downstairs hall window, the doorway between the hallway and the front room, the sill between the hall and the living room, and the moulding that sits on the wall over the hall bench, under the bannister shoe.  Then I came back up and laid a coat on the main stair tread and on the pine stringers either side of the main stairs.  Drew the line at shellacking the hall bench, since it still had the protective paper on it and I hadn't cleaned underneath it.


Looking down from the 2nd floor


I don't have pictures of all this wondrousness, because my stoopy camera eats batteries like I should drink water, the ones I had in were dying, and I had no more in the house to replace them.  (Last time I'll buy a camera that takes AAs, believe you me.)  But maybe that's just as well, since I was shellacking without a worklight, deliberately.  The plan was that if I worked by natural light only I wouldn't get too fussy about making the first coat perfectly even, but leave it to the next coats to blend it all in.
Blotchy mess!
But as you can see from this very blurry shot I took today (no battery power left to use the flash), maybe that wasn't such a--ahem!--bright idea.  What a blotchy mess, and this doesn't show the half of it.

The saving grace is that the successive coats of shellac should blend it in, though it'll probably take a clear coat or two to accomplish that.

The color isn't as dark as it shows up in the photos.  But I doubt I'll make it as walnutty-dark as it was originally.  I want the reddish warmth and the grain to come through.

Tuesday, August 24, 2010

And Then I Go and Spoil It All by Doing Something Stupid Like . . .


(We pause while Frank and daughter Nancy go to fade . . . )

All right.  Today I got back on the 3rd floor stair sanding work.  The general plan was to do as many treads as I could with the shop vac at the top, then when it would no longer reach, to move it down to the 2nd floor and finish the treads at the bottom.

But I discovered last week that with patient application with the big oscillating sander I could clean the treads off a lot better than I thought when I started this job.  So before I moved the vacuum cleaner down, I wanted to go back and redo the three winders at the top.  I'd given up too soon before and left a lot of the carpet knife scratches on them and some general dirt, and I knew I could do better.

So I did.  The scratches aren't totally obliterated; at least, there's still some discolora- tion in the wood where they were (which shows up less in person than it does in the pictures), but for the most part the cuts themselves are gone.  The winder treads look a lot cleaner and brighter and now they match the ones below.

However.  Still.  Nevertheless.

The third winder from the top has a crack in it, that left the pieces on either side of it uneven.  You know, I says to myself, if I just keep at it with the sander I can get that levelled off and get off the dirt that's collected in there.  What?  You say I could switch out and use the palm sander to do that?  Oh, surely not!  That'd leave a depression!  I'm going to use the big dual motion sander and keep it moving and the tread will come out nice and even!

Uh, notice anything strange about this picture?

Yeah, that's right.  Talk about "something stupid"!  No, sanding down the rest of the tread to match is not an option.  I want to be able to walk on it, after all.  Nor is replacing it without mass destruction, since the treads are slotted into the stringers.

Oh, carp carp carpitty carp!

OK, let's think of something.  All right.  How's this:  The wallpaper is going to be William Morris, and he was influenced by designs from the Middle Ages.  The tile I've got my eye on for the first floor hall has a Medieval motif to it.  I've got reproductions of Gothic art all round the house.  That's it!  I'll just tell anybody who asks that I wanted my 3rd floor stairs to look like the turret stairs in a Medieval castle!  Never mind that in that case the low place would be in the middle of the tread and not at the side . . .

No use!  Epic DIY fail!  Now I've gone and done something that future owners can rag on me about.

Saturday, August 7, 2010

Fillets Mignons

Last night after posting I took my 40-grit sandpaper and my B&D mouse sander to the topmost winder of the stairs to the 3rd floor.  After about an hour and six or so pieces of the paper (all cut out individually by hand, I might mention), I began to make some impression on it.

This is going to take bloody forever!  What do I do if, a week from now, after assiduous labor, I'm working on tread No. 7 and my eldest cat hocks a hairball on the exposed wood of tread No. 3?  I gotta get these sanded and refinished within a reasonable timeframe!

There is hope, however.  Late last evening I got a call from my friend Frieda*, and asked her if anybody in her family might have some other kind of sander that might have more of an effect.  "Oh, yes!" she said, obviously going into their garage, her husband has all sorts of different sorts, including ones good at getting into tight areas.  He's off on a fishing trip now, but she'd see if she could call him today and ask him.

By now, I know she wasn't able to get back with me today, but there's a chance that by Wednesday I might be able to borrow something useful.  I could wait, I told her, because in the meantime I can work on shellacking the stairrail parts from the 1st to the 2nd floors, down in my workshop.

Took awhile for me to get to it, but this evening I got the first coat of warm walnut shellac on the rail and shoe fillets for the bannister.  Used a 1" synthetic watercolor brush I got at the arts & crafts store, and it seems to be working well.   I plan to put on another coat before I go to bed, then lay on the third coat when everything is back together.

I may be taking a risk by leaving the brads in, but I'm thinking I can realign with the existing holes and tap the fillets in with a rubber mallet.  We'll see.  I took some of the more crooked ones out.

+++++++++++++++++++++
Quick addendum, then I'm off to bed:

Got shellac coat No. 2 on.  The fun bit is trying to remember which of these fillets I'd recoated, the finish dries so fast.  You'd think I'd be able to tell by the color of the wood, and I hope I have.  But if anything looks funny tomorrow, it's liable to get another coat slapped on, regardless.

Friday, August 6, 2010

Slog Ever, Slog On?

The 40-grit sandpaper arrived today.  I cut a couple of pieces to fit my Black & Decker mouse sander and tried it on one of my hard yellow pine stair treads.

It works, sort of.  At least, it gets the tippy-top layer off.  The dirty scratches in the recessed grain, not so much.

Now, I'm not looking to have these floors mint-perfect.  I mean, the staple holes are part of the house's history, right?  But I'd like to get the worst of the dirt out, so the grain will actually shine through under the shellac.

I've been online to see if anybody can recommend a small hand-held electric sander that might have a little more horsepower than the B&D.  No luck.  Looks like I'm just going to have to cut a lot of hook-and-loop sheets and go at it.

And at it.

And at it.

And at it.

And at it.

And at it . . .

Wednesday, August 4, 2010

Sir Isaac's Revenge

While I'm waiting for the heavier-grit sandpaper to get here so I can continue with the stair treads and 2nd floor hall floor, I've kicked myself up to see if I can get going on the shellac for the trim.

First thing that entailed, late this afternoon, was cleaning up my workbench.  It looked so pretty and clear!  For about five minutes.  Then it was messy time again, filtering the bug bits and stick residue from the Kusmi #2 shellac I mixed up the other day.  No, I didn't make the mistake of blowing on it to make it go through or anything Newtonian like that.  I just had a bad aim when I first tipped the mixing jar to pour the solution through the cheesecloth in the strainer.

No problem.  I had newspaper down and didn't lose too much.  Strained the shellac twice, once into the spare jar and then again into the original mixing jar, which I wiped down well first.  Lots more residue than in the Kusmi #1, I noticed.

But Sir Isaac had his little joke later, when I was mixing up a tinted sample of what is supposed to be a warm darkish walnut.  I bought a couple of little syringes the other day, thinking that would give me better control over the dye amounts than trying to dip it out with the teaspoon set.  So I drew a little of the mahogany color up in one of them, thinking I'd decant just a 1/4 teaspoon or so into my yogurt cup of 1.5 lb. cut shellac.

Spluuurrrtttt!!!!

Oh, yeah, I got dye into the shellac, all right.  Also all over the workbench, on the shelf above, on my scratch pad, on my t-shirt, on my left arm, and a few drops on the finish sample I made for the floors the other day.  Though it should have been out of range.  Happily, the shirt is old and navy blue, I was wearing disposible gloves, and the solution on my arm came off easily with some fresh denatured alcohol.  And unlike some people I could mention, I did not get any on my face.  I checked.

Confident that that little contretemps was past, I thoughtlessly proceeded to try to eject the rest of the mahogany dye from the syringe.  Spplaaaaatttt!!!!  Well, I tried doing it more gently! 

This time, most of it ended up in the yogurt cup-- just before it hit me that I wasn't planning to put that much red color in there.  So I added the equivalent (I think) of dark walnut.  Nope, not warm enough.  OK, more mahogany. 

With that I'm seeing what it will do on the back side of one of my oak balusters.  Not anywhere near dark enough yet (it looks way darker in the photos), and I don't want to lay on more than three coats.  Color's nice, but too much like the floors.

Maybe I should leave the trim shellac a 2 pound cut and dilute it, if at all, with the dye.  I think I need more coverage.  And a bit more walnut.

I know for sure I'm going to have to invest in another, narrower, shellac brush.  The 2" one I have is too wide for those balusters.  Got drips all down the sides, meaning some stripping will be in order.

Never mind.  It's easily done.

Tuesday, August 3, 2010

Hard Pine

I don't know why I think of pine as a softwood.  Like heck it is.  Not yellow pine, at least.  I just tried sanding down my topmost stair tread with 60 grit paper on my mouse sander, and it made hardly an impression on it.  And that was going at it for several minutes.  (The photo is an after picture.)

Phooey.  I`ve just ordered a 40 grit hook-and-loop roll from the Online Industrial Supply people (they're running a pretty good sale, if anyone's interested), and another roll in 120 grit, for the pre-finish smooth sanding.  If the 40 grit doesn't do it, that'll mean buying a more powerful sander.  I don't think hiring a floor sander would do any good, on these winders. 

So that's a couple more days of waiting.  Though why that should bother me, I don't know.  Just because I'm suddenly in the mood to get this all done doesn't mean I should gripe at a little more delay.

Besides, in the meantime I can mix up my dark shellac and tackle stairparts down in the workshop, right?

Sunday, July 25, 2010

It's Always Something


I'm trying to make progress on my floor refinishing, I really am.

This past week I mixed a quantity of Kusmi #1 shellac buttons in denatured alcohol, enough to make three cups of 2-pound cut shellac (that's the biggest jar I had).  Three days to let the lac dissolve, then filter it and the aniline dyes yesterday or today, and I'd be ready to start mixing up color samples.

But once the buttons were dissolved, I noticed an orangey cloudy substance floating in the bottom of the jar.  And though I tried filtering it out through heavy t-shirt fabric, whatever it was went right on through.  Looked it up online last night, and it appears that's the wax that naturally occurs in shellac.  I also learned that it's good to get rid of it, since the less wax, the better water resistance.

Yesterday I decanted the waxiest part into another jar.  But this evening I saw that what was left is pretty waxy still.  The websites tell me to siphon the good part off, but I'm not schooled in such mysteries.  Doesn't that involve sticking a tube into it and sucking it up and trying not to get it in your mouth?  Sounds like a dubious procedure to me.

As it is, I think I have half or less left of what I originally mixed, and I'm contemplately committing sacrilege and letting the Zinsser people take care of it.  I know what they say about getting better quality control and freshness if you mix up your own shellac, and I also know what other people say about Zinsser having perfectly good quality control, you just have to make sure you look at the top of the can and make sure it's from a recent batch.  I do know that I sampled the can of Zinsser amber shellac I bought in May last year, brushing a swatch on a piece of Plexiglas, and it set up right away.

If I give in and use the commercial shellac, it may be because I'll need more of it than I can mix on my own with what I have.  For some reason, when I ordered the lac buttons I got three different kinds, none of which are enough to do the whole job, floors, trim, doors, and all.  Gary at the Old Crackhouse says the various lac colors don't show up that different as applied, but I'd prefer not to make the experiment.

Meanwhile, what I have left of the Kusmi is settling some more.

Got the walnut and mahogany aniline dyes filtered.  That's done, at least.  Had some sediment stuck on the bottom of the jars after I was done.  I'm hoping that took care of a lot of the particles that wouldn't remain in suspension, and isn't a sign I've waited too long to use the dyes.  (Mixed them two months ago yesterday.)  Not sure what would happen if I had; I dipped a piece of pine wood into the mahogany dye and it took it and dried like it's supposed to.  Whatever I use for my basic shellac, it will be cut and tinted with the aniline, so the color will go on in layers, vs. dyeing the wood itself.

The next thing on the list was to sand down some discarded pieces of floorboard to emulate the real thing, to test colors.  The sandpaper sheets you can get to go on the Black & Decker mouse sander are too blinking expensive, so I purchased rolls of fuzzy-backed 60 and 80 grit paper from these guys.  Works great, but I have to use an old sheet as a template and cut each piece to size.  No problem, except I can't find the scissors I use for that, anywhere.  It's a old pair I inherited from my grandfather, and last I saw them, I'd discovered I'd left them out in the garden all winter.  I thought I put them someplace safe, but if so, they're safe from me!  And my other utility scissors refuse to work.

So until I can cut sandpaper, I can't do any sanding and the work is at a standstill.

Actually, I'm on for round three of chemotherapy tomorrow, so there's a standstill of its own.  Temporary, I hope.  I've been stinking tired these past few days, but I hope that's from the heat.

Monday, March 15, 2010

Bits and Pieces

I'm making haste slowly on the 2nd floor hall crack filling, piece by piece, bit by bit.

The other day I tried scoring the thin filler strips with a utility knife to split them in half lengthwise. Uh, no. Wood grain is wood grain and it splits where it will. But a scrap wood board set next to the table saw fence allowed me to cut the strips in two, as long as I started them from one end and finished them from the other, to keep my fingers away from the blade. And yes, I use that plastic guard thing that came with the saw.

The first thing is to clean out the cracks. I tried using a dental tool first, but soon found that the angle of an ordinary five-in-one tool works the best. Scrape, scrape, scrape, vacuum, vacuum, vacuum. Scrape some more, vacuum some more. Until finally I can see the surface of the floorboard's tongue.

Then I look over the different widths of filler strip I have and figure out which size will work best. Cut the right length using the hacksaw in the mitre box, spread on the glue, fit the strip in the crack, then tap it in with the rubber mallet.

Or not, if I've miscalculated the fit. Then I have to pry the piece out, wipe it off with a wet rag, then use the plane to remove whatever I need to. Or maybe that's time to select a different size.

Then I take the next smaller size, cut it to the right length, and do it all over again. And again, until the crack is too narrow to accept anymore wood strip. I'm trying to butt the pieces closely but not too snugly end to end with each other. If you don't look at it too closely . . .


It's fiddly work, but I think the final effect will be very pleasing. I made some good progress Friday night, and even more last night and early this morning. What hampers me the most is the cramped conditions of my hall. What with miscellaneous tools (contained and loose), wood strips, glue, wet rags, vacuum cleaners and yards and yards of extension cords, it's hard to get at the gaps that need filled.

So each evening I do what I can, clean up the mess completely, go to bed, and start the process over the next day.

It's coming along.

Thursday, March 11, 2010

A Girl's Gotta Do What a Girl's Gotta Do. Well, Mostly

One salutary (Attention! Irony alert!) effect of facing possible cancer is that it focusses one's mind on what's important and on what one can let go. Including when it comes to floor renovations in a 2nd floor hall.

Would it be ideal if I could rip strips of old flooring as long as each individual crack and taper them perfectly to fit, end to end? Yes.

Is it essential that I rip strips of old flooring as long as each individual crack and taper them perfectly to fit, end to end? No.

Could I fill each crack with different widths of wood, depending on how big the gap is? Yes.

And once the floor is shellacked, is anyone going to notice that the strips aren't continuous-- other than me, that is? Not at all.

I have some old floorboards, handily nailed up as blocking around the doorway to my bedroom. So what's stopping me from slicing off what I need from there?

So Monday afternoon I pried one off and hied me and it down to the basement workshop and the table saw, where I cut a selection of filler strip widths. And did not to slice my fingers. And after I got home from choir practice, I nailed the now-slenderized floorboard-blocking back into place.

Tuesday evening I was very naughty. I took one of the wood strips, one that had come from the groove edge of the board, and determined that, once cut to length, it would be perfect for my widest gap, just outside the bathroom door. And it was, for about half its length. But then the crack narrowed and the piece wouldn't fit. I got out my grandfather's plane (which I'm sure needed sharpening) and went to work on it. And went to work on it. Around 8:15 PM I felt overwhelmingly frustrated and sleepy and decided to lie down on the bed for just a little rest. And, since it was cool in the house, why don't I just pull the quilt up over me?

You guessed it. I conked out and fell asleep. Until nearly 8:00 Wednesday morning. In my workclothes. With lights blazing upstairs and down. Poor dog didn't get his evening constitutional and nobody got fed.

Much as I hate losing the income, I was glad I didn't get called in to work that day. I wasn't looking forward to tackling that filler strip again, but it had to be done. Besides, I got nearly twelve hours of sleep. What was my excuse?

It took some more planing. And some sanding. And more than a little doing other things that did need to be done, like cleaning out part of the back garden. And finally, at nearly 2:00 AM last night-- ta-da! I fitted my first wood filler strip in a crack in my 2nd floor hall floor. Used Tite-Bond wood glue, and I'l leave it to dry 24 hours. The websites say to glue the piece only on one side, to allow for movement. I tried, but it didn't seem like enough. On my head be it.

But here it is. Looks real purty, don't it? That slight rise at the end is over one of the nails. It'll come level when I sand the floor.

I would have done more, but first I have to figure out the best way to split the 7/8" thick slices lenghwise. That'll give me more strips per board and keep my hall from feeling like a bed of nails while I'm waiting for the glue to dry.

Monday, March 8, 2010

Mind the Gap

Some people build castles in the air. I imagine I'm going to get a finish on my 2nd floor hall floor before I go into the hospital for surgery two weeks from now.

The old shellac finish and the random paint drips are off and the 3¼ x 7/8 tongue-and-groove yellow pine floorboards are (relatively) bare. No problem.

The next step hasn't been so easy. That's deciding what to do about the gaping cracks between the floorboards. Should I ignore them and say they're part of the house's history? Don't think so. With three cats and a dog, too much gunk gets into them. And sticks out of them. It's filthy. It's nasty underfoot. It looks horrible. In some places the loose tongue has broken off and there's an opening down into the floor-ceiling cavity. Can you just see shellac running down that "drain"? Uh-uh. Unfilled gaps are not an option.

Neither can I take the floorboards up and hammer them back in place correctly, as some websites urge. These boards are subfloor and finish floor in one, and they have an interesting habit of running under the partition walls and into adjacent rooms.

After some investigation, I've rejected commercial wood fillers. Nothing I read tells me they can bear up under floor use. Besides, I wanted something that'd match the existing yellow pine flooring.

The people at This Old House recommend filling the cracks with stained rope. Can you see me at Lowe's, standing there by the rope display, trying to figure out how long of each thickness I was going to need? And the mess of staining it! Besides, that looks better in early 19th century Colonial-type houses, not in 1910s kit-Craftsman foursquares like mine.

So up until recently, my filler of choice was to be sanding dust-- from the floor itself-- mixed in with wood glue. But I've been experimenting with it for the last year or two, using it to fill gouges and missing areas in the wood trim. And I'm not sure how it'll take stain. And oh, it's a bear to sand. It certainly seems to dry hard and inflexible. Some of my gaps are pretty wide. Would my homemade filler come popping out in the summertime?

So, maybe two or three months back, I went on the Internet and entered a search for wood floor crack filler. And someplace I came across a website for an historic house someplace in Virginia or Maryland; I think it was built by one of the framers of the Constitution. And it had a video of a workman plugging the gaps in one of the floors there with long narrow strips of matching wood.

That's the way to go, I thought. I even have the matching wood to use, since my POs-1 used leftover floorboards for blocking around their new openings when they remodelled in the '80s. Trouble is, my cracks aren't uniform in width. They taper from as much as 3/16" at the wide end to almost nothing at the narrow. How was I going to cut strips like that on my table saw? I don't even own a pushstick! And you're asking me to cut long whippy tapers? No thanks. I'd like to keep my fingers.

Then there's the roofing nails some PO toenailed into the gaps to keep the loose floorboards from lifting. I'd glimpsed those pieces of metal sticking up and hoped they were some sort of staple they'd used instead of proper squareheaded flooring nails. No such luck. And no, you can't countersink an angled roofing nail. How could I get wood filler strips to fit over them?

But something had to be done. Stay tuned for what that turned out to be.