Showing posts with label 1st floor hall. Show all posts

Monday, May 27, 2013

OK, So Where Were We?

Oh, yes.  Up to the first weekend in May, recounting this spring's not-so-lightninglike progress.

Eh bien.  Nous recommençons.

Saturday, 11 May 2013:  Dare I admit that nothing got done on the house this past week?  Too much sub teaching, too much working in my least-favorite department at the Big Blue Box Store (Home Décor-- booooorrrrrrinnnngggg!!!), too much rain, and too much watching TV late at night on the computer.  But this morning I Made Myself get out to do something about the weeds in the flower beds in the front garden.  Even though it was in the lower 40s and freezing.

Not the worst of it, either
But as soon as I opened the gate from the back yard, I knew the grass in the Snow Carpet roses in the front border was going to live another day.  The box shrubs and the golden cypress growing along the walkway along the east side of the house had burgeoned so prodigiously and grown together so enthusiastically that I could hardly get myself or the garden cart through them.  So, change of plans.  Clipped shrubs instead.  I might have gotten to the flower bed weeds after I was done with that, but I got an opportunity to make some money that afternoon and evening and couldn't say No.  I had to be grateful I at least got the walkway shrubs into a presentable shape.  And got most of the clippings raked and swept off my walkway and the neighbors' lawn.

A little too friendly


Couldn't use my electric blower/vac.  I lost the nut for the impeller somewhere in the backyard leaves the other day and it won't work without it.  Plus the impeller has worked its way up the bolt it spins around and won't come off or go back down, either one.  Stuck.  Hope I can get it repaired.

Monday, 13 May:  Excitement unimaginable.  This afternoon, in the interval between getting home from teaching and heading for the evening job, I finally, after all these years, got the stringer moulding for the main stairs nailed back up.  Hooray!!


Friday, 17 May:  Eve of the annual Borough Large Item Pick-Up.  Not much from me this year, but I did get rid of the old white pine painted quarter round put up by the previous owners two back.  I'd been keeping it thinking it'd be useful for something.  But having watched enough episodes of Hoarders . . . 

Saturday, 18 May:  Took the electric blower/vac to a small machine repair shop over in Industry.  Yes, I can repair it, for $16 worth of parts.  If I can't find a wingnut or something that will function to keep the impeller on, I'll have them order them.  But I have to try the cheaper option first.  The guy at the shop worked the impeller off for me, no charge.  It's plastic, and he figures it got too hot and melted to the shaft a little.  Could be right.

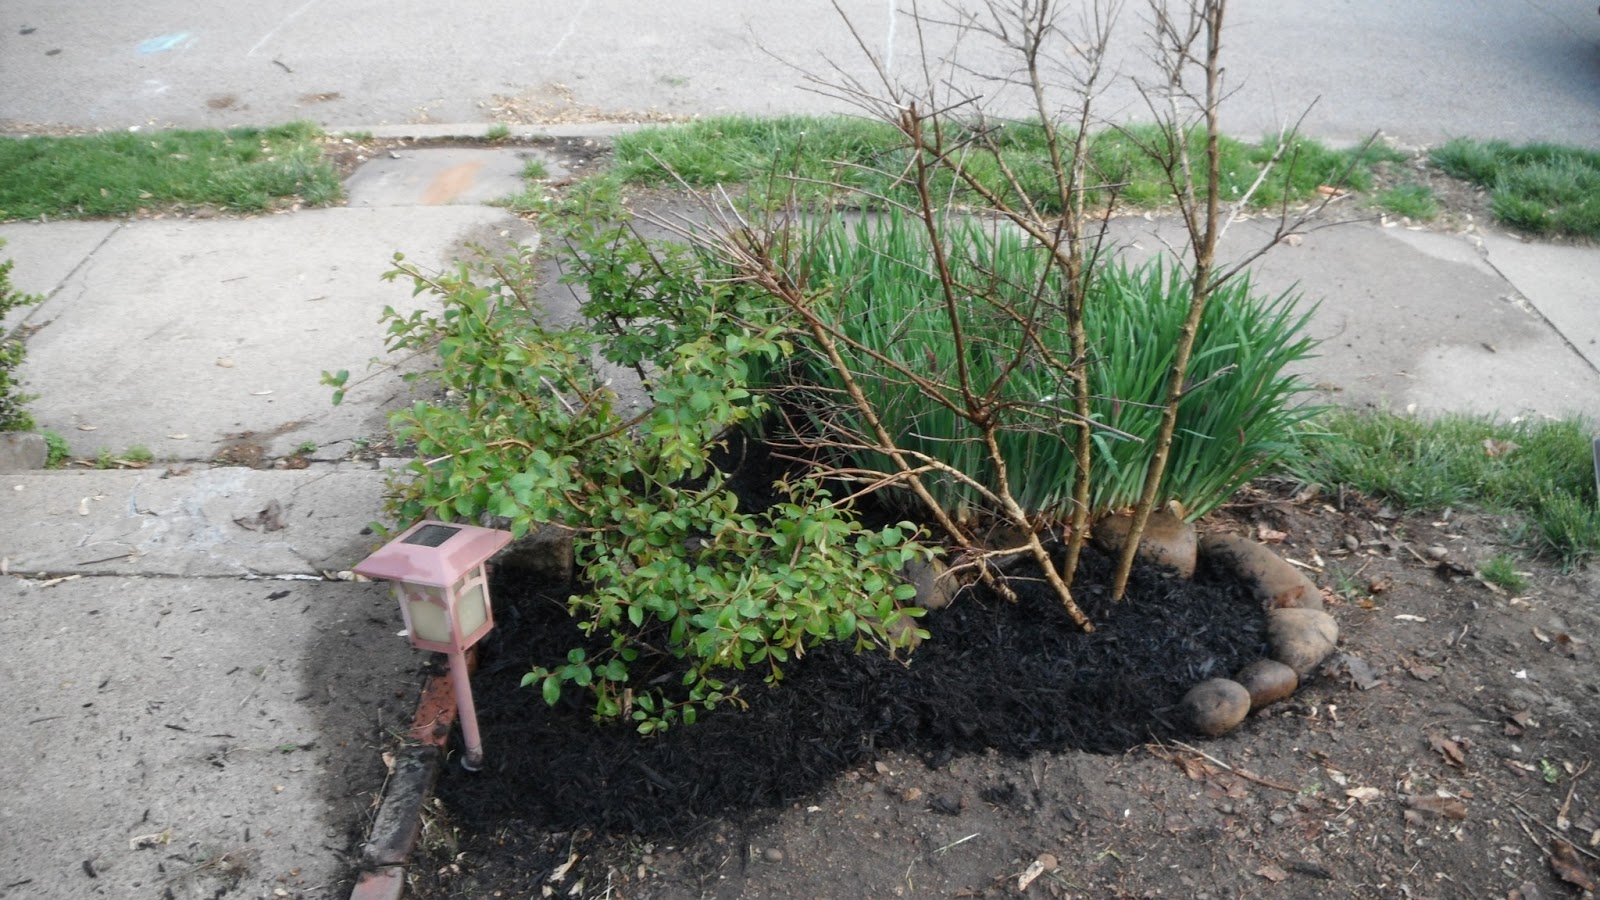
Then at the grocery store I picked up some eggplant and broccoli plants on sale to put in in the front garden.  Yes, the front. I have some  ideas about that, which I think I'll regale you with in a separate post.

Later, got out front and cleaned out the crape myrtle bed.  Pruned off last year's seedpods, shaped up the branches, cleared out the winter cover (old leaves and pine branches), and laid down some shiny new black cedar mulch.  Happy to see the two "New Orleans" crape myrtles and the One-That-Was-Supposed-to-Be-a-"Bayou Marie"-But-Isn't are all leafing out.  The One-That-Was-Supposed-to-Be-a-"Pixie White"-But-Isn't is still just bare branches, though those branches are green inside.  (Oh, didn't I tell you?  Naughty me for not posting.  Early last December I got fed up with the pink, oversized, so-called "Pixie White" mugging everyone who tried to come up my front steps and switched it around with the so-called "Bayou Marie."  The latter, the smaller of the two, took the transplanting just fine.  The former apparently is still thinking about it.)


Sunday, 19 May:  More front yard work.  (Watch this space.)  That evening, took the liquid refinisher/stripper to the tall bookcase.  Looks pretty smeary.  I think it's because I'm trying to be too stingy with the steel wool pads and using them way too long.  Guess I have to put them on the shopping list whether I want to or not.

Tuesday, 21 May:  Didn't get called in to teach, for a change, and I was going to get all sorts of stuff done, yay, me!  Instead, I spent most of this very warm day trying to figure out, remember, recollect, work out, 
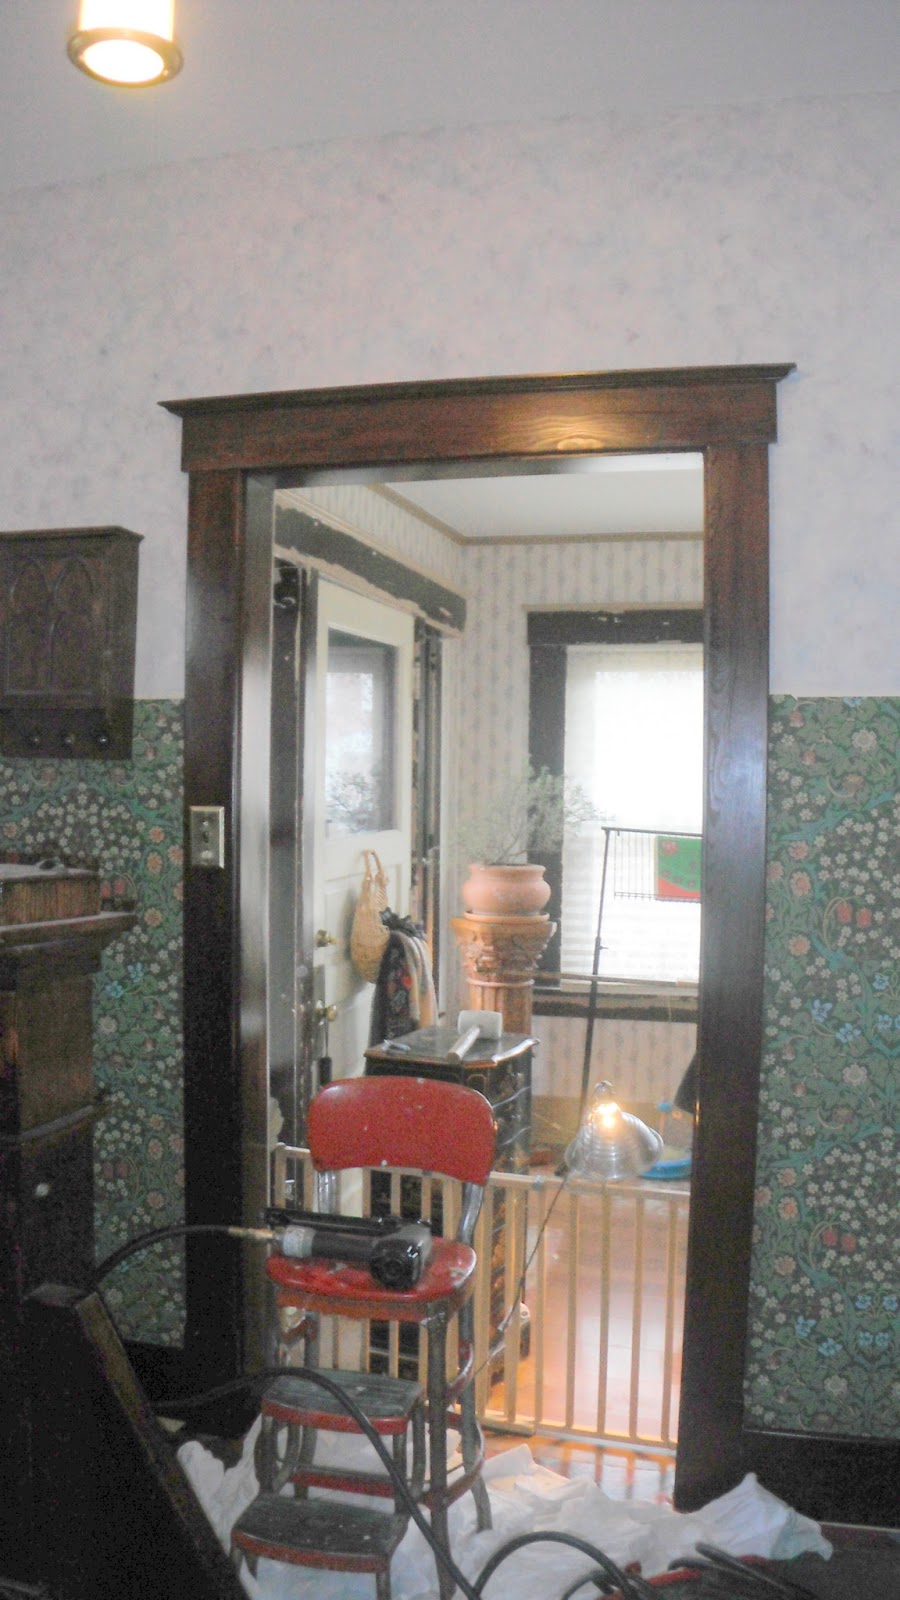
etc., etc., how the heck the operator for my kitchen door transom works.  Finally cut the Gordian knot by unscrewing the guide that holds the transom rod to the jamb casing and pulling it through.  Having experimented with it, I think you push the bottom tab up to make the rod go up to close the window, and you push the top tab down to make the rod pull down to close it.  I think.

Other than that, spent a few minutes out in the back garden trimming last year's dead leaves off the hellebores and mulching around the blueberry bush.


Maple mulch composting since October 2008
And I cut a piece of oak chairrail trim to cope for the south wall of the 1st floor hall.


Also contemplated cleaning up my basement workbench.  There's no room to do the cope till I do, and besides, I can't find my middle-sized nail set and I need it to countersink the stupid nailgun brads that are still protruding out of the quarter round trim in the living room and hall.  Maybe it's in all that mess.


Wednesday, 22 May:  Got a wingnut at work (after work) that fits the impeller shaft on the yard blower/vac and it's all back together.  Haven't tested it yet, but I expect it'll function again.

Saturday, 25 May:  Worked on getting the last of the oil-based primer off the carcase of the tall living room bookcase, until I ran out of refinisher.  Found a whole bag of #0 steel wool in the basement the other day and yes, using cleaner pads does make a real difference.


Sunday, 26 May:  Borrowed the neighbor's spare electric edger and tackled the encroaching grass growing over the back walkway for the first time in maybe two or three years.  As a machine it's better than nothing, and I certainly don't want to be an examiner of the mouths of gift horses, but getting much done with it is, well, arduous.  Maybe the problem is that it hasn't rained for awhile and the grass is holding on for dear life.  Thankfully, my neighbor says I can keep it as long as I need it.  Did all I could reach on two extension cords then did the same on one side of the front sidewalk.  By then, I had no stomach for rustling up a third cord.  Time to clean up and pack it in for the night.


Monday, 27 May, Memorial Day:  After work at the box store, got downstairs and made progress cleaning out my workshop.  Haven't finished the job; the stuff on the shelf above the workbench still needs going through before I can put things away, but the bench itself is clean.

Say goodbye to the mess!

Well, I tried.  Stoopy kamra!!
No nail set.  Don't laugh, but a lot of the inside work is being held up because I can't find it and smack those brads down.  For want of a nail set the progress was lost . . .

OK.  Maybe.  I guess.  But stay tuned for the big project that's developed this month.  As indicated, it's not an inside job.

Sunday, May 19, 2013

Bits and Pieces, Dribs and Drabs

I was right, and I wish I weren't.  Working two jobs on weekdays plus a little freelancing whenever I can get it is definitely not leaving me much time to work on the house.

Nevertheless, I manage to sneak in a little DIY on weekends, or every so often between the end of school and the time I need to clock in at the Big Blue Box Store, or after I get home from selling other people the supplies they need for their projects . . .

Let me see.

Wednesday, 24 April:  Worked on getting the last of the black oil-based paint heat-stripped off the tall teak bookcase.


Sunday, 28 April:  Shellacked quarter round for the 1st floor hallway, several coats. 


 And finished heat-stripping the bookcase.

The black spot is a scorch mark.  Oops.
 Monday, 29 April:  Totally fed up with only being able to do one quarter round cope per evening before the battery power in my Dremel would run out, I gave in to temptation and bought a corded Dremel 3000 kit once I got off work this evening.  With the markdown and my employee discount, the price wasn't too bad.  See, I'd found out that I'd cut the quarter round pieces for the south wall of 1st floor hall too short (well, they were fine until I overdid the copes!) and figured my time is worth something.


So I ran home and recut them out of new stock (I'll resize the shellacked pieces and use them in the dining room or maybe the 2nd floor hall) and with my new toy-- I mean, tool-- got both of them coped (both ends) and ready to shellack the next day.


Tuesday, 30 April:  Got two or three coats of shellac on the replacement pieces of quarter round, and applied the finishing coat to some of the other pieces. 


Drilled the 1st floor hall newel post to receive the pegs that are now going to hold it and its cap together.

(rotation fail to be corrected asap)

 Wednesday, 1 May:  In the morning (I taught only a half day that day), slapped more shellack onto the new 1st floor hall quarter round.


And got out into the back yard and ground up some more of last fall's leaves with the rake/vac.


Late in the evening, using a rubbing on tracing paper, I transferred the position of the peg holes in the newel post to the underside of the cap, and drilled the holes. 


Yes, the pegs fit, but no, they weren't straight, and no, the cap doesn't fit on the newel post.  It's what I get for not using a jig of some sort to keep my drill bit perpendicular.  I couldn't get the pegs out, either, even with no glue.  Never fails.

Thursday, 2 May:  After school, pretty well finished sucking up and mulching the leaves in the west back yard border.  Discovered that someplace along the line I'd lost the plastic nut that holds the impeller to the unit, but it made no difference since the impeller was stuck to the bolt shaft anyway.


Friday, 3 May:  Didn't have to report to work till 10:00 AM or so, so I was able to nail in some of the 1st floor hall quarter round and a piece of the new chair rail.


 This little piece tickles me because it ties into the bottom of the spacer between the stair stringer and the wall on the upper part of the stairs.  It's what determines the height of the new rail trim all around the space and on up the stairs.


 The curved quarter round is a resin product.  No way was I going to kill myself cutting kerfs in the oak material, once I learned this stuff exists.  Not looking forward to figuring out how to cope the piece that'll run into it.  Probably just a matter of simple geometry, but my head's not into it yet.

Purchased two more pegs for the newel post.  I figure I might have to cut at least that many flush and redrill.

The next day, Saturday the 4th, I'd intended to get a ton of work done on the house.  But my nephew whom I hadn't seen for over five years unexpectedly was in town, and I had to visit a farm to see about a new source for the raw milk I've become accustomed to, and then on the way home I came across fresh strawberries for 75c a pint.  So what could I do in the evening but make jam?


Which took a lot longer than I'd expected.  And I see this post is getting to be a lot longer than I'd expected, too.  And I will be in in a jam if I don't get to bed ASAP.  Later on,  I'll go on pretending I've actually gotten anything significant done.

Monday, April 1, 2013

A Notice, with a Touch of Irony

These past few days I've been making increment progress towards completing the work in my 1st floor hall.  Small but necessary stuff:  Filling screw holes and touching up the faux finish on the upper wall because I've accepted that no, I can't have my wall-hung coat rack hanging over the new chair rail.  Measuring for, cutting, sanding, and coping quarter round.  Ordering flexible resin quarter round for the foot of the curved bottom step.  Cutting (and sometimes recutting) the chair rail pieces I previously coped, now that the jamb trim is up and I know how long the rail pieces need to be.  That sort of stuff.

Nothing exciting, nothing demanding daily posts, just stuff that's got to get done.

But from now on, I don't know how much is going to get done.  Because I've taken an additional job, working half time, every weekday evening, at the Big Blue & Gray Box Store.  I've been in for paid orientation and training already, but tonight I begin my regular shift.  In about 25 minutes, to be exact.

Ironic, isn't it?  There I'll be surrounded by all sorts of products I can use working on the house, but I'll have no time to do it!

Sunday, March 24, 2013

Eeyore Nails Up Trim

Where we came from (2003)
    After I got home from church early this afternoon, I stood in the hallway looking at the new casing for the doorway to the kitchen.  It looked-- off.    In fact, the right end of the head seemed to be sloping downwards.  But how could it?  The jamb pieces are exactly the same length.  The head piece is nailed into them square.   A check with the level-- several checks with the level.  Oops, it was true:  The right end of the head was a quarter inch lower than the left.

    Huh.  The new casing may be straight and level in itself, but that doesn't mean the floor is.  I guess this would explain why the righthand jamb trim seemed to extend 1/4" too high with the original notch.

    Knew I had to get that right side raised up or it would look hideous once the lintel was reinstalled.  Problem: the foot of the casing was wedged against the plywood over-floor.  Hard to pry it off without destroying the joint with the head piece and maybe tearing up some wood.  Possibility: I'd put only two nails in that jamb casing, and they were towards the top.  And flexible.  So I got the little pry bar in under the piece and jacked the assembly up (a flashlight revealed that the nails were bending).  Once it was high enough, I cut some pieces of paint stir stick and shoved two layers thereof under the bottom.  And one piece to go under the plinth to bring it up a bit.  Funny, that's all it took.  And interesting, too, that the enlarged notch in the face trim still seemed to be needed.


    So I got the casing secured in its new position and nailed the face trim up.  But for some reason, I simply could not get the wall trim at the end of the bench to snug up to it.  Still has the same damn gap.  Was it cut at an angle such that the back side is broader than the front?  I can't figure it out.  And I wasn't in the frame of mind to do any more sawing.

     Why?  Because Thursday something possessed me to decide that the lefthand face trim to the kitchen was about an eighth of an inch too tall.  And I cut it down.  And from the floor it looked fine, like it matched the portal trim perpendicular to it.  But when I got up on the stepstool to check where the top of the righthand face trim was hitting, I discovered that now the trim on the left was, yes, an eighth of an inch too short. 

    Good reason to keep the light levels down in that hall . . .

    On to the next bit.  Cut the shims to go under the long baseboard.   (No, wait, I did that before.  N'importe!)  Three quarters of an inch high to bring it up to meet the baseboard on the south wall.  Not for the first time am I giving thanks that the quarter round is a nice substantial 3/4" high.  And oh, boy, you can see how that floor slopes as you follow the pattern of the wallpaper along with baseboard.  (It's straight at the top.  Really it is..)

    So the baseboard is nailed up.


    And then I got ambitious.  Not excited or energetic or thrilled, just ambitious.  Decided to see if I could put the lintels back up by myself.  Turns out I could.  Portal lintel up first, for the kitchen doorway lintel butts into it.  But oh, boy, when I cut down that lefthand face trim I sure added to the already-full list of things to caulk.  The lintel can't sit on it; since the lintel's height and level are determined by how the cornices come together.  Clear caulk (touched up with shellac) is my only hope.


    And you know how they say "Measure twice, cut once?"  I did on the new chair rail that'll go to the right of the doorway to the front room.  Made sure I had the cut on the correct side of the line, too.  But for me, it should be, "Measure twice, cut once-- a sixteenth of an inch bigger than you think it needs to be."  Because that's what I was lacking, that or a fuzz more, when I tried the cut piece in place.

    Bugger.  Right there at eye level.  And sliding it away from the corner didn't look too good either.  In this case I cut a sliver off the waste piece and glued it on.  I'll touch it up and hopefully it won't be too obvious.  If it's made the piece too long, I'll sand it down, no more saws for this.  But the glue bottle says don't stress it for 24 hours, so I won't.

    Should be really thrilled the major hallway trim is back up.  It's looked like hell for years.  The neighbors must have thought I was a real bum every time they glanced through my hallway window-- how pleased they will now be.  I hope for a time when I will be very pleased, myself.

Saturday, March 23, 2013

Creeping Along

I really expected to be a lot more excited about this.

Reinstalling the trim in my 1st floor hall, I mean.

After all, it's been down and the space has been looking scabby since September of 2008.  On summer evenings these past four years, every time I've hung out with the neighbors on their front porch, I've looked through my hall window and been faced with the busted plaster that should be concealed behind the trim.  And I've thought, "Damn!  I can hardly wait till I can get that woodwork shellacked and back up. It sure looks like hell from here."

But like Martha in the Gospels I've been worried and distracted lately by many things and tired out by the flu and now that the time has come for me to remount the hallway trim, I'm not that enthusiastic about it.  But my intellect tells me it needs done and urges that I may feel better about things if the house is neat and assembled and orderly.  So here I go.

All this is to explain that each day I do what I'm up to doing, and when I get tired or feel like I'm about to scream, I stop.  Which may be all that can be expected, when I've already spent the bulk of the day substitute teaching.  Which cannot be stopped when one gets tired or feels ready to scream.

So, the thrilling and breakneck progress since Tuesday:

Wednesday, the big deal was to redo the switch to the outside light, the one over the front door.  The switch is cut into the jamb trim on the lefthand side of the doorway to the front room.  I'd been subjecting the previous owners--whichever one it was-- to direst obloquy because obviously they'd failed to install the switch in an electrical box, nor did they use a wire nut to secure the two neutral wires, the style of switch not having screws to fasten those into.  Instead, everything was wrapped with electrical tape.  How foolish and dangerous!

No box, no wire nut-- tsk, tsk
But as I was shoving the new box into the front of the trim and pulling the existing Romex through the knockouts, I had to notice that oh, look, the cutout in the trim is exactly the size and shape of a standard electrical box.  And it crept in on me that four and a half years ago when I took that trim down, I was afraid of messing with that switch myself (it had to be dewired to get the woodwork off the wall).  So oh, yeah, I got the professional electrician I was using at the time to come and pull it out for me, didn't I?  Along with the two in the long living room baseboard.  I now recalled him asking me if I wanted him to take the switch out for the time being, me saying No, I needed the light, and him, yes, taping everything up as a temporary fix, because what was the use of him putting it back in the box when it would just have to be taken apart again when I remounted the trim?

Back together and boxed
So who's the danger-mongering fool?  Nobody, I guess, since a pro did it for me.

Don't know what became of the original box.  I utilized one I bought for another location and didn't use.  Used the original switch, since it's more solid than the flimsy modern one I thought to replace it with.  It's all back together, the outdoor light lights, the jamb trim and the lintel are nailed back up, it's all fine.  Previous owners, my apologies.

Then came a step that I really should get excited about. Wasn't excited Wednesday night, but I guess I'm getting there now. It's when I nailed together the replacement casing for the doorway to the kitchen and got it nailed into the ragged, nasty opening that's been taunting me for months and years on end.

New casing ready to rise

This casing is the thickness of the wall, unlike its predecessor
Fun, fun, the new white pine had a little warpage and on neither side did the jamb pieces automatically snug up to the edge of the cutouts in the plywood over-floor.  And they had to, or the plinth blocks would be sticking out into the opening.

Warped at the bottom

Blocked and shimmed into submission
Didn't feel like messing with it then.  I saved the fun for Thursday night.  Got them persuaded out as well as I could, but I think some caulk will be in order on the left side.

Other than that, Thursday and today, the jollification has been with the face trim in the northwest corner, between the portal to the living room and the doorway to the kitchen.  It was a bit of a Chinese puzzle, how it was all supposed to go back together, and I was glad I took pictures back in 2008 when I took it down.   There ensued a saga of blocking and shimming which I won't bore you with (though I have to say it amused me to be putting the original blocking back in, especially the pieces I used to test shellac colors)..  Some of it had to be done twice in the same place, when I realized (in time, thank God) that what the woodwork needed for proper reassembly was not notching and cutting and trimming, but a bit more blocking and shims behind a piece I'd already nailed up.

(Gimme that pry bar, will you?)


2nd attempt. This butt joint was really off before.
Finally together


So finally the vertical pieces are back up in the northwest corner, left of the kitchen doorway.

Not so the jamb trim on its righthand side.  It's overlapped by the nosing of the hall bench, and a notch was put in in days of yore so the trim could slide in between the bench nosing and the wall.  But when I test-fitted it, the trim sat a quarter of an inch too high.  In relation to its plinth, in relation to the head casing, in relation to the jamb trim to the left side of the doorway.  Weird.  Had no compunction about taking the Dremel and bringing the notch the required distance higher.  This piece of trim is presently down on the basement sawhorses in the process of receiving a few coats of shellac on the enlarged notch.

Enlarged bench notch in progress.  Dremel battery needed to recharge
But in addition to this, I couldn't get it to sit snug to the horizontal trim at the end of the bench.  Kept rocking, with the bench seat as its fulcrum. On Thursday I thought it had a bump I'd have to take out to get it to work.  But bother that.  The level says it's straight.  Silly to start butchering the woodwork.  Just pry the horizontal trim off and reinstall it flush left to the jamb trim once it's up.  Still have no idea why the gap is there, but since it is, it can go in the dark corner and get a bead of clear caulk.  Easier and less destructive that way.

A little retrograde motion


Well, easier and less destructive until I cracked the board down the middle prying it off.  I'll do my best to hold the pieces together and put it back up as is.  If I have to glue or fasten them, I'll ruin the shellac job.

That's all for tonight.  Once I get that jamb trim up, it really would be nice to get the lintels up.  The lack of them is what has been so glaring from the neighbors' porch.  But the way the cornices are mitred together, it may take an extra pair of hands.   Or two.

It's not like I don't still have plenty to do in there without tackling that . . .