Showing posts with label friends. Show all posts

Friday, November 28, 2014

Believe It or Not

I've been neglecting the blog, but not the house.

Last strip, up but not trimmed
The William Morris wallpaper in the dining room is up.  Can you believe it? As of last Sunday night, after a good-- how many? seven? weeks of working on it.

It wasn't procrastination that made me take so long, it was waiting until I had an extra pair of hands available.  I did a lot of it myself, but some places I simply needed a helper.

Especially for the corners.  I didn't like the way my previous method for turning them was eating up so much pattern.  I found this method on YouTube and decided to try it.


I succeeded at the first one, in the northeast corner-- eventually.   But not after having the piece going onto the adjacent wall (all 5" of it) flop down on my head, onto the steps of the ladder, get stepped on, dirty, cat-haired . . . miracle it wasn't trashed.  I cleaned it up, repasted it, and got it on the wall, but after that experiment I decided no more corners until I had help.

That came in the form of my friend Lizzie*.  Between my work schedule and hers it would run two or three weeks between the times she could come and help.  And as the video says, the method takes time.  Lizzie and I were lucky if we could pull a corner turn off in an hour.

My walls are screamingly old and out of square and going around corners there was often a goodish amount I had to trim out of the piece going onto the adjacent wall.  At the top, especially.  That wasn't fun.  I was afraid to use the X-Acto knife to trim it (as the paperhanger in the vid does at 11:00 min.) because I was afraid I'd cut through both layers.  Instead I'd crease it with my thumbnail to give me a guideline for my scissors.  The worklight doesn't cooperate at such times.  It washes out the shadows and with my lousy eyesight the cutting was often hit-or-miss.  Still, at eye level the pattern looks pretty darn continuous and matched.

The scissors method doesn't work in the dead corner (southeast, in this room).  There I sucked up my courage and used the craft knife to trim the last piece in the corner.  Gently, gently . . . almost managed to do the whole cut without piercing through the bottom layer.  Almost.  Of course it had to be about six feet up, where the bookcase won't cover it.  Trimmed an eensy piece of wallpaper and shoved it into the inch-long slot, to bring the top piece out and eliminate the shadow.  It worked; at least, I have to be looking for it to find it.

It was a toss up as to whether a given whole strip would go up peaceably or fight me all the way.  The one after the turn around the northwest corner took Lizzie and me a good hour, just to get it matched.  Not sure why.  We blamed the settling of the house and let it go at that.

Dead corner, done and trimmed
Time and again the hanging got precarious.  Too bad: trashing a strip and starting over with a new one was not an option.  But this Britpulp is thick and pretty forgiving; you can even smooth down minor tears (not that I had more than one) so they're not obvious. In the end, I came out with a whole full strip to spare. Would have had a full, unopened roll had I given more thought to the cutting at the start, but them's the breaks.

Since it takes me so blinking long to hang a strip I've had to cope with popped seams here and there.  That's where an artist's detail brush comes in handy.  I gently lift the loose edge, poke in some wheat paste, wait five minutes, poke in some more, wait another five minutes (normal relaxing and booking time for a Britpulp paper like mine), then gently smooth it down with a clean, just-damp sponge.

All in all I think the installation looks good.  I'm no pro but I'm getting better.  Full strips matched up nicely with partial strips above and below windows, and in the dead corner the pattern's only off by a half inch (compare that to nearly an inch and a half in the living room).  Except for a couple of unobtrusive places I don't have any overlaps, and there they face away from the light so you have to run your fingers over them to detect them.

So now, at last, it's finished.  I wish I could post better pictures.  The "Savernake" pattern's so subtle it's impossible to catch on camera.  But the color turns out to be fine.  It changes depending on the time of day and the light, from cream, to yellowish, to off-white, to palest green, but never does it bellow "Celery green!!!"   And the pattern makes the room look bigger.

I've been shellacking and remounting the dining room window trim as the pertinent walls get papered, but that's another post.

Sunday, October 5, 2014

Still Waiting

It’s Sunday night, and no dining room wallpaper is up.

Yes, Lizzie* came over yesterday.  But I didn’t get around to sizing the blankstock will mid-afternoon.  And whether it’s because I overthinned the paste or because it’s supposed to do that, the size bubbled the liner off the wall in several places.  Watch Kate run around with a paste pot poking paste up behind loose seams!  See her slit long bubbles with an X-Acto knife and dab paste into them!

In the end, after we’d had pizza and talked and she’d gone home, the liner dried and the bubbles went down smooth of their own accord.  Of course then I was spending hours on the Internet trying to find out if they re-adhere as they dry.  And trying to find photos of wallpaper literally falling off of walls, to determine what caused it.

It will be all right, won’t it?  I mean, that blankstock is definitely Up, isn’t it?

Before supper Lizzie helped me find the center point between the two north windows and mark the vertical line I’ll butt the first strip of “Savernake” up against.  Of course when I went back to check it later I found one or the other of us had let the straightedge slip and the cross point was marked 3/16" too far to the left.  Either that, or the windows are so far out of square it throws everything off.

Will I notice it if that’s the case?  I want that strip to be centered as possible, since I usually sit at the end of the table opposite that wall.  The way my previous-owners-two-back papered the room, starting at the southeast corner and working around so the seams fell where they might, the pattern sat five or six inches off center for ages.

No more.  Not if I can help it.

I considered flying solo with the Morris paper this evening.  But a distant cousin is letting me log in to Ancestry.com on his password so I can contribute to our mutual family tree, and well, when you’re breaking down long-standing brick walls, it’s easy to avoid papering the plaster-on-brick walls you stare at every day.

Especially when you’re still a little scared.

Saturday, October 4, 2014

Precarious

Please consider the usual apology for long silence made.  Let me announce rather the wallpapering of the dining room is moving forward.  (Pause for trumpets, or at least a kazoo). After literal years of contemplation, hesitation, and self-doubt; of picking at the old stuff and planning for the new; of stripping and scrubbing, prepping and priming, the walls as of early this (Friday) morning are finally lined with blankstock, sized, and ready for paper.

A big part of the hold-up has been getting extra pairs of hands to help.  My friend Janet* from England aided me with hanging the stairhall paper (the Morris “Blackthorn” green) in the spring of 2012.  My local friend Frieda* contributed mightily to my getting the living room paper (the Morris “Owen Jones” red) up the subsequent fall.  But Janet's far away in Essex and Frieda's current work schedule sucks away nearly all her time, and there's something that shrivels up in me when I think of asking just anybody to help me with the house.

But a couple weeks ago a church friend I'm calling Lizzie* expressed herself willing to lend a hand.  Or two.  We were planning for her to come help put up blankstock the third Saturday in September-- until I got an emergency call to come work that day at the Big Blue Box Store.

We tried again last Monday the 29th.  Together got five strips of blankstock up.  Railroaded.  Yaaaayyyy for us!

I won’t go into the convolutions that put us through; suffice it that I learned or was reminded of enough hanging technique that I was able over the next three days to hang the rest of it myself– even the 12' strips at the tops of the west and south walls.  Without bubbles, wrinkles, or disasters.  Unbelievable, but true.

Lizzie is coming again tomorrow afternnon (later today?) to help me hang the actual paper, the very William Morris & Co. “Savernake” No. WR8480/5, and you know what?  I’m scared.

Not scared of any part she might play in it, but of all the things that could go wrong, now I know that the stakes are so high.  Didn’t I title one of my previous blog posts on the subject “On the Verge”?  Yeah.  On the verge, and hoping to God I don’t fall off.

What’s all this trepidation about?

Well, first, I dread I’ll get it all done and I won’t like it.  I’m still kicking, kicking, kicking myself for not buying the paper back in 2004 when it was a) a lot cheaper, and b) produced in the creamy tone I really wanted.  Having looked and looked it’s this Morris pattern or nothing, and the pale celery tone with the brownish figure isn’t bad for a dining room, and as greens go it’s the sort I like, but for a whole room it’s not really me.

I’m telling myself it will be all right once the drapes are up and the chairs reupholstered.  I hope I’m right, but my gut tells me No.

And I’m scared I’ll run out of full strips of paper before I’m through.  I was an idiot when I started cutting the strips for tomorrow and a) didn’t look hard enough at the pattern and correctly choose the cornice line, and b) when I wrote down the correct measurement of 8'-7" (including margin top and bottom) but for four whole strips I assiduously made the cut at 8'-5".  Maybe the all-nighters I pulled hanging blankstock are catching up on me?  Aaaggghhh!

The measuring error was a blessing of a perverse kind.  It forced me to start over and recut.  If I hadn’t, the pattern imbalance would have been noticeable, very.  But by the time I discovered it I had only six and two-thirds whole double rolls left.  Eyeballing the walls I conclude I need twenty full strips to cover them without horizontal seams.  Twenty is exactly what I can get out of what I have left.

So what if I muck one of those full strips up?  What if due to corner cuts I need one more?

Yeah, I know.  Do a horizontal double-cut and splice in a piece at the bottom of the wall in a corner and stick the bookcase in front of it.  But my pride suffers agonies at the thought.


And then I’m spooked by the paper itself.  That stuff was running 18 quid a double roll back in 2003, around $33 at the time.  I got it for £27; about $45 each, in 2009.  You know what it’s going for now?  Before shipping?  A bleeding $98 a double roll!  Mon Dieu, at that price it’s practically sacred!  At that price I should have auctioned it off on eBay and paid my mortgage the next month and a half!

But I didn’t. Almost half of it is cut, and the rest will have to follow.  And for better or worse, scared as I am of mucking up the job, it has to be hung.

I still need to size the blankstock.  But that can wait till daylight.  I stay up any later I’ll just add to my mistakes.

Tuesday, June 11, 2013

The Sound of Crickets in the Night

You know what happens when you put out a call like this on Facebook?
Help! I have some garden soil I need to get out of my yard and some friends who live seven miles away who need it in theirs. Anybody have a pickup truck I can borrow to load it onto?
Nothing, that's what.  Crickets.  Because you have sensible friends who know that it's not just their pickup you want to borrow, but their shovels as well, and also probably (ok, certainly) their muscles and time to wield them.  And that's assuming that any friends who might have pickup trucks even see your post, given Facebook's arbitrary practice as to whose news appears in whose newsfeed.

I posted that plaintive appeal last night around midnight, after an afternoon of fun in the south vegetable garden bed, the one where the tomatoes are to go.  Spent about an hour and fifteen minutes weeding it (though it seemed a lot longer),


then started sieving the dirt into the garden cart.  I have too much and some friends up above New Brighton need some yard fill, but I didn't want to give it to them complete with roots and weeds.
And when I considered how much dirt is involved (and they can't help me, because the wife is older and the husband has a bad back), I was feeling very discouraged.  Like existential-angst discouraged.  Why don't I have some nice, useful, significant-other type guy attached to me who could help me do this?  Why am I not making enough money so I could hire it done?  How could I ever bag up all this and load it into my car?  I'm pretty strong, but that would take forever!

Thus the idea to appeal for a pickup truck.  Finished filling up the cart with cleaned dirt-- and slow work it was-- parked it over to the side with a yard bag over it in case of rain, and focussed on transplanting the volunteer lettuces.
(If they want to pop up without my having to plant them, the least I can do is give them a safe home for the season.)

But as I say, nobody (at least not so far) has risen up to be a hero and champion in the way of pickup trucks.  Not even after I pleaded for mercy for the tomatoes:
This is kind of urgent-- I can't plant my tomatoes until I remove the mound that's built up in the garden bed.
So this afternoon I took stopgap measures and potted them all up in gallon pots using the soil from the bed where they'll eventually grow.  Sunk them deep in the bigger pots to give them more support and encourage them to develop roots from the leaf nodes.  Should give the "Red Brandywine" a chance at survival, if anything can.

Other than that, dumping yesterday's cartload of dirt in the new planting bed in the front, and digging out a few more trowels full of nutsedge-infested soil from the lawn, I've let things sit today.  Let's give it awhile longer.  Maybe there is somebody out there I know who's dying to haul a few loads of dirt for gas money and free pop.  Maybe my friends in New Brighton know somebody who has a truck.  Can't hurt to ask.


Sunday, June 9, 2013

Plugging Away-- and Getting Plugged

Just a little progress report.  All garden related, of course.

My friend brought the tomatoes he promised to give me to church this morning.  One "Italian Goliath,"
one "Red Brandywine,"
one "Brandymaster,"
and one miscellaneous cherry.  Just now they're all leggy seedlings in 8 oz. yogurt cups.  The "Red Brandywine" broke on the way home, which is too bad, since I like me a Brandywine tomato.  But maybe it can be nursed and recover.

They won't get planted for awhile, though:  Over the years the garden bed that I'm rotating the tomatoes to has gotten so mounded up with soil amendments that it's more than a foot higher at the center than at the edges.  And the beds in the round vegetable garden aren't that big.  It needs to be levelled off before anything goes into it.  Oh, yeah, and it needs weeded before that.

Which didn't happen this afternoon or evening.  What did happen is more digging and spading of dirt off the bare places in the front lawn, where the nutsedge is emerging where I dug it out before.  Not as thickly yet as before, but still there.  It's very depressing having to deal with this, such a waste of time and topsoil, too, but what can you do?

Finished cutting up sticks and shifting leaves from the part of the open compost pile I began cleaning off yesterday.
There was a little finished compost at the bottom of it, which I spread on the new planting bed in the front garden.

At least, I think it was compost.  May have just been a mounded bit of topsoil.

Whether or no, after that it was time to make a new compost pile where that bit had been.  Didn't have a lot of "green" material, unless you count the Virginia creeper I pulled off the fence.
Organic parfait
Instead I made layers of grassy sod and leftover unmulched leaves.  Yeah, I know you're not supposed to put dirt in the compost heap. But what else am I supposed to do with all those turves?

A lot of the leaves I was using for that I shook off the branches and sticks that came off the limb that fell down last year.  There weren't too many large ones left on the pile to cut up for kindling today, so I just took the leaf rake and drew the leaf residue off the old pile to use it on the new.

Where things got left, in a hurry
Or I did until some apparent residents of the old pile took exception to this disturbance. First I knew of it was when something  tried to fly up my right nostril.  I sniffed out violently and tried to bat it away, whereupon it stung me twice on my nose right above the lip, on the septum.  Ow!

Quick but careful removal of self into the house-- don't want to be precipitous and trip on the porch stairs-- all the time hoping it wasn't a honeybee, since their stingers remain in and you have to tweeze them out.  Quick, find the baking soda and make a poultice with water.  Dab it on the affected area . . .  know one looks like an idiot, but never mind.  It kept the swelling down where the creature plugged me, and within five minutes the pain was gone too.

Returned to the scene of the incident, though not to do any more raking.  Yellowjackets, it was.  There were still three or four hovering around.  Not going to mess with that pile again until I've consulted the exterminator.

So as much as I wanted to get that pile turned for the first time in three years, it was time to drop it and do something else instead.

Like plant the Berberis thunbergii "Crimson Pygmy" barberry I bought Thursday night from the Outside Lawn & Garden department at work.  I was thinking I needed a reddish specimen in front of the right-hand Alberta spruce . . . but one will do, since my neighbor to the east has four or five or these.

She was out in her front yard, too, while I was planting this.  I told her about the yellowjacket sting.  I mean, I didn't expect to go into anaphylactic shock from it, never have before, but I know some people develop that reaction when they get older.  So in case I suddenly quit breathing and keeled over . . .

I didn't.  I finished getting the red barberry into the ground and went on to transplant a few volunteer Blackeyed Susans into the little strip next to the Siberian iris at the toe of the slope to the sidewalk.

Still so much to do, but the light ran out.  It'll all get done-- eventually-- if I keep plugging away at it.  At this rate I should be able to go back to working on the inside of the house by, oh, late September or so.

Thursday, October 4, 2012

Checking In

No business being up this late, but wanted to check in and say work is getting done around here.  The screen door still isn't installed on the back, but I've got a lot done with sanding off the old paint on the doorframe (so it'll fit!), cutting and sanding stock for to make stops for both the inner and outer doors, painting the steel lintel, and so on.

Frieda* came over this evening for a couple hours and we got some more of the red Owen Jones wallpaper up in the living room.

Pictures?  Yes, I should post pictures.  But my computer is slow and maybe, just maybe I might get called in to work in the morning.  Which could be in three hours.

Yikes.

Monday, September 17, 2012

Beige Again

No, not really.  For a little while, only.

Frieda* came over Saturday afternoon and helped me hang manila-paper blankstock in the living room.  Top strips only, the 12' ones that needed two ladders and four hands, because she had to leave by 7:00.  I worked till after 2:00 in the morning and finished blankstocking the three walls we started, and it really does look better already.

Even if the stuff is beige.

I'd hoped to get the fourth wall, the one with the fireplace, done this evening, but my feet hurt so badly when I got home from teaching that I lay down and um, rested a little.  Actually, I fell asleep.  For two hours, until Frieda* woke me up calling to find out how much more I'd gotten done on Saturday.

When I did get to the blankstocking this evening, I discovered the paperhanger guy is right-- if you're not going to finish up your mixed wheat paste all at once, splash some Clorox into it.  I didn't, and it was starting to smell.

Didn't feel like mixing up a new batch, so I've left it for later.  I've cut and labelled all the blankstock pieces for the fireplace wall.  That's enough for this evening.

Meanwhile, yesterday was nice out so I demounted the back door (again!), took it out to the sawhorses on the porch, and this time I got the old shellac finish off it.  It wasn't as difficult as I'd expected to dig the white filler out of the gouges (dog claws?) at the bottom of the stile on the lock side.  It was just spackle, and scrubbed out with a toothbrush and liquid remover.  Filled those and other major flaws with wood filler, and laid on a second coat of it this evening where the depressions were still apparent.

So what shall I do tomorrow?  Sand down the back door or hang blankstock?  Something to contemplate when I need to distract myself from the trials of teaching 7th grade algebra in the morning.

Friday, September 7, 2012

Back Door Project Addition


Look upon it and lament; ye shall soon see it no more.
My friend Frieda* came over tonight and in short order she and I together removed the falling-off aluminum back screen/storm door and its frame.  It marked the End of an Era, an era that would have ended three or four years ago if I'd gotten around to it.

R.I.P. aluminum screen/storm door
(Moment of silence for the aluminum door.)

Now that the screen door is down and I've pried off one piece of trim from the hinge side of the door,  I've been able to make some observations about the back door and its surround, historical, structural, and other-al:
Hooray for friends wielding power tools
  • The wood trim on the outside is not original.  Bless me, I'd been thinking for years it was, and had been working out in my mind how to repair the ogee that was cut out when they installed the aluminum door.  It was Frieda who said, "I don't think that's what was on the house.  I think it's modern."  You know, she's right.  In fact, I have a couple lengths of the very material down the basement.  The POs-1 also used it for trim under the portal sill between the living room and front hall.
  •  
  • The original brickmould was probably like what still surrounds the openings from the front hall and the living room in the front room, which used to be the front porch.  I've spent some time tonight online (no, really!?) researching and I think I can get a reasonable facsimile of it from a lumber and millwork dealer down in Pittsburgh.  If they aren't to the trade only.
  • The original house trim finish was a dark brownish-black stain or dye.  No paint, no shellac.  Just stain.  This fits with what I encountered in the front room when I was stripping the openings there.
  • The door frame itself is a big ole 3x6.  It's not in the best of shape-- plenty of nicks and dings-- but it will do.  Maybe by itself until I can get some new trim.
Gap needing filled
  • There's a gap maybe ¼" to 3/8" wide between the 2X6 doorframe and the brick.  I intend to clean it out and fill it with backer bead and caulk, whether I get new brickmould in there or not.
  • Frieda and I brought the new-old screen door up from the basement and set it in the opening, just to see how it fits.  It does, basically, but there are some absurd gaps between the door and the frame here and there where the frame has gotten out of square.
Funny and inadequate screen door stop
  • The funny little blocks nailed against the stop mouldng halfway up the door height look to be the only stops the original screen door, whatever that was like, ever had.  The stop moulding I've been working so hard this week to sand clean measures ½" by 1¾", and is eased on the vertical edge towards the exterior of the house.  It comes 1¼" short of the inside face of the replacement wooden screen door.  No sign of any other stop moulding a screen would have closed against, just those little blocks.  As much as it pains me to remove any original element like the stop moulding (especially after I've worked so hard to strip it), I may well do it and replace it with ½" by 3" material that my screen door can close against.  Those gaps I saw between door and frame pain me even more.
So this is more work added to the back screen door project, which was only supposed to involve stripping and repainting a salvaged door and hanging it on its hinges.  And here I have to get up at the crack of dawn to finish stripping the wooden back door, another thing added to the fun . . .

Friday, April 20, 2012

Look! Look!


Look what we have as of tonight!  William Morris "Blackthorn" wall paper on my very own front hall!  True, it took a friend coming all the way from the 'burbs of London to get it there, but there it is!  Look!  Look!

Tuesday, April 17, 2012

The Best I Can Do

Oh dear o dear o dear, I am so far from having accomplished what I wanted to accomplish by the time my friend from England arrives tomorrow evening.  Shocking how much needs to be done on a house before you get to the fun stuff, even when it's only finishes being worked on.

Well.  Frieda* came over around noon this past Saturday to help me remount hallway trim.  But I was up the ladder priming the north wall of the living room, and didn't want to stop before I'd finished it.  And the east wall, since I still had primer in the tray.  So she went in the kitchen and dynamited grease and pet hair off the stove and surrounding cabinets until I was done.

By the time we got upstairs to work on trim, we had time only to nail some replacement blocking into the rough opening for my bedroom door, put up the trim on the inside of the bedroom and find out that the lintel was cockeyed per the wallpaper and the level, put the bedroom door frame back together, attach the stop moulding at the guest bedroom door (successfully), and discover that something's weird about the relationship between the bedroom frame and the lintel on the hallway side.  Then Frieda had to leave and I had to change to go to Dick and Harry's Tax Service to finish doing my taxes.

Before Janet* comes I have got to get that door rehung, not just for my privacy but to get the bedroom door out of her way.  And rehang the closet door.  And reattach the stops to the bathroom door.

And if I can, finish shellacking the doorway and portal down on the first floor of the stair hall, so we maybe can put up wallpaper together, seeing that she's offered to help and is bringing her grubby old overalls.

But the cleaning still needs done, like the cat barf stains removed from the guest bedroom rug, and the mess in the living room needs to be cleared out. and I still have to wash the comforter and so on for the guest bed.  And here I am sub teaching at a local grade school, or rather, not teaching because the school's at sixes and sevens due to meetings and new-student assessments and I've turned out to be redundant.  So I have opportunity to work on the blog, but not on the house.

This is a situation where I need to do my best to do what I can to make things comfortable for my old friend, then depend on her friendship to overlook what I can't.

Some time I'll post some photos of what's gotten done.  But not now.  No access to the files, and it's 3:00 o'clock.  Time to go.

Tuesday, April 10, 2012

Immer Zu

I'm still here.  Actually, I haven't really been any place much other than here.  Not working on the houseblog, no.  But working on the house.  Workingworkingworkingworkingworking ....

Tired, crabby, frustrated; no way I'll get done what I'd hoped to get done by the time my friend from England arrives on the 18th, but still at it, obsessed, devoted, immolated.

I'm only up at my computer now because I was seized suddenly by the fear that I'd forgotten in the throes of house idolatry to pay one of my credit card bills.  So I left the trim I was working on in the basement to run up to the 3rd floor study to make sure.

Yes, it was already paid.  And I'm paying this debt to houseblogdom, putting down a minuscule installment payment on what I owe to my two or three readers, to give you some indication on what's been going on at the Sow's Ear the past month.

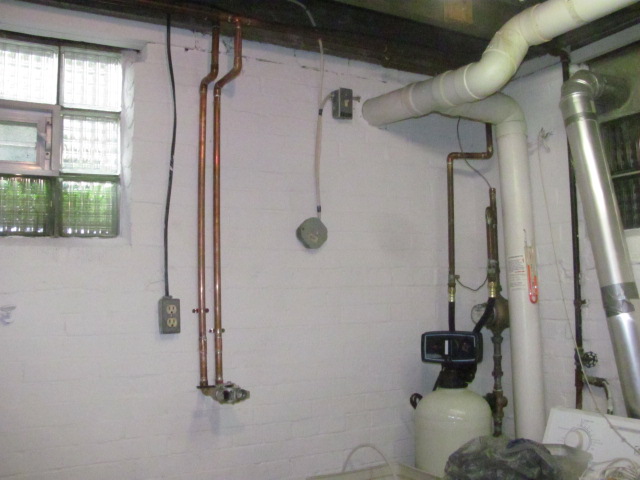
Heaven help us, what hasn't?  The spray foam people finally came (no, that was February, but never mind, they did).  The roof repair contractor and his son showed up three or so weeks ago (he was originally scheduled for early December) and took care of everything on the list, and a couple-three other things beside.  What they couldn't rectify was the wet on the face of the chimney breast in the living room, which issue they diagnosed as being due to my having no liner for the hot water heater in my chimney-- the warm water vapor condenses on the cold brick et voilà! failing skim coat and sticky old wallpaper paste on the living room side.  So I've had plumbing contractors marching through sizing up the height of the chimney, and I've accepted a bid from one who's supposed to come install me a metal liner early next week, hopefully before Janet* arrives.  And things have gotten to the point with my own work that I had to get the electrical contractors in to bid out installing properly-grounded circuits for the outlets that go in the baseboards that I hope soon to be reaffixing.  One bid was so astronomical I thought I should suck it up and rewire them myself after all; the other, from the guy who seemed to know more what he was talking about, was low enough to make me feel it wouldn't be worth the time and tribulation for me to try to do it myself.  And unlike the other guy, he can work with the trim installed.  I plan to have him come in May, if I've got the place reassembled by then.

But me?  Damn.  A short list, in no particular order: 
1)  Shellacking woodwork, starting with the stairhall's pieces and going on to the ones for the living room.
2)  Buying select white pine 1x boards and having my friend Steve* rip them to size to replace missing or hopelessly damaged yellow pine originals.
3)  Shellacking white pine replacement pieces to try to get them to match the yellow pine originals (semi-successful, if you don't mind a little streakiness). 
4)  Finishing up the Big Wally's plaster repair I started last month.
5)  Finding out that even Big Wally's won't get rid of a wall bulge caused by settling from the floor above.
6)  Doing an obsessive amount of research on how properly to hang my William Morris wallpaper, and finding out about blankstock liner paper and mix-it-yourself wheat paste and happening on a good source for both.
7)  In the course of said researches, learning about a homemade device that should make it easier for me to remove the old paper from the sheetrocked walls in the dining room and front room, and pulling together the pieces and parts and beginning to make my own.
8)  Trying repeatedly to get the old wallpaper paste removed from the living room walls and failing miserably, unless my goal is to take off all the previous owners' repairs.
9)  Carrying on an extensive email correspondence with the proprietor of the concern referred to in No. 6 and learning from him a) that I can use a Zinsser product called Gardz to encapsulate the old paste and size, and b) what "size" is and how to make it.
10)  Doing the Big Wally's routine on the east wall of the living room, especially down at the bottom along the line of the baseboard, where the plaster seemed to be flapping in the breeze.
11)  Ordering Gardz over the Internet (Lowe's and HD don't carry it around here) and applying a first coat on the north and east LR walls.
12)  Cutting to fit and screwing in pieces of drywall to replace the plaster that fell to pieces when I removed the baseboard along the east living room wall.
13)  Taping cracks in my living room walls with drywall tape and mudding, sanding, and mudding again.  (Which I hate-hate-hate!).
14)  Locating the most workable location for the outlet I've wanted for years in the 1st floor hall, and cutting the hole for it (happily, it falls right in the drywall under what I call the portal between the hall and the living room, where my POs-1 partially closed in what used to be a large doorway.
15)  Taking up the ridiculous sheet vinyl from the hallway floor, and discovering that the plywood underneath seems to be glued as well as nailed down.
16)  Doing the long-postponed measured drawing of the existing structure under the 1st floor hall, and submitting it to the John Bridge Tile Forum to find out if it can support ceramic tile.
17)  Getting an answer from one of the tile pros there that my structure might do, but unless I tear out both the plywood and the original tongue-and-groove subfloor and sink new plywood between the joists, I'll be way out of Code due to the odd riser height at the bottom stair.
18)  Saying O crap! and checking into linoleum tile and other, thinner alternatives, and deciding probably I'll clean up and smooth down the plywood that's there and paint a faux tile pattern instead.
19)  Using some medium red-brown paint left behind by my POs on the existing LR cornice moulding to even out the place where they or somebody got ceiling paint on it, then going over that with two coats of warm-walnut tinted shellac (north wall cornice is done; east wall in progress).
20)  Stripping, repairing, and sanding the trim that goes on the kitchen side of the doorway from the 1st floor hall-- nasty job, since it doesn't seem ever to have been shellacked, so the paint wouldn't just chip.
21)  Removing the rest of the wallpaper from the east and most of the south living room walls (yes, this should have come a lot sooner, but I just remembered).
22)  With the help of my friend Frieda*, remeasuring for the new chair rail for both storeys in the stairhall, sizing the lower part of the walls there, and hanging blankstock on them, but not before going back and filling and patching ten dozen dips and holes I never noticed till the work light was shining on them.
23)  Except for an occasional mowing and covering the roses when a frost warning's on, letting the garden take its own course this spring.

Did I say this was supposed to be a short list?  Gaw.  And I need to go back down the basement and prime that kitchen side trim and the trim for the doorway to my bedroom, because oh, yeah, I got the loan of a nail gun today, and if all goes well I can start rehanging trim this weekend and that needs to go up before-- well, never mind, it'd take too long.


Immer zu!  Immer zu!  Ohne Rast und Ruh'!

Saturday, February 18, 2012

By Way of Explanation (and Apology)

For all two or three of you who read this blog, I thought I'd check in and let you know I haven't fallen off the edge of the world.

Actually, I've been working.  Working my usual day job substitute teaching, and working doing supply preaching on Sundays, and working at Dick and Harry's Tax Service* on evenings and Saturdays.

And yes, working on the house.  Woodwork is getting shellacked!  Can't do that much at once, given the limited capacity of my sawhorses.  But progress has been made.

A jolly lot more progress must be made, in the next two months.  Yes, I have a deadline.  My best friend from theological college in England is coming to visit a couple weeks after Easter, and I'm determined she's going to have a civilized place to sit down in.

Thursday, September 1, 2011

Here We Go Again

The o-rings for the water softener meter-bypass valve connection came Tuesday morning.  By now all the plumbing aligns, and a good shove got the unit seated and joy, joy, no leaks there.

Yesterday I called Charlie Moore at the Ohio Pure Water Company and had him walk me through the process of setting the meter for the right number of gallons per regeneration cycle.  Mine is set to regenerate every eight to ten days.  I'm a little concerned that the program wheel isn't engaging, though; at least, it hasn't shown any water usage since yesterday.  I'll check it tomorrow and call if nothing has changed.

What has changed is that the blankety-blanked elbow joint between the outflow riser and the pre-existing horizontal run above the water softener is leaking again.  Noticed it when I was on the phone with Mr. Moore.  Could very well be that the water wasn't totally out of the old pipe.  Or the new one, either.

I'm not panicking because those runs won't be compromised by being shortened up when the bad joint is cut out.  So I made yet another trip to Lowe's last yesterday afternoon for yet more copper fittings.  I was actually planning to buy me a torch and some solder and redo it myself, but the salesman convinced me to try a GatorBite instead.

GatorBite won't do, though.  There's too many drips and bumps of excess solder on those pipes.  In any event, Steve* says he'll try to come over after church on Sunday and take care of it.  (I bought the fittings for him to do it, don't you worry.)  I won't be able to be there myself, since I'm preaching way down in West Virginia and won't be home before he leaves, probably.  I'm not totally happy with that, because I'd like to see what he does and how he does it.  But I need to be grateful for what I'm given.

In the meantime, I've got the leaky joint plastered with plumber's putty, wrapped in duct tape, wound with a rag, wrapped with more duct tape, clamped, and wound again with an old piece of terry cloth towel.  And I've laid a towel over the WS plumbing and bypass valve, to catch any drips before they hit the floor.  It's a slow enough leak that so far the piece of towel around the pipe and the dehumidifier are taking care of most of it.  But I'm not embarking on any big laundry campaigns until the leak is fixed.

And if Steve can't do it, I'll bring in the Big Guns:  A real, live, professional PLUMBER.

Wednesday, August 24, 2011

Getting There

I'm almost done getting everything put together to get my new water filter and softener system up and running.  Steve* made it over (with the kids) by 9:15 or so to correct the problem with the stems going into the back of the bypass valve.  Since the riser pipe had to be cut to get rid of the ends with bad solder on them, he used the unions I bought this morning at Lowe's and a couple more sections of the 3/4" tubing.  (I think we've used nearly all the 10' length I bought).  Didn't have to replace the elbows, but if we had, I'd bought them.  (Yay for me.)

So everything got soldered in the right way and Steve drilled the pipe hanger/retainers into the wall at convenient brick joints, so the whole system doesn't get knocked into the next county every time I bump my head on the valve.  We turned the water back on, Steve looked at his work, and said, "Great!  No leaks!  I always have at least one!"

But not this time, it appeared.  This time, solder joint success at the first go.

Apparently.

He and the kids leave, and I go to enjoy the luxury of a toilet that actually flushed.  I come out of the basement bathroom, and go to admire the work.  Yes, it was messy as to solder drips and so forth, but it was done!  But wait a minute.  There's water on top of the bypass valve.  I look up.  Oh, no.  There is a leak, up above, coming from the elbow at the top of the outflow riser.

Called Steve to let him know.  He said, "There's things I have to do today, but I'll come take care of it tomorrow.  Put a bucket under it."  I wrapped the leaky joint in a strip of the old faded pink and white towel that had belonged to my grandmother (I remember back in the early 1960s when that towel was bright and  new), then encased towel and pipe in the last of my duct tape.

There's a wire that connects the inside meter with the outside one the Borough reads, and we'd pushed it up out of the way so it wouldn't get burned by the torch.  If I was planning on running water despite the leak, I needed to reconnect it.  Got up on my stool, and as I was sliding the wire and its plastic tie down the pipe, I felt, oh, no, water at an upper joint.  In the elbow about 2" away from the plastic radon exhaust pipe.  It would be in an inconvenient place, wouldn't it?  But maybe why that's why it's leaking.

About that time, Steve called and said frankly, "We're coming back to take care of that leak now.  I want to get this done and over with."

"Good, because there's actually two leaks."

Steve, Stevie*, and Letty* showed up soon, and Steve was able to redo the joint above the bypass valve so it was sound.  And he thought he got the one above the water meter taken care of, too.

They all left.  I put away tools, used some more water.  About a half hour passed.  I was up on the stool again, cleaning the hardened splashes of solder off the top of the meter, when I felt, oh, no, drip, drip, drip!  This time, more frequent and forceful than before.  This is not a place I can put a bucket under.  I called Steve again.

And shortly after lunch, back they came.  And Steve tried it again.  He loaded on so much solder the elbow looked like a messy silver-plating job.  Then we waited.

Steve felt the joint.  "Yeah, it's still wet."

All was not lost, however.  Because of where that assembly is (connected at the bottom to flexible line leading from the outlet side of the water filter), we could afford to cut out a bit of both the horizontal and vertical runs and eliminate the bad elbow.  And because I bought three elbows first thing this morning, just in case, we had one to use.

Steve made one more attempt, this time with the new fitting.  It's several hours later, and the joint seems to be sound.  No side of leakage.  Hurray!

Anyway, with one thing and the other, it was very late this evening before I got downstairs to actually finish installing the equipment.  This mainly involved fitting and routing plastic drain lines and filling the softener tank with water and resin (Safety Note:  Sweep up any resin beads that fall on the floor as quickly as possible.  They're slick and dangerous underfoot).

It'd be nice to say I was finished putting everything together, with or without setting the meters and timers, and the treated water is beginning to flow.  But there are a couple of things still:

a) I overlooked the fact that this brine tank is bigger than the one on my old Kenmore.  The instructions say, right there, "add 3-4 bags of . . . salt."  I only bought two.

Then, b) There's a part, a top distributor basket, that the instructions say I'm supposed to fit to the top of the riser tube before screwing that big honking 2510 Fleck meter on top of the softener tank.  Or rather, there's not a part.  I've either misplaced it since June, or they didn't send me one.  The directions say this device is used "when the unit is subjected to higher than normal water pressures . . . which are present in a few areas of the U.S."  Maybe my area is not one of them (my water pressure is normal), so it didn't come in my shipment.  I'm making no assumptions; I'm going to call the Ohio Pure Water people about it in the morning.

After I've gone back to Lowe's for more salt.

Tuesday, August 23, 2011

Well, Almost

I got my new Fleck water treatment system installed today.  Almost. 

My friend Hannah's* husband Steve* came over this morning with their kids Stevie* and Letty* and by 2:45 or so had all the piping soldered and in place before he had to run to keep another obligation.  All I had to do then was finish replacing the old or missing hangers and fill the filter and softener with media and water and set them going.

Only one thing:  Steve's* not big on reading instructions, and though I printed out the directions last Saturday and skimmed them over, it slipped my mind to tell him one very important thing as I was assisting today:  You have to have the stainless steel bypass valve in the "Service" position before inserting the horizontal input and output fittings into it.  So there I was early this evening:  I'd gotten the filter tank all filled with media and water (from my neighbors' hose tap) and fitted with its valve, and I'd connected it into the water system with flexible connectors.  Now I could turn on and use my own water to finish filling the brine and softener tanks, assuming that the softener bypass valve, which as yet was hanging off the pipes separate from the meter and the tank, was on "Bypass."  It was, but from my reaction you would not have thought so.

"Oh, carp!!"  And I grabbed the instructions.  Oh, carp, carp, carp.  Steve had put the piping in with the valve in the wrong position, and now I couldn't turn it to "Service."  I tried calling the Ohio Pure Water people for advice, but it was after 6:00 and their phone was on the machine.

Steve came over later this evening and we took the stems off, unsoldering the 90 degree elbows from the vertical risers.

Well, you can guess what happened.  It's why this will be a short post, for me, with a paucity of pictures.  We couldn't get the elbows back onto the bottom of the verticals.  And of course, despite I'm embarrassed to say how many trips back and forth to Home Depot and Lowe's, I didn't have any spare 90 degree fittings lying around.  And it probable doesn't matter, since Steve thinks he'll probably have to cut off the soldery ends of the verticals anyway.  Meaning we'll need a couple of unions, too.

Steve plans to be over here at 9:00 tomorrow morning "to get this done and over with."  So guess who has to be up and over to the local Lowe's at the crack of dawn?
___________________________
>As it turns out, Steve's return trip was necessary anyway.  When I'd gotten it through my head that a) the softener valve was in the Bypass position, and b) that meant I could safely turn on the water, I found that he'd turned the service entrance valve off so hard that I couldn't budge the handle.  It's still off till tomorrow, and I'm making do with water I put aside for this project, and hand sanitizer.

Thursday, July 7, 2011

It Never Ends

It occurred to me that none of the pictures from the 29th showed both white walls.  There they are, though not with the floor repainted.


That got finished up last Thursday and Friday.  Ended up repainting about a quarter of the laundry room floor, so the enamel table can go back and stay back, not to mention the new brine tank.

(Here's a highly-instructive progress shot of the corner where the water softener used to be.  No more red and gray.  [Please disregard the smudges from the camera lens: it needs cleaned.])

To my massive annoyance, between the first and second coats of pale green floor paint, I noticed that iron water stains in the mortar were showing through here and there on my nice, clean new paint job.  Tackled them with a spray can of aluminum paint (as much as I hate to put anything nonbreatheable on my basement walls).  Of course that meant another round of primer and paint.  Of course.

It's taken care of now, so as soon as my friend's son gets back from vacation, he should be coming over and maybe we'll make some progress towards actually getting the water treatment equipment installed.

However.  However.  It's true, I spent Sunday through Tuesday in the garden, back and front, putting in the last of this season's annuals (yes, they are the last!  Haven't I said so!?).  But I've been going up and down my basement stairs past a very disgusting and grotty brick foundation wall, and I've been poking at that wall here and there, and chipping loose paint off that wall, and I've been thinking how awful that wall looks in comparison to the Two White Walls in the laundry room.  And yesterday I said to myself, "To hell with it.  Something has to be done!"

After scraping, before scrubbing
Scraped as much old paint off it as I could persuade to flake off.  I regret to say that was a great deal. Usual scrub-down with TSP and bleach, then another scrub-down with DampRid.  Dirty, dirty, dirty.

Primed it this evening, along with six brick courses of the wall perpendicular to it, which also looked a little grungy at the foot.  (Not doing that whole wall now.  Too much junk to move.  Too much junk that presently can't be moved.)  Looks a lot better with just the primer on, but I can't be surprised if this wall should need a spritz or two from the aluminum paint can as well.

I've sometimes thought that if and when I sell this house I'd refer prospective buyers to this blog to show them what I've done to the place.  And I wish I had nothing but a bone-dry basement to report.  A local dry-basement expert told me a few years ago that my biggest problem is humid air and not water infiltration, and what I need is to keep running the dehumidifier.  The fact that I had mildew stains on the perpendicular wall supports this position, since it's an inside wall-- my workshop is on the other side.  Still, I'd be a lot more complacent on the basement waterproofing subject if I could get all the brick joints repointed. I mean, it couldn't hurt.

One thing I know for sure is that the two places where the actual bricks show signs of water damage, they're  right under the outdoor water faucets-- or in the case of the backyard tap, where it used to be before the POs-1 built the screened-in deck.  Think of nearly 100 years of leaky hoses and insufficiently-closed spigots . . .  And at least the brick in question was hard and not spalling when I painted it.  I sure don't have any standing water anywhere.

I'm going on faith that the POs' can of gray floor paint is still good.
Anyway, as before, I'll gave the primer a day or two to dry, since I really had to glop it into the joints.  I've got a big nasty teacher certification exam coming up next Friday the 15th and another one on the 22nd.  So no telling how soon I'll get the paint on.  On the other hand, considering that I'm not exactly feeling encouraged about my prospects of passing, I may get the Pearly White on the basement stair wall just to know I've accomplished something.