Showing posts with label kitchen. Show all posts

Sunday, August 7, 2016

Stuck

Not a rummage sale
So what are all my platters, teapots, vases, and so on doing piled on my dining room table?

Not sitting in the cabinet over the refrigerator, that's what.

Just one problem . . .
Last September I acquired a new Frigidaire french door refrigerator.  Well, not "new," exactly: it was a returned-and-refurbished model from the Big Blue Box Store, marked down to where I could consider it, then further marked down for me, as an employee, to a figure where I could actually buy it.  Yay.

But in my enthusiasm at finally finding an affordable white french door refrigerator, in my rapture at getting rid of the inefficient 1997 side-by-side model that was in the house when I moved in, I never thought to measure how tall the thing was in relation to the existing over-fridge cabinet.

It fits in the space, yeah.  With maybe a half inch at the top to spare.  But the doors and so on at the top front of that new Frigidaire are 1-1/2 to 2 inches higher than those on the old one.  And it wasn't until the installers were gone that I noticed that I couldn't get the platter, teapot, vase, etc., cabinet open.  And try as I might, I couldn't roll the refrigerator out to do anything about it.

Well.  There was a leak in my old icemaker supply line that prevented the BBBS installers from hooking up the water when they were here in early October.
Push fitting to the rescue,
because I can't solder pipes,
and saddle valves leak
I fixed that myself later that month, thanks to a push fitting (and I guess I could have blogged about that, right?).  But it wasn't till mid-December, after one of the store assistant managers put his foot down, that the installers came back to attach the new icemaker supply line.  I still had to hook it up to the
Bad photo,
good connection
pipe in the basement myself, but at least I was able to catch the guys before they left so I could take the doors off the cabinet and get access to my crockery.

And thus it remained till a couple weeks ago.
No, that's not exactly true.  Once I saw the problem I began to think of ways to solve it.  Buy a new, taller fridge cabinet?  Too expensive, and it wouldn't match the existing.  Shorten the doors on the one I have? They're plastic-clad, and they wouldn't cut off neatly at all.  Piece on something at the bottom of the existing cabinet to raise it higher?  How is that going to be structurally sound?

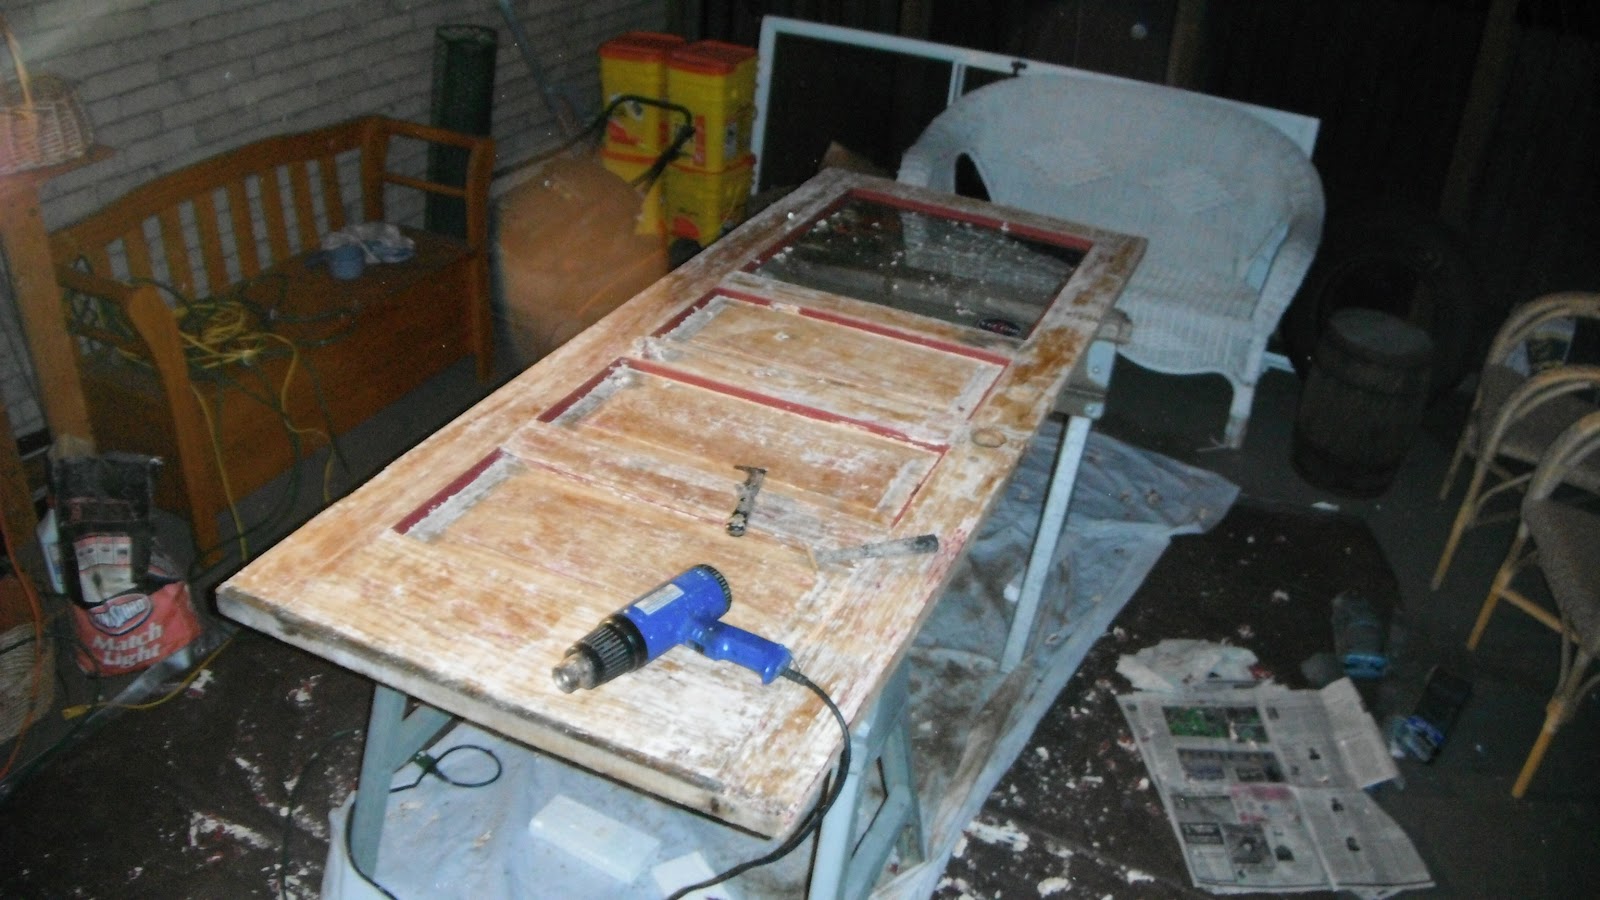
Best solution:  Buy new plywood panels for the sides, cut them to fit to make the whole cabinet a couple-three inches taller, and attach the existing over-fridge cabinet to them.
Ne'er more shall they meet
Only weakness in this plan is that there'll be a gap in the cornice where the fridge cabinet now meets the pantry, but I can deal with that later.

I have the plywood, 1/2" pre-primed finish grade birch.  Got it half price last December, when we BBBS employees have our holiday double discount.   But I've done nothing with it, because I Still Couldn't Roll the Refrigerator Out!  And I was convinced I had to have it out before I could start this project at all.

Fast forward to last month.  I was having trouble with the freezer.  Such bad trouble I had to take all my freezer food to my friend *Frieda's to keep for me. Repair guy came out (on warranty, thank God), and discovered the wire basket in the freezer was sitting crooked and was keeping the drawer from closing entirely.  Basket realigned properly, ice build-up cleaned out, all is well.

But before he came, I'm thinking, maybe he'll have to get behind the unit to fix it. Maybe it'd make easier access in my narrow kitchen if the fridge cabinet were down, at least on the lefthand side.  It also dawned on me that it would actually be easier to get that upper platter, teapot, vase, etc., cabinet off the wall if I could set it down on the top of the refrigerator once the wall screws were out.  [In fact, it hits me just now, why shouldn't I just leave it there on top of the fridge until time to reattach it to the new tall cabinet sides?]

Ghost of wallpaper past
So I cleared out the crockery.  Moved out the pie safe.  Knocked the cornice moulding off and set it aside. Brought the filthy bowls and things down off the top of the cabinet.  And dusted and brought down the even filthier pieces of shelving I keep up there so the bowls and things don't get lost behind the cornice moulding.

The repair guy didn't need to get to the back of the refrigerator.  Never mind.  I had received the impetus I needed to start this project and was now ready to demount the upper cabinet.  I undid the screw that ran through some blocking into the lefthand side of the tall cabinet.  I readied my trusty ratchet screwdriver to do the old lefty-loosy to the two big screws that attach the upper cabinet to the wall.  Annnnnnnd . . .

Nothing.  Stuck.  Next day, I tried it with my power drill on reverse setting.  Still nothing.  Bit just popped out.  Drenched those screws with PB B'laster until the kitchen stank.  Still nothing.  Stuck, stuck, stuckity-stuck.

I said to heck with it and went and focussed on the front door woodwork instead.

I need either A Strong(er) Person or a more powerful drill/driver.  Or else some way to drill those screws out.  But right now my ladder is in the front room, and it's staying there until the work in there is done.  I have plastic over the doorway to the hall to keep paint stripper off my stairhall woodwork, the living room is full of furniture from the front room, so I can't bring the ladder back into the kitchen and try anything right now.

Oh, I could fetch the wooden ladder up from the basement . . .

Hush.  I'll live with the crockery on the dining room table awhile longer.

EDIT:  This morning (8/8/16) I recalled something about the icemaker line business that I guess I'd been happy to forget.  And that's that last fall, between the first week in October, when the delivery guys installed the new refrigerator, to mid-December, when they returned to hook up the new icemaker line, I had no--- I repeat--- no cold water to my upstairs bathroom.

Yeah.  The existing saddle valve apparently had been stuck open for years.  I had no idea.  Since the icemaker stopped working in 2008 or 2009, I assumed the water supply was off.  But as soon as they disconnected the vinyl hose from the old fridge, boy, did the water spurt!  The older installer handed me the line to put my thumb over the end, and tried to turn off the saddle valve in the basement. But it failed at the first good turn.  Only solution: to close the branch valve in the pipe that feeds the icemaker.  Immediate crisis halted, but it also halted the flow of cold water to my main bathroom.

So, for two and a half months, for my morning drink I had to snatch the coolish water from the hot side before it warmed up, or bring up a glass of water the night before and have it waiting.  Washing my face was a delicately-timed process, as I got the washcloth under the tap just enough so it wouldn't get too scalding.  I went farmhouse style flushing the toilet, keeping a bucket in the bathtub and dumping a couple gallons of lukewarm water in the potty every three or four uses.

The installers could have come back any time after I got the push fitting in and bought the new copper line, and several times they were supposed to . . . on a "they'll stop by when they're in the neighborhood" basis. But manpower is limited at the BBBS, and as an employee I was pushed repeatedly to the back of the line.  It wasn't till the ASM actually put me on the installation schedule that I got results.


Friday, October 5, 2012

Living Room Wallpaper Pictures

 As promised . . .


Though it looks like I took pictures from only one angle.  So I'll make do with a shot of my back door with a couple coats of new red paint on it.
 

And here's the back door lintel spray-painted Rustoleum "Hammered Bronze" . . .


. . . With a little "Before" action to bid a proper farewell to yet more beige:


And here's the vent cover for the 2nd floor hall wall duct spray-painted bronze . . .


. . . because I can't afford the Arts & Crafts style register I really want and this will have to do.

And oh, yes, here's a the new middle mortise for the new-old screen door:


Once I sanded the paint off the doorposts I found traces of the original surface-mounted hinges, which later were supplanted by the mortised ones, and later still with the aluminum screen/storm assembly.  But barring the latter, always before there were only two screen door hinges, top and bottom.  My door, however, came with three, and all three are going in.

Saturday, September 8, 2012

Not What I Had in Mind

When I got up this morning, I was a woman on a mission.

Now that the stripped-screw, hinge-hanging, barely-closing-anymore aluminum screen/storm door and its frame are off the back entry, it was time to finish what I started two days ago when I gave into the temptation to peel the paint off the outside of the big wooden entry door.  I was up by 6:30, and by 8:00 my breakfast was eaten and my morning chores were done.  The good baby gate (the one with the pedal-operated door) was wedged in the open back doorway to keep the pets in the house.  I'd confiscated a dead chipmunk from my going-on-fourteen-year-old calico, sent her inside, and given the rodent a proper burial-- in the garbage can.  Time to demount the big wooden door, lay it across the sawhorses on the back porch, take the Wood Doctor to its exterior to finish the stripping, fill the bad gouges, sand it as required, lay on four or five coats of shellac (to the exterior only), and hang it back up.  Today.  Before I went to bed.  I didn't want to have to wrestle that door back onto its hinges more than once, and I certainly wasn't leaving the back side of the house wide open while I was catching my Zzzzzs upstairs.  So if it meant staying up till 3:00 in the morning to get this done, by gum, I'd do it.

What is it they (maybe it was Bobby Burns) said about the best laid plans . . . ?

First off, I seriously underestimated how much paint still had to be removed from the stop moulding profiles.  Over two hours worth with the door still hanging, using the heatgun while sitting on a low stool in the open doorway with a cold rain and wind lashing the yard outside the deep back porch.  

Well, fine.  Don't want the door out on the porch till the weather settled down a bit anyway.

But then came the hardware malfunction.  A little after 9:00, I was ready to bubble off the paint trapped behind the knob and lock.   The deadbolt assembly came off easily enough, though there was a piece of metal I didn't notice until I was putting the parts into the berry picking carton for safekeeping.  (I hoped I could figure out where it belonged.)  And when the deadbolt cylinder casing came away from the interior face of the door, it pulled off a lot of the red paint and exposed the beigey-cream color underneath.  Boy, that'll look great repainted . . . not . . . (Cue ominous music.)

Likewise, it was simple getting the interior knob detached, too.

But the exterior knob, and the latch assembly . . .  ?  Oh, my.  It wouldn't budge.  Yes, I knew those little holes in the knob shaft probably gave access to some release mechanism.  Got the finest gauge brads I could find out of my workshop and found one small enough to go in.

Didn't do any good.

I put off thinking about it.  Finished heat-gunning the paint off the outside of the door, trying not to give in to the low blood sugar/useless adrenalin influx my setback with the knob was inflicting on me.  By around 10:15, I'd taken off all the paint I could reach and I had to deal with it.  Took several trips upstairs to look up sites on the Internet that might help me (this, and the Schlage spec sheet, were the most useful).  Repeatedly pushed, pulled, and turned the knob, to no avail.  Wandered outside to see if any of my neighbors had ever changed out a knobset.  Sorry, no.

Around 11:30, I called the local hardware store that cut all my keys.  Clerk suggested I try the hole on the other side of the knob.  Hmm.  Substituted an unbent paper clip for the little brad and tried to poke it in.  Not going.  Maybe, I suggested to the hardware store clerk, the holes in the knob stem are misaligned.  I'll try fixing that.  Still on phone, I pushed in the latch bolt so the innards of the knob stem wouldn't move, and turned the knob.  It clicked around, then stopped.  Oh, joy, now I've got the knob frozen up and the latch bolt is stuck retracted in door.  And the store's locksmith isn't in today.  Maybe Monday?

I really didn't want to have to spend money on a locksmith.  It wasn't what I'd had in mind.  But after more futile pulling and turning, I called and talked to one.  Despite my very specific explanation, he didn't have a clue what I was talking about.  Had I tried removing the screws from the rose?  No, I repeated patiently, this model has little holes, and no visible screws. He quoted me a price:  $29 just to come out plus $35 labor, not including parts and tax.  I found his patronizing lack of imagination disquieting.  Told him it was early yet (12:30 PM), and I'd like to call some other locksmiths to compare.

Back downstairs.  More turning (rather, not turning), pulling, and frustration.  More lightheadedness.  Not that many locksmiths in the phone book.  Called what there were.  No answer, or got an answering machine, or the same company as I called the first time, under a different name.  Ate something, felt a little better.

And got a sensible idea. Why not try Craig's in New Brighton, the hardware store I'm in an out of every weekend and ask what locksmith they recommend?  Clerk gave me the name and number for a guy named  Elmer W., and said he was good.

The reason I don't give Elmer's full name and with it a reference is that, strangely, he didn't bring any tools in with him-- he used mine.  But he arrived at the house in very good time and got the job done in short order, primarily by knack and main force.  Took a certain amount of pushing and pounding to get the outer knob cylinder free of the door.  When it and the latch assembly came out, he showed me the point of a nail protruding 1/8" or more into the circle of the bore hole.  Probably it was there to hold in the block that filled the mortise where the original mortise lock used to be.  And that's what everything was getting hung up on-- a little present from a previous owner.

Elmer only charged me $10.  As I was writing the check, I asked him what that little tongue of metal was that had come out of the deadbolt.  It's the piece that actually makes the bolt go in and out, and shouldn't there be another one of them?  Hadn't seen any, I told him.  Well, then, maybe not.

By the time the locksmith left, it was rising 3:00 o'clock.  It was nearly seven hours since I started this morning.  The door was finally on the sawhorses-- I moved it while waiting for Elmer to get here-- but   the ancient alligatored shellac was still on the door.  And it remained on the door, and remains to this time, because . . .

Because I took a good hard look at the inside face of  this door.  I saw the paint I'd pulled away with the deadbolt cylinder.  I saw how the red color I applied in 2004 had begun to chip and fade.  I visualized the effect of liquid stripper running down the edges and making inroads into the paint.  I imagined how impossible it would be to remove that paint at some future time without destroying the shellac job I was about to apply.  It wasn't what I had in mind, but it had to be done:  The interior surface had to be stripped.

First, then, I had to remove the metal retainer piece from the long-departed weatherstripping at the bottom of the door.   Screws painted over a million times took repeated heatings to clear off enough paint to get at the slots.  Once the metal strip was off, I saw that it was original to the door-- the wood underneath it was bare.

Then there was the sliding bolt my previous owners attached to the bottom of the door.  I hated losing that, in a way.  But it was loose and bent and I needed to get at the paint under it.  But try as I might, I couldn't convince it to reveal its screws.  Had to pry it off.  Some of the wood came off with it.  Oops, well, that's some more patching to do.

Ate something to recruit my strength.  Then finally, finally, got to the stripping.  On the painted side of the door.  Barring 45 minutes or so for supper, I worked nearly six hours straight. Used the best heat gun, the one that goes to 1200 watts, which I now read isn't the best idea with lead paint, since it vaporizes it.  I admit, my throat was a little irritated until I had the sense to put on a mask.  That side of the door has, as I suspected, always been painted, so though the paint came up pretty well under the heat, it didn't sit up and beg to come off the way the two layers of latex on the exterior had.  The scraper jumps, gets stuck, and hesitates from time to time.  Result?  Some not-so-pretty five-in-one tool marks in the wood.  In fact, the inner surface of the door looks downright rustic.  It'll need sanded, or filled.  It needs sanded anyway, because the bottom-most layer of paint isn't entirely off.  Yeah, that'.s the thick white leadbased one.

At 9:10 PM I still had paint in the profiles.  Not to mention what there was around the window glass which I wasn't going to tackle with that heat gun, for fear of breakage.  Time to give up for the evening.  Didn't have enough light to keep myself from gouging the wood, and my left hand holding the heatgun was literally shaking.  It's not what I had in mind, but I wrestled the door back and rehung it.  Then I shop vac'd the back porch, and cleaned up all the hard crunchy curlicues of paint.  And set out to reinstall the deadbolt for the night.

This is where I learned that Elmer the locksmith had been right the first time:  There were supposed to be two of those metal tongues in that lock.  And it dawned on me that the metallic-looking "strip of paint" I'd vacuumed off the backdoor welcome mat a few minutes before was probably the piece I needed.

Not to panic.  That's one thing nice about shop vacs-- if necessary, you can open them up and retrieve what's been sucked inside.  Gloved up again, selected a metal plant prop from my gardening tools, and began to fish around.

No joy. But here's where I had a sensible idea, and it worked.  Fetched a strong magnet and stuck it on the end of the plant prop.  My "rod" thus baited, I did better.  The missing tongue soon attached itself and I hauled it up.

And believe it or not, I didn't have too much trouble getting the lock back together-- once I'd consulted a photo I took earlier and got it oriented the right way up.  It locks just fine, and the knob hole I've stuffed with an old towel. 

I am knackered.  Don't know how much I'll get done on this tomorrow.  At the moment, I'm too tired and achy to have much of anything in mind.  In consideration of the luckless chipmunk my kitteh slew this morning and the shellac that's still on the door, I sign off with this:


But Mousie, thou are no thy-lane,
In proving foresight may be vain:
The best laid schemes o' Mice an' Men,
Gang aft agley,
An' lea'e us nought but grief an' pain,
For promis'd joy! 

                            ---Robert Burns, "To a Mouse, on Turning Her Up in Her Nest with the Plough"

Monday, November 23, 2009

Trimming the Sow

When I first saw the notice for the latest Houseblogs.net/ True Value (http://www.startrightstarthere.com/) DIY contest, "My First DIY," I thought I was supposed to write about my first do-it-yourself project ever.

Ah, yes. That would be the time I demounted and stripped all the Victorian hardware in the first floor apartment I shared with two other girls one summer at college, to the genuine joy of the landlord.

But I looked closer at the notice, and it actually says "After I got the keys to my house, the first thing I changed was..." So this is definitely a Sow's Ear question. My first and so far only bought-and-owned-by-me house.

Then it reads, "We want to hear all about that very first DIY project you completed, once you had the keys in your hand."

Oh. Do you really want to hear about that? It was really simple and boring, if very effective. I scraped and cleaned the basement bathroom and laundry room floors and gave them a coat of porch floor paint. It went from flakey gray and burgundy red, pockmarked in places with spots of bare concrete, to a nice light green. Brightened the spaces up amazingly and six years later, even after two supplementary applications in the john, the fresh color makes that part of the basement a pleasure to work in. The only thing I would have done differently is to paint the laundry floor before I had the new washer and dryer installed. Oops.

But how exciting can that be? That ranks right up there with, well, watching paint dry. So if I may submit a more involved project for the community's amusement, may I present the Grand Woodwork Stripping and Refinishing Campaign-- even if even now it's not yet done.

Truly, spiritually, the woodwork is the first thing I began to change after I got the keys.

From the moment I first walked through the door with the real estate agent in June 2003, I knew the mushroom beige paint on that trim was doomed. It was already trying to shrug it off, helped a lot by my previous owners' dogs. I could see the deep shellacked red-brown peeking out from cracks and chips in the loose paint, whispering the promise of solid oak natural-finish woodwork just like I knew back in Missouri. Turned out it was yellow pine, but never mind that. As soon as I had the keys and had retrieved my toolbox from the storage locker, I took my razor blade scraper (with a dull blade) and began flaking away.

And flaking away and flaking away. But I'd just started a 60+ hour a week job as a church pastor and I had to get my study painted and in order so I could find my books and write my sermons, and then there was no way I was going to put my dishes away until the kitchen was relieved of its nice-try-but-too-busy-and-dark wallpaper, was repainted, and had the new backsplash border up and the cabinets remounted. Which didn't get accomplished till January 2005.

Meanwhile, I kept chipping. I chipped when I was on the phone. I chipped when I was bored. I chipped when I came home from a meeting and wanted to feel I'd gotten something useful done that evening. I was awash in dark-beige and cream paint flakes, flakes under the furniture, flakes down the heat registers, flakes tracked around by the dog, flakes being sampled by the cat ("No, Wennie! There might be lead in that!!"). But I swept and vacuumed up the mess and kept on going.

Seeing how easily the paint came away, I concluded that the POs who'd applied it in the first place (this turned out to be my PO-2) had neglected to prime the wood first. Worked well for me, since the only places the paint stuck was where the original finish was worn. The question then was, what to do about them? Once the paint was off most of a piece, the finish was beautiful. So why mess it up? Why not just use the Western Wood Doctor refinisher and use it for both the stubborn paint and to blend in the rest of the finish? And I'd do all the trim while it was still up. So much less hassle that way.

In late February 2004 I got serious about this project, starting with the doorway between the front hall and the kitchen hall. But problems immediately reared their heads. The inner casing, I discovered, once was mortised for hinges and a latchset and the patches screamingly didn't match. These pieces were in bad shape, too, so gouged and pitted the palm sander wouldn't even it out. Bugger. I'd have to take it down after all. But the adjacent face trim was stuck behind the lip of the hall bench and I couldn't work out how to remove it. The casing wouldn't come off till the trim did.

Phooey. I decided to strip it all in place after all. But somehow, I could never work up the nerve to make the commitment and the mess this would involve. Besides, I lost my job for awhile and couldn't afford the supplies, and then I got another job (as an architect) which hardly gave me time to turn around once I got home in the evenings.


So I kept chipping and sweeping, sweeping and chipping. Front room, 1st floor hall, living room, dining room, 2nd floor hall. The only reason the incompleteness of it didn't drive me mad long since was that even with the spots and splotches of stuck-on paint, the natural wood finish revealed on the trim made even the boring ugly beige wallpapers look good.

But in January 2008, in response to a Houseblogs.net call for New Year's DIY resolutions posts, I realized I needed to make a big push and get this project finished. Or refinished. Whatever. And I faced the fact that there was no way I could get it done without taking the trim pieces down. So I launched my big woodwork refinishing campaign . . . which as of now still isn't complete. I'm set to start reshellacking the woodwork and remounting it, but nothing has happened since the end of August. A girl has to deal with the garden and pursue her part time work and look for a fulltime job, you know.

But I've almost finished doing the things I swore I had to do before I could go back to the woodwork, and maybe-- maybe-- the stair balusters and 1st floor hall trim-- if nothing else-- will be shellacked and remounted in time to deck the halls for Christmas.

Or maybe not. It occurs to me I may have made a similar resolution before on this blog . . .
__________________________________________
This post was written for Houseblogs.net as part of a sweepstakes sponsored by True Value.

Tuesday, February 17, 2009

Something More for the To-Do List

Today or tomorrow I have to send my computer processor away to be repaired. Which means for ten days to two weeks I won't be sitting in front of the monitor surfing the Internet.

The grand plan was to spend the time madly stripping woodwork. I still plan and hope to, but maybe not madly. I messed up my lower back muscles somewhat due to an intimate meeting between my car and a guardrail in early January, and they tell me at the chiropractor's office that if I do physical labor for more than a half hour at a time I'll tear them up worse.

But maybe with breaks (for the heating pad?) I can get something more done.

But as of this noon I have something else to put on my To-Do list. Last week's plumbing repairs left me with holes in my kitchen ceiling and the wall of my guest bedroom (Kitten Room!) closet. This morning, the drywall guy sent by the home warranty company came and did his work.

The plumber told me the surfaces would be left primer and paint ready. I was prepared to tackle that. But the plumber was wrong. Turns out the drywall guy's authorized only to patch the holes and apply the first coat of patching compound. Subsequent sanding and succeeding coats of joint compound are up to the homeowner.

Meaning me.

Could be worse, hey? I could be some helpless schlub with no clue about DIY or house renovation. I've got the ladder, the wet-sanding blocks, the drop cloths, and the plaster spatulas. I need to get another bucket of joint compound, but I've worked with it. I know how.

So even though I wasn't planning for this project in the next two weeks, I can do it.

As long as I don't spend more than thirty minutes at a time on it. Right.

And I learned something useful. The drywall guy used a product by USG, "Sheetrock Patching Compound," which can fill deep cavities without sagging on walls or on ceilings. It's said to be compatible with both drywall and plaster. It comes in 5-minute, 20-minute, and 40-minute workability grades. The 5-minute kind was used here today.

Hmmmm. I've got some places underneath the trim I've removed where the plaster or old patches to the plaster are in pretty bad shape. A product like this could prove to be very useful.


In other news, the concrete steps from my front walkway to the public sidewalk are crumbling so badly that I'm surprised the Borough hasn't come through and condemned them. I have to get them repaired before they give way under someone.

Of course, I have to be cute about it, even in this economy. Before I give in to the dismal reality of glaring white concrete, I want to get some bids on replacing them with stone.

Not sure exactly what kind of stone: the kind the house has as windowsills and entry stair cheekwall caps. I'm thinking it's Pennsyl- vania bluestone or else limestone that's gotten very, very dirty. The stoneyard guy who's coming Thursday afternoon to give me an estimate should be able to tell me what it is.

The tread edges would match the existing caps in thickness and cut. The risers, maybe in the same stone? Or maybe in soldier-course brick to match the house. That'd look good. All over a concrete base, of course.

That's the plan. Maybe I'll get on a computer at the public library and blog on what I find out. I do plan to update my woodwork stripping Project Tracker when I'm there, however. So keep an eye on it! 58% done now.

Monday, February 9, 2009

The Fun Never Ends

The plumber has come and gone. He found a bathroom sink drain pipe that was leaking badly through a compro- mised solder joint, and left me with a pipe that is booted and clamped and apparently not leaking anymore.


He also left me with a hole in the plaster and lath at the back of the guest bedroom closet, and a cavity in my kitchen ceiling that looks like it was carved out by one of those dot-eating, maze-running entities in an early video game.

I'll have that to amuse me until sometime after Wednesday. That's how long I need to wait to make sure the pipe stays dry. If it does, I'm to call the home warranty company and they'll send the drywall guy (or gal) out to patch the holes. It'll be intriguing seeing how he deals with the one in the kitchen.

The plumber also showed me how closely my bathroom supply pipes hug the underside of the subfloor. Meaning that if I ever redo the bathroom flooring, it might be wise for me to avoid underlayments that require driving nails.

(U wantz leek, ai shohz u leek!!)

But the fun is not over! Oh my, no.

For shortly after the plumber left for his next appointment, I noticed there was water on the bathroom floor behind the pedestal of the sink. Oops! He'd said when he first came that there seemed to be a little-- had he gone back to look at it? Don't think so!

Letting the hot water run into the basin and down the drain, I got down on the floor and took a closer look. And a closer feel. Oh, dear, yes, the drain pipe is leaking, and it's leaking from the place where the stupid old crookedy pipe that comes down from the drainhole joins with the straight run to the trap.

Surprised I am not.

I hung an old hand towel in the bend of the trap to catch the drips, and called the plumber back.

He's returning tomorrow to try again. I wouldn't blame him if he just shoots the joint full of pipe dope.

And I wouldn't blame my dog if he decides this plumber is his permanent new playmate and his tools, his new fun toys.

Saturday, February 7, 2009

"Caulk Is the Solution to All the World's Problems"

At least, that's what one of my architecture professors used to say.

But at the moment I'm wondering it it can cause more problems than it solves. In the short run, at least.

This noon, meaning Friday the 6th, the plumber sent by the home warranty company to unclog my bathroom sink asked if the drain assembly leaked. I told him I didn't think so.

But after he left and I was cleaning up, I noticed this ominous low place in the floor just behind the sink pedestal. And I noticed all the other gaps in the sealant between the ceramic tile wall and the sheet vinyl floor.

Yes, ever since my toilet overflowed the last day of 2007 I've had it on my To-Do list to renew the caulk in the upstairs bathroom. And today-- yesterday-- I finally got around to it.

In the afternoon, I started on the wall that the toilet and lav back up onto. Dug out the old sealant, made sure the floor and wall were nice and clean and dry, and activated the tube of tub and tile caulk bought for the purpose months ago, which was waiting in the basement just for this occasion.

This came out to be a pretty decent looking sealant joint, even if I did have to use three lengths of foam backer bead side by side in that low place. The other joint, the one on the wall next to the toilet, I don't like so much.

For more than one reason.

I didn't get started on it till after 10:00 PM. For one thing, I wanted to give the first joint time to dry a little before I pushed the storage unit up against it, and for another, I was actually, finally putting away Christmas decorations.

That joint was a real job to accomplish, and I was reminded why I'd been putting it off. The flooring there is curled up and in some places sits nearly 3/8" above the toe of the ceramic tile base. You can reach your fingers under the vinyl, there's that much of a gap.

But I washed it out with Simple Green on a sponge and removed as much of the old caulk as I could get at, then washed it out a little more. I dried it nicely and pushed in a long length of foam backer bead. Then I recut the tube tip so it was about the size of the Mississippi delta and ran a honking big bead of caulk all along that wall.

It looks awful. It covers the toe of the tile. It'll probably shrink and I'll have to go over it again in a day or two.

But it's done and the bathroom is clean and that should be the end of that.

Right?

Sorry, not exactly.

For after all this was completed, I went downstairs to take my dog out for his midnight constitutional. In the kitchen I heard something almost like a scratching sound-- was one of the cats on the counter getting into things?

I looked, and confound me if water wasn't dripping from my kitchen ceiling, in the same old places it always comes through when I have a leak from the upstairs bathroom!

I checked: Toilet wasn't overflowing. The bathroom sink nor the tub were running. Everything upstairs looked perfectly dry.

Oh, God, please let it be that I used too much water cleaning out that damned joint so I could caulk it! Pleeeeaaazzzzz don't let it be that the plumber's snake this afternoon hit a weak spot in the pipes and it took this long before it started letting water through! It only started a little while ago, and I've been using the sink to rinse out cleaning sponges all afternoon and evening! Pleeeeaazzzzz???

Nothing I could do about it tonight but lay a bathtowel on the kitchen floor and hope for the best. Oh yeah, and worry.

. . . It's after 2:00 AM by now and I just went down to the kitchen and checked. The dripping has stopped. So if it starts again, it has to be the bathroom lav drain pipe. I could even put food coloring in the washbasin and find out for sure. I mean, I'll have to repaint the kitchen ceiling anyway!

Well, plumbing repairs are covered by my home warranty, even should this not count as a followup call for the previous problem. The question is, does that cover replacing the drywall in my kitchen ceiling where they'll have to tear it out to do the plumbing repair? Or the bathroom tile if they have to go through the wall?
I guess I'll see. If I'm lucky the leak will only be an unintended consequence of a well-intended application of much-needed caulk.


Friday, February 6, 2009

Pis Aller, or Fun with Plumbing

Want to hear something amazing? The plumber the home warranty company sent came on time this morning. Actually, he came a little early.

I was right about what was stopping up the kitchen sink pipe between the garbage disposal and the drain with the trap. It was pistachio nut shells, all right. The plumber unscrewed the PVC pipe, emptied the contents into a bucket, and handed it to me to take out to the compost bin. Then he screwed the pipe back on and that was that.

Good grief! Is that all there is to it? I could have done that myself! Maybe I didn't need to call the plumber after all!

Upstairs in the bathroom, he was just as quick to remove the lavatory trap and the straight pipe connected to it. The assembly was full of water, of course, and when he emptied it out into the bathtub, a few gray flakes of calcium deposit dropped out.

That's odd. That wouldn't be enough to cause the rattle I'd heard before.

I picked it up and saw there was some greenish goo in it. So while he was doing something or other under the sink I ran hot water through the trap assembly. And this is what came out:

That's not lime flakes, that's bona fide pebbles! As to how they got there, my working theory is that my POs' preschooler dropped them in more than five years ago, but only now has it come to matter.

I figured that now the problem was taken care of, and once the pipes were put back together the basin would drain and all would be well.

But no. It was still clogged. When the plumber went to his truck to fetch his motor-driven snake, I decided that no, I couldn't have done this job myself.

It took two tries with the snake to clear the drain. Apparently the obstruction was pretty far down.

But there was still a problem. "This trap is on backwards," said the plumber. "Do you have leaks in this sink?"

"No-- I don't think so-- I mean, I've never noticed-- "

"I'm surprised if you haven't. This flange isn't designed to go on this end of the trap. Whoever did this put it on the wrong way."

So he took his little coping saw and cut off a few inches of the straight pipe so the trap could go the right way around. With that done and the pebbles removed, my drain could get a better scour and I won't get the buildup that had caused the pipes to stop up below.

But he tried and tried but couldn't get the trap to go on the correct way. Or he got it on and it leaked. Or he got it on and the gasket broke.

Why? Because whoever installed my pedestal sink failed to make sure it was resting on its pedestal. So the weight that isn't taken by the wall bolts is taken by the plumbing, with the result that the first length of drain pipe is at least 5 degrees out of true. And given the "creative" way some previous owner that adapted the wall tile to a cockeyed piece of trim, this doesn't surprise me one bit.

I sat there watching for most of this operation. Not sure what the plumber thought of it, but I like to know what's going on and learn. But after the plastic gasket broke, I figured I'd clear out of his way.

When he came downstairs, he was apologetic: "I had to put it back the way it was. That's the only way I could make it work with that crooked drain pipe."

So barring being pebble-free, I won't get the improved scour through the trap. Oh, well! The drain is flowing freely again, the water gurgling merrily down its gullet, and that is something that was long overdue.

Thursday, February 5, 2009

Help Is on the Way

It's like this: My bathroom sink has been slow, yea, clogged for the past few months. And I've been putting up with it.

I've been putting up with it, because I knew what was wrong with it and it seemed like a really neat thing if I could Fix It Myself. I knew what was wrong, because after all the Liquid Plumbr and vinegar and so on, when I'd plug the overflow hole and go at the drainhole with the plunger, I could hear what sounded like gravel rattling in the trap. Calcium deposits come loose and slowing down the water flow, no doubt.

But I didn't have the right wrenches and I just never got around to buying any.

As an alternative, I thought I might get this friend who does his own plumbing to come over and fix it. He's got the right wrenches. But somehow, every time I mentioned it to him, he seemed strangely deaf . . .

But call a plumber? Forget it!

But last weekend my kitchen sink got stopped up, too. Knew what that had to be: pistachio nut shells. Not a good idea to put pistachio nut shells down the garbage disposal. They get past the blades and camp out in the pipe that runs to the other sink. They fill up with water and let little or nothing by. Glad I had the other sink bowl clear to run faucet water down. But frantically bailing out the overflowing stopped up bowl every time the dishwasher empties through the disposal is a little too exciting for me.

So I had a brilliant thought: Let's see if my home warranty covers plumbing clogs! And lo, it does!

So tomorrow morning the plumber cometh, and as for my own ventures into pipe wrenching, they will have to fly away to the realm of Might-Have-Been.

Friday, August 1, 2008

Oooh, Yummy!

. . . If you're an ant with a death wish.

Got a call about 8:40 this morning. It was Grover*, the pest control guy: "Hi, I know I'm supposed to come on Monday, but I've had a cancellation this morning, is it all right if I come now?"

Oh, sure, sure. Sooner the ants get out of my kitchen, my woodpile, and my life, the better.

So in about a half hour, Grover* appeared in his bright red truck wearing his bright red shirt, and, after duly saluting my dog, went to work in the back garden laying down some kind of super-pyrethrum ant bait.

While I proceeded to feed the animals and clean out the litter boxes and do my usual morning routine.

When all of a sudden it hit me: Oh my gosh, he's going to need to put ant bait in my pantry and the shelves are sticky dirty filthy!

All right, it's not supposed to be that way. But cooking oil and honey and Worcester-shire sauce have a way of, well, migrating. And leaving their marks on the shelves. And the idea is that the ants take the bait, not keep hanging out in their traditional local, Ye Olde Honey Staine.

So I frantically got to work unloading the shelves and wiping them down, hoping I could get it done before Grover* finished outside so I wouldn't hold up the show. And wiping down the counters and backsplashes so they could be treated, too.

He was kind of treading on my toes as I finished up, but I had the kitchen ready in time. This is what the bait looks like in the pantry:

It comes out of a little plunger tube, like clear toothpaste. And the ants, as you can see, find it deelicious.

Too bad for them, little buggers. It doesn't kill them immediately; they track it back to the nest and infect everybody else first. The bait put down outside works on the same principle. Grover* tells me it'll take ten days to two weeks to kill them all, but it's a lot more effective than a repellant or contact poison.

Here's what was put down in the woodpile, around both trees, and in the big stump:

I'm glad to get the process started, sooner than later. There is an irony about it, though. I had outpatient surgery yesterday, and I was told I wasn't supposed to do any work today. Cleaning out cabinets isn't quite work, is it? I mean, not when you really have to do it?

So why do I feel tireder than one of those perishing little ants?

Tuesday, July 29, 2008

Bugged and Buzzed

True confession: For the past few weeks I've been waging war against little black ants in my kitchen.

I've put down diatomaceous earth on their trails and around the house. I've scattered the Amdro ant block baits here and there.

And there's a lot fewer than there were, but by ones and twos, I still have them.

And then, out in my vegetable garden, I have some sort of hornet or wasp or bee infesting my cobblestone paving. They're there every year, from June to September, at least. I see more and more holes in the sand between the stones, and even so holes in the garden soil itself. These insects seem to be rather aimless and daft, buzzing in circles a few inches to a foot above the pavement, especially when it's sunny and bright. They don't like rain, or even shade, and go in when it's cloudy or wet.

Me, I go in when they're out. I don't want to risk weeding or cultivating or harvesting while they're up and active.

So between the ants and the hormuts, I called in an exterminator today to see what I needed to do.

Guy comes this noon. Call him Bert*. Checked out the ant problem in the kitchen (didn't see any at the time, but I let him know what I see). Out in the backyard, Bert* makes a beeline (lol!) for my woodpile, next to the wood board fence. Oh, fun, here's a problem I didn't anticipate: I have carpenter ants in the woodpile. Yeah, I saw one. Yeah, they're bad news for wood, and saying I have a brick house doesn't make me immune. Or the neighbors, either.

Carpenter ants have to be dealt with, regardless. And the pile has powderpost beetles, too.

Bert* the exterminator guy looks at my hornet problem in the vegetable garden. Says, "That's ground bees."

Says, "It'll be $225 to get rid of the carpenter ants, and another $50 for the kitchen ants and the ground bees. Then we'll come back every thirty days until winter, then pick up again next spring, for six more applications at $78 each."

Bert's* a nice guy. Buys a couple of my green Brandywine tomatoes off me. But we're definitely into "get a couple more estimates" territory. I tell him I'll let him know: I have to finish killing the spurge in the garden paving and unloading the woodpile onto my friend Steve* (who has a thing for burning wood outside) before anything can be done, anyway.

I call exterminator guy No. 2. Ernie* arrives about an hour after Bert* leaves. Ernie* does get a keek at the ants in the kitchen: "Those are Pharaoh ants. They're unusual around here." But he tells me how he can be a modern chemical Moses, driving the forces of Egypt into the Red Sea, or at least out of my house.

Out we go to the backyard. Ernie* sees evidence of the powderpost beetles in the woodpile. Doesn't see the carpenter ants. I tell him I definitely have seen them, so he has to take my word for it.

We look at the vegetable garden. Ernie* takes a look at the hovering creatures and says, "You have solitary wasps. Look at all the holes. They're really difficult to get rid of."

Ernie's* also a nice guy. I put him in touch with a man I know who keeps bees, since he often has to call on local beekeepers to come remove honeybee colonies, since by law he's not allowed to exterminate them. Ernie says he'll take care of it all for $100, plus $25 if a follow-up visit is needed. "But it shouldn't be."

Now I'm confused. Bert* seems very confident, and wants to charge me a total of $743 over the next nine or ten months, and Ernie* says it'll be difficult but tells me $125 over two applications will take care of it.

And ground bees or solitary wasps or ground-nesting hornets, what do I have?

So I take up the Yellow Pages and call yet another exterminator. I put in my name, and a couple hours later, I get a call from Grover*. He's coming late tomorrow morning. But over the phone, he figures it won't run more than $200 to deal with it all.

However. The kitchen ants, Pharaoh, suger, or little black, we wants dem gone. Ditto their carpenter cousins. But the winged critters in the vegetable garden-- I need to find out exactly what they are.

Because when I look up "ground bees" and "solitary wasps" on the Internet, I've told a) they're harmless to people; neither of them sting unless you step on them or bottle them in your hand; b) they're essential for pollination and to keep down harmful insects; and c) one should let them alone and coexist with them.

Okay . . . but what if I do have some kind of nasty, vicious hornet out there?

Maybe I should get my friend who keeps bees to come take a look, before I do anything at all.