8:00 this morning. I haul myself out of bed and endeavor to make myself look respectable. The roof inspector is coming at 8:30, after all.
8:43. The roof inspector hasn't arrived. I take advantage of his delay and vacuum the waves and billows of pet hair off the front room floor.
9:15. I've been worrying/wondering/getting annoyed for the past half hour at least. I leave a message on his cell phone politely inquiring if something's gone wrong, did he still expect to make it this morning, or should we reschedule.
I'm hungry. I start cooking my breakfast.
9:21. I post on Facebook that I think he's forgotten.
9:40. I'm finishing my breakfast. The phone rings. It's the roof inspector. He got himself rear-ended two miles from home, his driveshaft was destroyed, and he's temporarily without a vehicle. Could we reschedule for Tuesday morning at 9:00?
Sure.
9:45. I'm glad I wasn't a jerk on the phone message.
******************
After that, you think I'd go back to bed, or at least work on my sermon for tomorrow. No. As mentioned previously, I've been researching spray foam insulation as a possible replacement for the moldy pink fiberglass in my attic crawl space, and I found out online the other day that one of the biggest installers in the Pittsburgh area was going to be exhibiting at the Allegheny County Green and Innovation Festival (hmm. Kind of a failure of parallelism there, what?). And somehow I preferred to make my initial overtures face to face.
Here are some views of the fair:
I found the foam insulation people there, and learned the name of the rep who'd be happy to come out and look at my job, as soon as his schedule would be freed up in a fortnight or so.
Saturday, September 24, 2011
I Thought I Was Finished
Last night, I thought I was finished. With one exception reserved,* I thought all the repairing, patching, painting, and touching up needed in my 3rd floor study was done.
The white trim, where needed, was recoated in semi-gloss latex, and any encroachments of the dark yellow hue painted over.
I'd gone around with a sponge brush and with the light yellow paint concealed the mar-marks that wouldn't scrub off on the west and north walls.
I'd pushed my utility table and my drafting table back against the wall, and carefully rehung the oak drawer unit on its brackets on the wall.
Except for the protection over the long wooden file cabinet (owing to the above-mentioned exception), the drop cloths and plastic sheets were taken away, to lie until needed, rolled up in the doorless closet in the 2nd floor hallway below. Paint, paint trays, rollers, brushes, rags-- all or most were removed to the stairhead below, to await the trip back to the basement workshop. The carpet was vacuumed, the work surfaces were dusted and wiped.
By this time it was rising 5:00 AM. Yes, I repeat it, nearly five o'clock in the morning. I hadn't been working and straightening all that time; no, more than once I'd succumbed to the lure of the computer and sat down to watch past episodes of Holmes on Homes on YouTube. Or, more to the point of rectifying problems in my own house, I'd been researching the pros and cons of spray foam insulation, which, if I can manage the cost, may prove to be the best replacement for the moldering pink fiberglass in my attic crawl space roof.
Why didn't I save both diversions and labor for later and go to bed? Because it seemed necessary that the decks be cleared for the visit of the roof inspector this morning at 8:30 AM, so he could examine the length and breadth of my 3rd floor, if required, without tripping over dropcloths and paint cans. And until the cleanup was complete, I wasn't turning in.
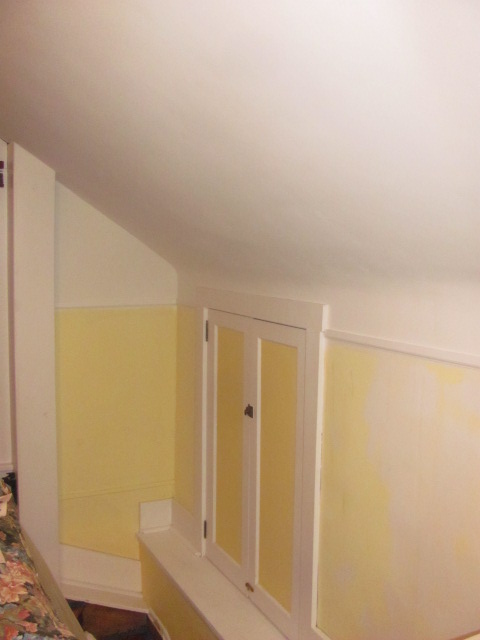
But by quarter to five it pretty much was, and I spared a few moments to gaze and admire my handiwork in the stairwell.
Even so, I couldn't help noticing a problem with the touch up paint on the west wall. That light yellow was a color mix of my own, concocted when I first painted my study in 2003 from three or more Sherwin-Williams colors, I not liking any of the ones they had in stock. The can I've been working with is an attempt at matching that was made back in January of 2009 when the drawer unit fell off the wall. I wasn't wholly convinced by the match then, and the best I can say about it now is that at least it was enough to do the east wall and the part of the north wall contiguous to it in one whole new coat. But the 2009 "matched" paint has a definite grayish cast not present in the 2003 original. Usually, with the shape of the room and rarity of direct sunlight through the gable windows, the difference isn't noticeable, even at touch-up spots. But at five o'clock this morning, just above the cabinets sitting against my west wall, I noticed it all right. Don't know if I'd raked some unmixed bit of pigment off the bottom of the quart can, or if my brush or the wall itself wasn't clean, but those spots looked dirty. Flat-out smudgy, grubby dirty. As Mike Holmes would say, "Unacceptable!"
I came closer to get a better look, and that's when I saw it. Just visible above the surface of my sewing table, insinuating its winding way up the pale yellow wall, was a crack. A crack I hadn't noticed before. Not a bad crack, not a wide crack, but--
I looked under the sewing table. Oh, crappolitis! It was a bad crack. And in the run of things, a wide crack as well. And it had a brother crack along with it.
Oh! Oh! Oh! I thought I was finished with all that! I've taken it all downstairs to put away! And now it's back to joint compound and primer and paint and redoing the baseboard paint (which'll surely get mucked up in the process), and oh! oh! why can't I ever be done!?
____________________________________
*I've decided my bookshelves and the ledge outside the attic hatch need to be redone in oil based paint. And of course I still need to finish painting the back walls of the built-in bookcases.
The white trim, where needed, was recoated in semi-gloss latex, and any encroachments of the dark yellow hue painted over.
I'd gone around with a sponge brush and with the light yellow paint concealed the mar-marks that wouldn't scrub off on the west and north walls.
I'd pushed my utility table and my drafting table back against the wall, and carefully rehung the oak drawer unit on its brackets on the wall.
Except for the protection over the long wooden file cabinet (owing to the above-mentioned exception), the drop cloths and plastic sheets were taken away, to lie until needed, rolled up in the doorless closet in the 2nd floor hallway below. Paint, paint trays, rollers, brushes, rags-- all or most were removed to the stairhead below, to await the trip back to the basement workshop. The carpet was vacuumed, the work surfaces were dusted and wiped.
By this time it was rising 5:00 AM. Yes, I repeat it, nearly five o'clock in the morning. I hadn't been working and straightening all that time; no, more than once I'd succumbed to the lure of the computer and sat down to watch past episodes of Holmes on Homes on YouTube. Or, more to the point of rectifying problems in my own house, I'd been researching the pros and cons of spray foam insulation, which, if I can manage the cost, may prove to be the best replacement for the moldering pink fiberglass in my attic crawl space roof.
Why didn't I save both diversions and labor for later and go to bed? Because it seemed necessary that the decks be cleared for the visit of the roof inspector this morning at 8:30 AM, so he could examine the length and breadth of my 3rd floor, if required, without tripping over dropcloths and paint cans. And until the cleanup was complete, I wasn't turning in.
But by quarter to five it pretty much was, and I spared a few moments to gaze and admire my handiwork in the stairwell.
Even so, I couldn't help noticing a problem with the touch up paint on the west wall. That light yellow was a color mix of my own, concocted when I first painted my study in 2003 from three or more Sherwin-Williams colors, I not liking any of the ones they had in stock. The can I've been working with is an attempt at matching that was made back in January of 2009 when the drawer unit fell off the wall. I wasn't wholly convinced by the match then, and the best I can say about it now is that at least it was enough to do the east wall and the part of the north wall contiguous to it in one whole new coat. But the 2009 "matched" paint has a definite grayish cast not present in the 2003 original. Usually, with the shape of the room and rarity of direct sunlight through the gable windows, the difference isn't noticeable, even at touch-up spots. But at five o'clock this morning, just above the cabinets sitting against my west wall, I noticed it all right. Don't know if I'd raked some unmixed bit of pigment off the bottom of the quart can, or if my brush or the wall itself wasn't clean, but those spots looked dirty. Flat-out smudgy, grubby dirty. As Mike Holmes would say, "Unacceptable!"
I came closer to get a better look, and that's when I saw it. Just visible above the surface of my sewing table, insinuating its winding way up the pale yellow wall, was a crack. A crack I hadn't noticed before. Not a bad crack, not a wide crack, but--
I looked under the sewing table. Oh, crappolitis! It was a bad crack. And in the run of things, a wide crack as well. And it had a brother crack along with it.
Oh! Oh! Oh! I thought I was finished with all that! I've taken it all downstairs to put away! And now it's back to joint compound and primer and paint and redoing the baseboard paint (which'll surely get mucked up in the process), and oh! oh! why can't I ever be done!?
____________________________________
*I've decided my bookshelves and the ledge outside the attic hatch need to be redone in oil based paint. And of course I still need to finish painting the back walls of the built-in bookcases.
Labels:
3rd floor,
attic,
clean up,
insulation,
misery,
painting,
renovation TV,
study
Thursday, September 22, 2011
Tiny Bubbles
". . . in the paint,
Make me feel sloppy,
Like I'm doing what I shain't."
This morning the cosmic question arose in my reluctant brain: Which means more time and trouble: Continuing to use the can of dark yellow paint I already had to lay the second coat onto the walls of the study stairwell, or driving the fourteen-mile round trip to the paint store to see what Sherwin-Williams had to say about it?
The first would mean repeating the tedious process of laying the paint on with the brush, then coming after to roll it out. The second would take time, gasoline, and negotiating some very annoying roadworks on the approach to the store. Which, which, which?
Well, it wouldn't hurt to phone the shop and describe the problem. When I did, the clerk who answered said it didn't sound like the paint ("Duration Home" Interior Matte Latex) was behaving the way it should, and to bring it in for her to take a look.
Funny how having something definite to do on a problem can bring clarity. Without further ado, I jumped in the car and drove down.
I showed her both rollers I was using, the one with the 3/8" nap and the fine-celled foam one. I told her how with either, the paint was leaving bubbles in the painted surface. At first she said that was normal for the foam roller. I wasn't convinced of that: the wrapper said it was designed to leave the finish smooth. Then, she opened the can of paint and saw how runny it was. "Oh, yes! You have bubbles in here. Shouldn't be that way. We'll exchange it."
And she did. And I got the second coat of "Decisive Yellow" paint on the stairway walls with a roller. A new, higher-quality, roller. Couldn't help but notice how much more paint I used than the first time around. But maybe that was down to this new can of paint being the thickness it should be.
I can't tell for sure with the dropcloths down, but I think I'm going to like this color with the medium mahogany tone of the stairs.
This was encouraging, so I went on to remove the books from the righthand built-in bookcase and lay a first coat of the dark yellow onto its back walls. Ended up using the new brush for all of that. Too much mess and awkwardness getting back in there with a roller.
The lefthand case can wait till I can get the furniture on that wall pushed back and out of the way. A cabinet sitting out in the room is no place to pile all those books.
Make me feel sloppy,
Like I'm doing what I shain't."
This morning the cosmic question arose in my reluctant brain: Which means more time and trouble: Continuing to use the can of dark yellow paint I already had to lay the second coat onto the walls of the study stairwell, or driving the fourteen-mile round trip to the paint store to see what Sherwin-Williams had to say about it?
The first would mean repeating the tedious process of laying the paint on with the brush, then coming after to roll it out. The second would take time, gasoline, and negotiating some very annoying roadworks on the approach to the store. Which, which, which?
Well, it wouldn't hurt to phone the shop and describe the problem. When I did, the clerk who answered said it didn't sound like the paint ("Duration Home" Interior Matte Latex) was behaving the way it should, and to bring it in for her to take a look.
Funny how having something definite to do on a problem can bring clarity. Without further ado, I jumped in the car and drove down.
I showed her both rollers I was using, the one with the 3/8" nap and the fine-celled foam one. I told her how with either, the paint was leaving bubbles in the painted surface. At first she said that was normal for the foam roller. I wasn't convinced of that: the wrapper said it was designed to leave the finish smooth. Then, she opened the can of paint and saw how runny it was. "Oh, yes! You have bubbles in here. Shouldn't be that way. We'll exchange it."
And she did. And I got the second coat of "Decisive Yellow" paint on the stairway walls with a roller. A new, higher-quality, roller. Couldn't help but notice how much more paint I used than the first time around. But maybe that was down to this new can of paint being the thickness it should be.
I can't tell for sure with the dropcloths down, but I think I'm going to like this color with the medium mahogany tone of the stairs.
This was encouraging, so I went on to remove the books from the righthand built-in bookcase and lay a first coat of the dark yellow onto its back walls. Ended up using the new brush for all of that. Too much mess and awkwardness getting back in there with a roller.
The lefthand case can wait till I can get the furniture on that wall pushed back and out of the way. A cabinet sitting out in the room is no place to pile all those books.
Wednesday, September 21, 2011
Nevertheless
In spite of whatever I might find out about my attic storage space this Saturday morning, I'm still proceeding with getting the 3rd floor study repainted.
The stair stringer, which I stripped of paint last year when I was removing the old shellac from the treads and risers, ended up needing three coats of paint in addition to one coat of primer. Not sure why; maybe it's because the 3rd floor trim paint had thickened up in the can and I added too much water to thin it out. Seemed the right consistency to me.
Had a dickens of a time cutting in a clean edge between the stringer and the natural finish stairs. That's what happens with old construction: you get those tiny gaps that paint inevitably finds its way into. When I get done, I'll take a dental pick to it and see if I clean it up a bit.
I had second thoughts about painting some of that woodwork-- after I had two coats on and it was too late, of course. But the question would be, where would the natural finish stop? And the white, I knew, would look better once the walls on either side of the stairs were repainted.
They're getting a more intense shade of yellow than was on them before. I wanted them to pop when I first painted the study in 2003, but in the ambient light they looked practically the same as the pale yellow walls of the room.
And pop the new color (Sherwin Williams' "Decisive Yellow") certainly does. Especially on the panels of the attic hatch doors. There I didn't prime over the previous color ("Daffodil", I think it was), unlike with the stairway walls. Not having the white underneath definitely affects the tone. Funny, I was in the middle of priming the stairway walls when I heard it probably wasn't necessary, and new latex adheres better over (clean) old latex than it does over primer. Never mind. Those walls had so many patches, splashes of old shellac, scrape marks, and other blemishes, the primer was needed to even things out.
First coat of the "Decisive Yellow" went on tonight. Weird thing, I had to brush it on, because both rollers I tried to use left bubbles on the surface. The 9" one was one I used successfully on the ceiling, and the 4" one was a special no-texture foam roller that should have been perfect for keeping the brush marks out of the door panels. Didn't matter. I got bubbles. I let the brushed-on paint dry a little, then went over it gently with the 9" roller to get the brush marks out, but the paint shouldn't act that way.
Maybe I should call my Sherwin Williams store tomorrow and ask them what they think is going on, before I do the second coat.
The stair stringer, which I stripped of paint last year when I was removing the old shellac from the treads and risers, ended up needing three coats of paint in addition to one coat of primer. Not sure why; maybe it's because the 3rd floor trim paint had thickened up in the can and I added too much water to thin it out. Seemed the right consistency to me.
Had a dickens of a time cutting in a clean edge between the stringer and the natural finish stairs. That's what happens with old construction: you get those tiny gaps that paint inevitably finds its way into. When I get done, I'll take a dental pick to it and see if I clean it up a bit.
I had second thoughts about painting some of that woodwork-- after I had two coats on and it was too late, of course. But the question would be, where would the natural finish stop? And the white, I knew, would look better once the walls on either side of the stairs were repainted.
They're getting a more intense shade of yellow than was on them before. I wanted them to pop when I first painted the study in 2003, but in the ambient light they looked practically the same as the pale yellow walls of the room.
| Old color left; right, the new |
First coat of the "Decisive Yellow" went on tonight. Weird thing, I had to brush it on, because both rollers I tried to use left bubbles on the surface. The 9" one was one I used successfully on the ceiling, and the 4" one was a special no-texture foam roller that should have been perfect for keeping the brush marks out of the door panels. Didn't matter. I got bubbles. I let the brushed-on paint dry a little, then went over it gently with the 9" roller to get the brush marks out, but the paint shouldn't act that way.
Maybe I should call my Sherwin Williams store tomorrow and ask them what they think is going on, before I do the second coat.
Friday, September 16, 2011
Oh, No. Oh, No!
I was all poised to make a cheerful post about how I was getting to the exciting part of my 3rd floor study repainting work. But about three hours ago I was wiping down the doors and frame of the hatch to the storage space, to see how much repainting they really need.* And I noticed little brown droplets at the top of the frame, inside where I don`t see it with the doors closed. They wiped right off with the sponge.
Wet. Wet where it shouldn't be wet.
I felt the paper of the batt insulation, which some previous owner installed between the roof rafters of that space and I never got rid of. Damp. I poked in the worklight. And where the paper is torn and the pink batting is visible, I see mold-- yes, nasty black mold-- in the fibers.
Oh, no, is my roof leaking? I don't have the money to deal with this!
I went outside, to see if I could get a view of my roof. From the next door neighbors' yard, the shingles look pretty good. No terrible curling or cupping that I can see. The neighbor next to them was in his back yard, so I joined him to see if he had any ideas and maybe to get a better look from there.
He doesn't think the overall shingle job looks bad, either. But I notice some definite waviness at the eaves . . . ice dams from past winters? Unlike my next door neighbor on the other side, who got up and repaired and reshingled his entire roof this summer, the neighbor two doors down can't claim too much proficiency in handyman skills. But he did have a useful piece of advice: That it's possible the problem may have been caused by the heavy rains we've had this summer, and it could be my homeowner's insurance might cover it. Yeah, maybe, but I don't want to call my agent to inquire and have my rates go up even if it turns out not to be insurable damage. True, he said, but I could get a home inspector out to take a look and see what the likely cause might be, before I make any insurance agent calls.
So. Don't know if I've followed the best procedure, but (after verifying that my home warranty company doesn't cover roof repairs at any time) I found a local roof inspector via the ServiceMagic site. Lots of reviews that were high over all. Soonest appointment that suits us both is a week from tomorrow at 8:30 AM, and I hope it doesn't rain so he can get a ladder up to the eaves and see what's happening at those gutters.
Meanwhile, I`ve cleared most of my boxes and bags and so on out of the storage space. None of it is wet. But I definitely have mold in that insulation, in the inch or so next to the brown paper. I wonder if the problem is due to inadequate ventilation in there, especially with all the rain we had last spring and this summer. I know it wasn't like that last January when the Comcast guys came up to put the cable in.
Got the dehumidifier in there running. And I don't think it'd be a bad idea to come in with the mildewcide and give those icky-looking batts a few squirts. My nose is itching a bit with that hatch door open.
Meanwhile, will I continue with the repainting? I think I shall. Those walls and trim shouldn't be affected by any roof work, and if I can get the study repainting mess straightened out and put away, I'll have more floor space if I have to clear out the closet so they can inspect the roof space on the other side of the house, too.
_______________________________________________________
*Ironically, I was listening to an episode of Holmes Inspection on my computer as I worked.
Wet. Wet where it shouldn't be wet.
I felt the paper of the batt insulation, which some previous owner installed between the roof rafters of that space and I never got rid of. Damp. I poked in the worklight. And where the paper is torn and the pink batting is visible, I see mold-- yes, nasty black mold-- in the fibers.
Oh, no, is my roof leaking? I don't have the money to deal with this!
I went outside, to see if I could get a view of my roof. From the next door neighbors' yard, the shingles look pretty good. No terrible curling or cupping that I can see. The neighbor next to them was in his back yard, so I joined him to see if he had any ideas and maybe to get a better look from there.
He doesn't think the overall shingle job looks bad, either. But I notice some definite waviness at the eaves . . . ice dams from past winters? Unlike my next door neighbor on the other side, who got up and repaired and reshingled his entire roof this summer, the neighbor two doors down can't claim too much proficiency in handyman skills. But he did have a useful piece of advice: That it's possible the problem may have been caused by the heavy rains we've had this summer, and it could be my homeowner's insurance might cover it. Yeah, maybe, but I don't want to call my agent to inquire and have my rates go up even if it turns out not to be insurable damage. True, he said, but I could get a home inspector out to take a look and see what the likely cause might be, before I make any insurance agent calls.
So. Don't know if I've followed the best procedure, but (after verifying that my home warranty company doesn't cover roof repairs at any time) I found a local roof inspector via the ServiceMagic site. Lots of reviews that were high over all. Soonest appointment that suits us both is a week from tomorrow at 8:30 AM, and I hope it doesn't rain so he can get a ladder up to the eaves and see what's happening at those gutters.
Meanwhile, I`ve cleared most of my boxes and bags and so on out of the storage space. None of it is wet. But I definitely have mold in that insulation, in the inch or so next to the brown paper. I wonder if the problem is due to inadequate ventilation in there, especially with all the rain we had last spring and this summer. I know it wasn't like that last January when the Comcast guys came up to put the cable in.
Got the dehumidifier in there running. And I don't think it'd be a bad idea to come in with the mildewcide and give those icky-looking batts a few squirts. My nose is itching a bit with that hatch door open.
Meanwhile, will I continue with the repainting? I think I shall. Those walls and trim shouldn't be affected by any roof work, and if I can get the study repainting mess straightened out and put away, I'll have more floor space if I have to clear out the closet so they can inspect the roof space on the other side of the house, too.
_______________________________________________________
*Ironically, I was listening to an episode of Holmes Inspection on my computer as I worked.
Labels:
3rd floor,
attic storage,
disaster,
home warranty,
inspection,
mold,
roof
Wednesday, September 14, 2011
More Boring White Stuff
White Thing No. 1: Got the paper tape spanning the gap between the left endwall drywall and the sloped ceiling finally mudded and sanded satisfactorily this past Friday the 9th. Yes, it took me four coats, as usual.
White Thing No. 2: Primer went on on Monday. Silly of me to use the passive voice saying that, since I had to put in a lot of work, starting with the adjustable ladder. Original idea was to set it up on the stairs to get at the sloped ceiling above it, but with the winders I couldn't find a place where the ladder was secure. I have quite an artistic new set of bruises on my legs from the time I tried to extend one side of the ladder down the stairs, thought better of it, and pulled it back up-- all while trying to keep both legs of the upper side on the slippery, drop-clothed-covered winder. Ended up laying the ladder flat between the landing at the top of the stairs and the ledge on the exterior wall opposite, and using it as a scaffold. Not ideal: still a lot of reaching and working blind, but better than nothing.
Only thing, I had the ladder down and myself virtually trapped upstairs when I discovered that the remaining primer had thickened up a bit. I simply did not care to move the ladder to get downstairs for water to mix in, so I used it as-is. Didn't go very far and didn't go on well. Wouldn't have gone on well anyway, since that study ceiling is full of dips and curves and irregularities, not a flat surface in the place. Some of this is by design; some of it is due to the way the rafters have settled over the decades. None of it made working a roller any easier or more fun.
Of course I had to go back to Lowe's for more primer. (Ironic, since last night I discovered a practically full can of primer in the basement). Thanks to more disused muscles and their contortions, finished up the priming and left it to dry.
White Thing No. 3: First and hopefully only coat of "Pearly White" paint onto the study ceiling and upper end walls. Best fun here is working with inadequate light. Couldn't use the ceiling fixture, since it was hanging from its wires and swathed in brown paper. Couldn't use the floor lamp with its open shade: I already destroyed one three-way bulb last week splashing water on it while wet sanding. It was draped with a spare shirt jacket. No, I was restricted to the halogen work light, and the Luxo lamp. The new color is a little yellower than the previous, so you could sort of tell which parts of the ceiling had been repainted, but it was hard. More contortions, more working around strange ceiling topography, more sore muscles. Found myself repeating, "I don't wanna do this, I don't wanna do this!" as I did it anyway.
White Thing(s) No. 4: No, I didn't get the study ceiling pearly-whited in one coat. Didn't have enough paint left to do a full second coat (sigh of guilty relief), but kept myself plenty busy this afternoon noticing thin spots and spots where the sheen wasn't the same and so on, and coming to the rescue with roller and tray and another dollop of the "Pearly White." Of course, one doesn't, on that ceiling, notice the next problem area until one has taken all the tools down to the 2nd floor bathroom and has everything rinsed out and wet.
Still, got in a tiny bit of what was actually on the agenda for today. The little chair rail/dado trim that separates the white of the ceiling from the yellow of the wall is now painted. On the east side. I read on the This Old House website that it can actually help you cut in the wall color if you paint the trim first and lap the paint over a little bit onto the wall surface. Happy enough to try it, since it removed the need for awkward cutting in in difficult to reach places. I was doing enough acrobatics balancing myself over the stairwell as it was.
Third and final white thing for today was more primer, this time brushed on walls and woodwork where needed. Hope I got all the messy spots on the yellow wall on the east. I really need to get it painted tomorrow.
This all really is Boring White Stuff. Ever since the ceiling plaster started coming down in 2007, I've been looking forward to having it mended, whole, and repainted. Now it's done, and I don't feel much of a sense of accomplishment. Shouldn't it have been like this all along?
I'll likely feel better when all the drop cloths are out and the furniture is pushed back where it belongs. Hope I will, at least.
White Thing No. 2: Primer went on on Monday. Silly of me to use the passive voice saying that, since I had to put in a lot of work, starting with the adjustable ladder. Original idea was to set it up on the stairs to get at the sloped ceiling above it, but with the winders I couldn't find a place where the ladder was secure. I have quite an artistic new set of bruises on my legs from the time I tried to extend one side of the ladder down the stairs, thought better of it, and pulled it back up-- all while trying to keep both legs of the upper side on the slippery, drop-clothed-covered winder. Ended up laying the ladder flat between the landing at the top of the stairs and the ledge on the exterior wall opposite, and using it as a scaffold. Not ideal: still a lot of reaching and working blind, but better than nothing.
Only thing, I had the ladder down and myself virtually trapped upstairs when I discovered that the remaining primer had thickened up a bit. I simply did not care to move the ladder to get downstairs for water to mix in, so I used it as-is. Didn't go very far and didn't go on well. Wouldn't have gone on well anyway, since that study ceiling is full of dips and curves and irregularities, not a flat surface in the place. Some of this is by design; some of it is due to the way the rafters have settled over the decades. None of it made working a roller any easier or more fun.
Of course I had to go back to Lowe's for more primer. (Ironic, since last night I discovered a practically full can of primer in the basement). Thanks to more disused muscles and their contortions, finished up the priming and left it to dry.
White Thing No. 3: First and hopefully only coat of "Pearly White" paint onto the study ceiling and upper end walls. Best fun here is working with inadequate light. Couldn't use the ceiling fixture, since it was hanging from its wires and swathed in brown paper. Couldn't use the floor lamp with its open shade: I already destroyed one three-way bulb last week splashing water on it while wet sanding. It was draped with a spare shirt jacket. No, I was restricted to the halogen work light, and the Luxo lamp. The new color is a little yellower than the previous, so you could sort of tell which parts of the ceiling had been repainted, but it was hard. More contortions, more working around strange ceiling topography, more sore muscles. Found myself repeating, "I don't wanna do this, I don't wanna do this!" as I did it anyway.
White Thing(s) No. 4: No, I didn't get the study ceiling pearly-whited in one coat. Didn't have enough paint left to do a full second coat (sigh of guilty relief), but kept myself plenty busy this afternoon noticing thin spots and spots where the sheen wasn't the same and so on, and coming to the rescue with roller and tray and another dollop of the "Pearly White." Of course, one doesn't, on that ceiling, notice the next problem area until one has taken all the tools down to the 2nd floor bathroom and has everything rinsed out and wet.
Still, got in a tiny bit of what was actually on the agenda for today. The little chair rail/dado trim that separates the white of the ceiling from the yellow of the wall is now painted. On the east side. I read on the This Old House website that it can actually help you cut in the wall color if you paint the trim first and lap the paint over a little bit onto the wall surface. Happy enough to try it, since it removed the need for awkward cutting in in difficult to reach places. I was doing enough acrobatics balancing myself over the stairwell as it was.
Third and final white thing for today was more primer, this time brushed on walls and woodwork where needed. Hope I got all the messy spots on the yellow wall on the east. I really need to get it painted tomorrow.
This all really is Boring White Stuff. Ever since the ceiling plaster started coming down in 2007, I've been looking forward to having it mended, whole, and repainted. Now it's done, and I don't feel much of a sense of accomplishment. Shouldn't it have been like this all along?
I'll likely feel better when all the drop cloths are out and the furniture is pushed back where it belongs. Hope I will, at least.
| A shot of what was there when I first looked at the house, just for fun |
Monday, September 5, 2011
A Bird in a Guilted Cage
I confess it: When I moved into the Sow's Ear eight years ago, I painted over the wallpaper on the 3rd floor. Lately, I've been excusing myself by saying that I had to get my home study set up as soon as possible so I could hit the ground running on my new pastor's job. But the fact is that though I moved in in mid-September, it was more like late October before I got it all finished and the furniture and books were fully arranged. I had plenty of time to remove the wallpaper, if I'd been so inclined. But I wasn't.
So it's eight years later. And I've been working away (off and on) since the middle of August patching, mending, readhering the ceiling plaster up there. Finally, about a week ago, I gave it a good look and declared the job done. Time the get out the primer.
Except for one thing.
At the south end of my study is a window, and on either side of the window are two closets, their doors perpendicular to the window wall. When you look inside the closets, you see that their other walls are painted wood plank. On the room side, each of these walls has a built-in bookcase to the height of about four feet, and above these is a triangle of drywall.
These triangles of drywall had wallpaper on them when I moved in, and I painted them-- I painted over them-- to match the ceiling. The bit above the righthand bookcase looked all right. But the one to the left was a bubbly mess. It's been hiding behind my reference books for years, but now, here it was, staring me in the face and laughing at me.
Should I just repaint, put back the books, and go on ignoring it? Did I have to strip the wallpaper on that portion? Or could I just open up one or two of the bigger bubbles and fill them with joint compound? I blush to admit that that's what I did.
But the nagging guilt wouldn't go away. It looked so awful, the paper must've been like that before, and I'd painted over it! And in the angle where the wall meets the sloped ceiling, the paint-stiffened paper curled distortedly, as if whoever hung it had thought to paper the ceiling, too, and at the last minute changed his mind. Was I going to let this abomination remain? Was I going to connive at this transgression of every rule of home renovation?
For a few days-- mea culpa!-- I was. But last Friday I knew I was trapped. I got out the Paper Tiger, the spray bottle of vinegar and hot water, and the 5-in-1, and had at it. For my sins, that paper was nasty hard to remove. Took several applications and a lot of time to get it all.
I found out why the wallpaper was so ineptly applied at the top. It had nothing to adhere to. There was a gap ranging from an eighth to a good half of an inch between the wall and the ceiling, and nobody had bothered to tape it, they'd just filled the joint the best they could with caulk (now hard and crumbling) and covered it with the wallpaper.
Huh. I discovered the same lame technique when I painted my kitchen in 2004. Bought some drywall tape to take care of the problem then; maybe the rest of it was down in my workshop.
Couldn't find it anywhere. So I tried to make do with a length of foam backer bead stuffed in and covered over with spackle.
Nope, that didn't make it. So this morning I was on for yet another trip to Lowe's, to get a new roll of paper drywall tape. It's on now, it's bedded, and we'll see how much fiddling it's going to take me to get it properly mudded. I bought a corner trowel once, but decided I'd never use it, and took it back. Ha. If only.
Nevertheless, the now-paperless wall looks so much cleaner and freer and better than it did before. Te absolvo.
Does this mean I'm going to be thoroughly virtuous and remove the rest of the painted wallpaper before I recoat it?
NO.
So it's eight years later. And I've been working away (off and on) since the middle of August patching, mending, readhering the ceiling plaster up there. Finally, about a week ago, I gave it a good look and declared the job done. Time the get out the primer.
Except for one thing.
At the south end of my study is a window, and on either side of the window are two closets, their doors perpendicular to the window wall. When you look inside the closets, you see that their other walls are painted wood plank. On the room side, each of these walls has a built-in bookcase to the height of about four feet, and above these is a triangle of drywall.
These triangles of drywall had wallpaper on them when I moved in, and I painted them-- I painted over them-- to match the ceiling. The bit above the righthand bookcase looked all right. But the one to the left was a bubbly mess. It's been hiding behind my reference books for years, but now, here it was, staring me in the face and laughing at me.
Should I just repaint, put back the books, and go on ignoring it? Did I have to strip the wallpaper on that portion? Or could I just open up one or two of the bigger bubbles and fill them with joint compound? I blush to admit that that's what I did.
But the nagging guilt wouldn't go away. It looked so awful, the paper must've been like that before, and I'd painted over it! And in the angle where the wall meets the sloped ceiling, the paint-stiffened paper curled distortedly, as if whoever hung it had thought to paper the ceiling, too, and at the last minute changed his mind. Was I going to let this abomination remain? Was I going to connive at this transgression of every rule of home renovation?
For a few days-- mea culpa!-- I was. But last Friday I knew I was trapped. I got out the Paper Tiger, the spray bottle of vinegar and hot water, and the 5-in-1, and had at it. For my sins, that paper was nasty hard to remove. Took several applications and a lot of time to get it all.
I found out why the wallpaper was so ineptly applied at the top. It had nothing to adhere to. There was a gap ranging from an eighth to a good half of an inch between the wall and the ceiling, and nobody had bothered to tape it, they'd just filled the joint the best they could with caulk (now hard and crumbling) and covered it with the wallpaper.
Huh. I discovered the same lame technique when I painted my kitchen in 2004. Bought some drywall tape to take care of the problem then; maybe the rest of it was down in my workshop.
Couldn't find it anywhere. So I tried to make do with a length of foam backer bead stuffed in and covered over with spackle.
Nope, that didn't make it. So this morning I was on for yet another trip to Lowe's, to get a new roll of paper drywall tape. It's on now, it's bedded, and we'll see how much fiddling it's going to take me to get it properly mudded. I bought a corner trowel once, but decided I'd never use it, and took it back. Ha. If only.
Nevertheless, the now-paperless wall looks so much cleaner and freer and better than it did before. Te absolvo.
Does this mean I'm going to be thoroughly virtuous and remove the rest of the painted wallpaper before I recoat it?
NO.
Labels:
3rd floor,
drywall,
painting prep,
previous owners,
study,
wallpaper
Subscribe to:
Posts (Atom)