Tuesday, December 13, 2011

Announcement

Yes, it's as late as the date stamp says.

But I simply had to announce that after a long Monday of sanding, steaming out dents, more sanding, more steaming out dents, a whole lot of vacuuming and dusting, a wipe-down with denatured alcohol, and, oh yes, a little more steaming out of dents followed by more sanding and vacuuming, I finally got things in order with my 2nd floor hall and the main stairs to get some mahogany-tinted shellac onto the hall floor.

Ta-daaaaahhhhh!!

Only "some," because I began by applying a repair coat to the stairs to the 3rd floor, and I didn't start that till after 1:00 AM.   I then proceeded to lay a first coat onto half the hall.  Only half, because my upstairs hall is L-shaped and  I can't levitate and I don't want lap marks at the midpoints of the longest boards.  Besides, it was past 3:30 by the time I finished the first leg of the L, and if I get called in to teach in the morning that's rapidly approaching, I'm going to be a big slice of burnt toast as it is.

But after all this time, I thought it was only right for me to mark the occasion.  Pictures and commentary to follow.

Thursday, December 8, 2011

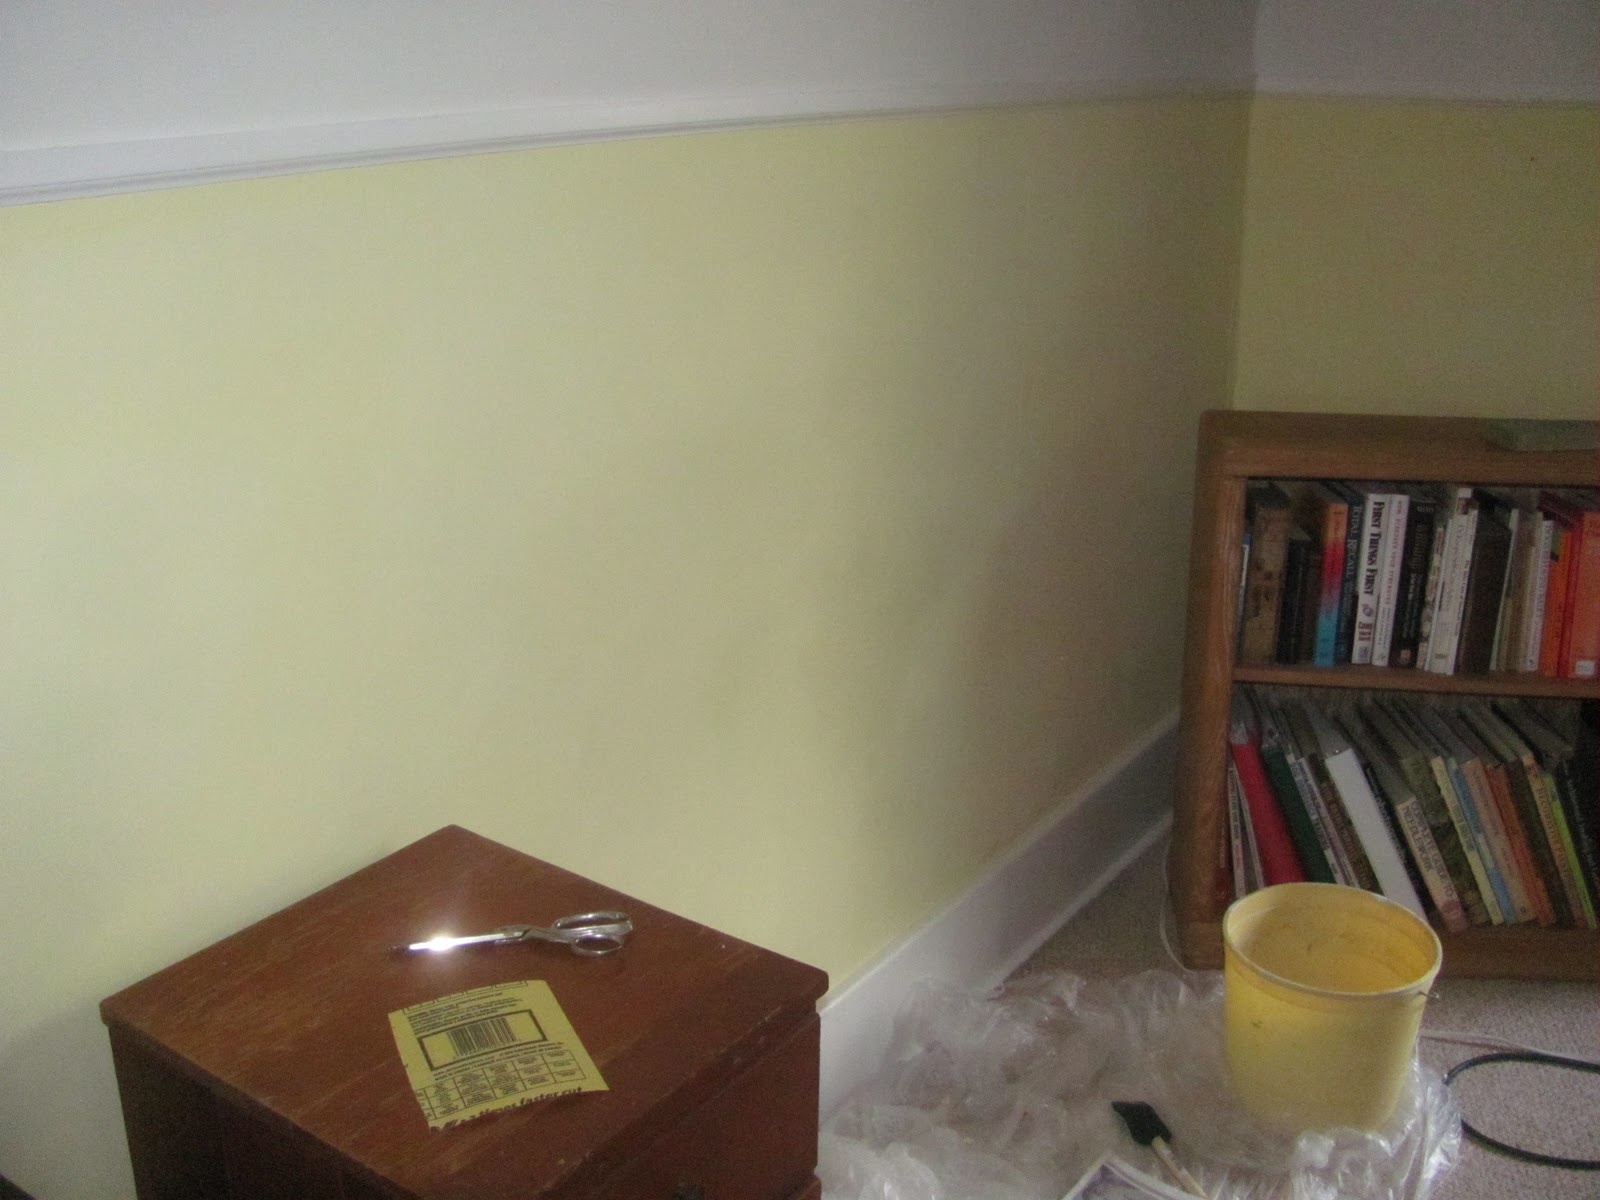
Heading in the Right Direction

12:45 AM

     Here I am in the front room, contesting possession of the sofa bed with a very determined dog.

    Yes, I've finally, finally made the long-awaited move downstairs to keep me and the animals off the staircases and 2nd hall floor until they're refinished and cured.  No, I haven't finally, finally got any new shellac on the staircases and/or the 2nd floor hall floor. 

    I have vacuumed the whole lot, and used a dental pick to clean the cat hair out of the joints between the treads and risers of the set to the 3rd storey.  Those were wiped down with a damp washcloth and dried off, then I went over them lightly with 220-grit sandpaper.  Then wiped them off with a tack rag, then with the damp washcloth again.

    The cardboard and brown paper is off the hallway floor, and I see I have a darker strip at the bedroom door where the bare boards weren't covered all these months, as well as residue on the floor from the painter's tape I stuck the paper down with.  I gave those places a bit of a sanding, and it seems to be evening out.

    The joints to the steps down to the 1st floor I haven't defuzzed yet.  It was rising  midnight and I felt it was a good point to leave it.  Still had to pull out and make the bed.  And go down and get ready for bed in the basement bathroom for a change.  And try to convince the dog to let me into the bed at all.

    The fun thing will be sleeping with all the electric candles around this room.  And the glare from the neighbors' Christmas lights outside.

   Not to mention the cats making noise trying to find a way around the barriers I've erected in all the stairhall openings.  Never mind.  I'll deal with that in the morning.

Sunday, October 23, 2011

Sometimes It's Good to Be Wrong

Tackled the attic insulation removal this afternoon and evening.  The process disabused me of a few false notions.

Starting at the back end, literally:  The knob and tube wiring I discovered yesterday is disconnected; it isn't live.  The receptacle I thought it served is wired up with standard white three-wire cable.  Nice not to have to be concerned about that.

(Incidentally, there's also a long disconnected strand of yellow three-wire cable [sorry, I should be able to remember the gauges of these things-- yellow is 12 gauge?  Or 14?  Oh, never mind!) on the back side of the knee wall; I uncovered it when I took a piece of cardboard tacked to the studs down, and happily, it's not live, either.  I think my electrician must've put that in; why didn't I have him connect it up?  I certainly could use another outlet under my work table!)

I was also wrong in thinking there was a lot of loose-fill rock wool between the batt insulation and the underside of the sheathing.  No, there was rock wool in there at one time; I could see little tufts of it stuck to the rafters and sheathing planks here and there.  But for the most part, it was gone.  So I didn't have to endure clouds of rock wool tumbling down on my head, as I'd anticipated.  True, I was encased in a hooded Tyvek coverall suit with attached booties, my face armored with an P100 anti-mold particle mask and goggles with no vents, but I hadn't fancied the prospect, all the same.

And I was wrong in thinking my roof is structured with 2x4 rafters.  No, they're 2x6s, or 1-5/8 x 5-3/4, to be exact.  The foam insulation guy was calculating on spraying on six inches, covering rafters and all, to get me to an R-value of 24, at least.  Not sure how this development will affect things.  Technically it could mean they could spray on eight inches or more, and maybe get me to the R-38 that's recommended for attics these day.  But that'd up the price beyond the just-barely-manageable figure I have from him now.

What else was I wrong about?  I was wrong in thinking that the black I was seeing on the back face of the kraft paper vapor barrior was mold.  Ha, silly me, that paper is black on the back side!  And, examining the insulation itself more closely, it's possible that the dark stuff I saw in the pink was only dirt, and not mold at all.  At least, it didn't look growy, just like dust.

Does that mean I was wrong about the whole project?  Not at all.  The batts were definitely damp that day in mid-September, and dirt is a classic place for mold to lodge in fiberglass insulation.  And with the facing paper hanging in tatters in so many places, the vapor barrier was grossly compromised.  I would rather not spend the money on this at this time, but it'll be money well-spent.

I was wrong in thinking the batts were held up solely by the lath battens that ran horizontally from rafter to rafter.  Yes, they gave some support, but mostly the pink stuff stayed put by means of staples-- lots of staples-- driven though the kraft paper wings into the rafters.  So I didn't have that stuff falling down on me, either.  Very glad to be wrong in this case.  And I was wrong in planning to roll up each batt in a piece of .5 mil plastic before I put it into the 55 gallon black bag.  I tried it once, on the first piece I took down, and the plastic got woefully out of control and simply would not stay put.  So I gave up on it and just rolled the batts in on themselves, taped them with cheap masking tape, and stuffed them in the bags.

Speaking of the bags, it's good that the insulation guy was wrong in predicting I'd end up with thirty bags of the stuff.  Nope.  Four bags of insulation and one of cardboard, small pieces of batten, and dirty dropcloths.

I've mentioned the cardboard.  It appears I was wrong in thinking that it was a pis aller employed by my POs-1 (who were, I believe, the ones who installed the pink insulation) to cover the gaps at the toe of the batts.  In the first place, the batts ran all the way down below the floor level, into the soffit space.  In the second place, it was abundantly evident that that cardboard dated from way, way before than my previous owners two back.  The cardboard lining the brick gable wall on the north end was clearly installed before the wood floor.   It was wedged between the floorboards and the brick and I had to cut it out with a utility knife. Whether it dates from the time the house was built in 1915 or so, or whether it was put in to protect the wall when the attic was finished later, I don't know.  I'm pretty sure that the room I use as my study wasn't original, as the 1916 tax assessment only lists three bedrooms.  But I saw at least one place where cardboard was used as shimming between structural members, so it's entirely possible that the house was built with a wholly-floored attic, with exposed rafters and the stairs leading up to it, and the knee walls and plaster came later.  I estimate that the room was done fairly early; pre-WWII, at least, since the trim matches what's downstairs (sans cornices) and the woodwork was originally shellacked, like the rest of the house.

Found something else curious, deeper in towards the front of the house:  There are three or four bays where the tongue-and-groove flooring doesn't go almost to the toe of the rafters, but there are wide planks of removable joinery notched in between the rafters instead.  I didn't lift any of them out the whole way, but when I shifted them I saw galvanized metal below.  Duct work?  A cold air return?  From where?  I think this would be over my dressing room, but the location is all wrong.  This really looks original.  What can it be?  Those planks will be immovable once the foam is in; will that matter?

In fact, speaking of the cardboard again, I found vestiges of heavy cardboard nailed to the underside of the rafters (which I found about impossible to remove, by the way), and I strongly suspect it was used to contain the rock wool that used to be in the roof.

On the back faces of some of this cardboard I saw evidence of water marking.  But it was dry now and I can only hope that that was from earlier leakage, like that which moved the POs-1 to remove the slate roof and put up fiberglass shingles.  (I found a piece of a slate at the eaves!).  There was also some water staining on the floor near the stub of the old kitchen chimney.  I don't say I won't give that a good scrubbing with borax, but it was dry, too.  In fact, the whole space was dry, and in some cases, too dry.  I didn't like the way pieces of wood would flake off some structural members when I was brushing them clean after the insulation was down.  I'm thinking a nice coat of spray foam will protect them, yes?

There were some things I was wrong about that I don't find so gratifying.  The Tyvek suit was a success, overall (pun!), and getting one that fit me by ordering online was the right way to go.  But I wish I'd gotten the gloves with the longer arms to them.  The 12" cuff kind I got you'd think would be long enough.  But the sleeves of my sweatshirt kept pushing them down, and they would creep out from under the elastic cuff of the suit.  I did pretty well at keeping fiberglass itchies off my skin-- except for that half inch of so at my wrists.

And despite my trying to order goggles in a "women's" size, they were still too big and conflicted with the particulate mask.  Great goggles, great mask, but my head simply isn't that big.  The two pieces of equipment got in each other's way and prevented me from having a proper seal on either.  The goggles quickly fogged up so I was working half blind, and the mask didn't sit tightly, so stuff still got up my nose and made it run.  Every three batts or so I'd have to take off the mask and blow my nose, it was so bad.  I'm still rather stopped up now.

But getting the headlamp was a fine idea; really, the only way to go, even though it barely perched on what was left of my forehead.  From the packaging I'd expected the batteries to last only five hours, but they kept going a lot longer, and are still good now.

I mentioned the 55-gallon bags.  My bright idea of throwing them out the north window once they were filled didn't turn out quite as planned.  The first one rolled off the back porch roof quite easily, but the next one landed square in the middle of the roof and stayed there. And my attempts to use the second and third to dislodge it only succeeded in creating a logjam.  So there I was, at maybe 11:00 o'clock at night, out on my porch roof trying to shove these big black trash bags down into the yard.  Still in the Tyvek suit, which wasn't the cleverest thing I've done all evening.  The booties on it give no traction whatever, so walking on the shingles was out of the question.  I had to lie on my side and kind of slither down till I could put a foot to the bags and send them over.  Of course they wouldn't go the with the first kick, and I had to creep lower and lower towards the eaves, hoping to gracious that any momentum I gave the bags wouldn't carry me over with them.  "Wrong" wouldn't've half described that!

They finally teetered on the edge of the gutter and rolled down, taking their sweet time about it.  Meanwhile, I saw that my thirteen-year-old calico cat had taken advantage of the open window from the guest bedroom to hop out onto the roof and do a little exploring of her own.  Happily, I had no compulsion to go lunging after her.  I slithered back up the way I came and called her to me once I was back on the sill.  She came, but changed her mind at the last moment and veered off.  Too bad, my girl! and I picked her up by the scruff of her neck and hauled her safely in. 

One last happy example of my being wrong:  It only took about three and a half hours to get the insulation down, rolled, bagged, and out the window.  It took the other three and a half hours to brush down the rafters and sheathing, remove stray pieces of rock wool, and clean up the floor.  One push-broom and three vacuum cleaners that took!  I think the hose of my shop vac is almost shot, which doesn't help.

Is the job done?  Well, almost.  I found there's rock wool in the soffit space, and I haven't removed it, since I'm not sure how that'll interface with the spray foam.  I want that area insulated, but somehow I don't see filling that whole space with the icynene.  I mean, won't that drive up the price, and what if I do get a chance to remove the aluminum exterior trim and the wood board underneath needs replaced?  On the other hand, does the foam have to run all the way to the gutter to prevent ice dams?  I may have to cut 1x boards and run the floor all the way to where the roof comes down.  Job for the portable circular saw, I expect.

I have the same question about the rock wool in the far southeast corner behind the lefthand closet.  There's a little triangle of space with insulation blown into it; will they foam that, or do I need to create a barrier to separate the two?

There should be no question about the old birds' nest materials in the northeast corner behind the old chimney.  It's got to go.  But somehow I didn't want to remove it out tonight.  Don't know why.  May have something to do with the kink in my shop vac house.  Maybe I want to see if there are any ornithological specimens in the mess.  But I'd rather deal with it in the daytime.

All cleaned up, barring the camera lens
Just sitting here typing this, I can feel that the room is colder than usual.  Even failing, that batt insulation did a reasonable job keeping the 3rd story warm.  Here's to the spray foam doing the job even better.

Saturday, October 22, 2011

The Worst of It Is Past

The worst of the moldy attic insulation demolition is over.

At least, in my opinion.  I have heard it said that taking down batt insulation, moldy or otherwise, is a nasty job, and I may well end up glad to pay somebody else to do it.  But to someone who has sanded down the treads of two flights of stairs with all the concomitant dust, removing the insulation will be a project worth tackling.  Besides, there will be the reward of seeing the sheathing exposed and the old batts removed.

No, the worst part, which is done, is the prep work.  I hate prep work.  And so, the dropcloths are down in the study.  And the flattened packing boxes are out of the far end of the attic crawl space and piled onto the study detritus and boxes of books and Christmas decorations amassed in the guest bedroom.

In the process, I've discovered a lone knob-and-tube circuit at the farthest point of the knee wall.  I think it serves the outlet that, well, that this computer is plugged into.  The insulation appears to be good yet, but of course, it has no ground wire.  Not good for electronics.  But I won't get excited about it until I've had the current tester to it and have verified that it indeed is live, and where exactly it goes.

And nothing can be done about it (if anything does have to be done about it with any immediacy) before the bad insulation is removed.  And that will be done tomorrow, maybe, or at any rate the first day this coming week when I'm not called in to teach.

Saturday, October 15, 2011

Ow Gosh

Listening to past Holmes Inspection episodes while you work on your house can make the time go faster.  It also has a way of making you see urgent agenda items in areas you'd been perfectly happy to ignore.

Take the angle between the main block of my brick house and the brick front room, formerly the front porch.  Sometime in the house's history the two began to separate.  Some previous owner tried to rectify the problem by glopping the space full of concrete, and it's looked like hell since before I moved in.  But it's the way things were and I ignored it.  And the concrete patch has been spalling, and a wide-ish crack has been opening up between it and the brick of the house, also probably since before I moved in.  I've paid no attention to that, either.  Lately, I've noticed I can see daylight through that crack in the corner of my basement workshop, but neither has that hasn't gotten much reaction from me.

But here's Mike Holmes holding forth on the gospel of caulk and Keeping the Water Out, and bless me if I am unable merely to be a hearer of the word, I am goaded into being a doer of it as well.

But, oh, gosh! the path of virtue in not smooth, nor is it narrow.  Actually, it's wide and it's deep; it's thick and arduous and very, very tacky.

Which is to say that when I got outside this afternoon to do the job, I followed the directions on the Loctite concrete crack and masonry sealant and set to work cleaning all the loose material out of the crevice.  With that, the fun began.

Did I say "crevice"?  Crevasse, more like it.  Oh, gosh, once I got done rooting out the scree, I could have climbed down into my basement workshop without going around by the door and the stairs.  At worst the opening was about an inch wide and an infinity deep.  Good grief, what was I going to put in there to keep the caulk from falling in?  What if it got dark before I could thick of something?  What if it should rain tonight and flood my basement?  Ohno-ohno-ohno!

The little ½" backer rod I had on hand wasn't going to make it.  Hoping the clear weather held, I jumped in the car and ran up to Lowe's, where I bought 20' of 3/4" backer foam backer rod.  And a second tube of the masonry crack caulk just in case I ran out.

It took four layers of that 3/4" backer stuffed in that crack before I could even think to start the caulking.

"Start the caulking."  What a joke.  No matter how much I pushed, I couldn't get it to come out.  I asked my next door neighbor, and he told me I had to shove something long and skinny down the spout and puncture it.  Weird.  Haven't had to do that with any of the other caulk I've been using.  Never mind, I did it.  More heavy pushing, and the sealant eventually came.  Hellsbells, if it'd been me trying to birth a baby, I would've demanded a C-section.  Had I bought a bad tube of sealant?  Maybe, it's happened before.  Tried the other tube.  Same thing.

Called Lowe's.  Is this stuff supposed to be like this?  Guy in the paint department says that yeah, because it's for masonry and it's like mortar, it is thicker than regular caulk.  OK, but this thick?  He said if I couldn't get it to flow, to bring it back and they'd take a look at it.

Very nice, but it was after 5:00.  I had to get this crack filled before nightfall.  I kept pushing, pushing, pushing, and eventually the stuff came out.  But what an irregular mess!  And how frustratingly sticky!  Ohhh, gosh, was I glad I'd laid in a gallon of mineral spirits, because slopping that on my gloved fingers and using them to "tool" the joint was the only way I got it halfway smooth.  Sure didn't come out of the tube that way.

But at least it's done and the crevice is filled.  Can't see daylight on the inside any more.  And the sealant color is good, a nice grey-beige that kind of matches my brick.  And it smells like chocolate!  And though it looks like hell, it's definitely upper circle compared to what was there before.

I'd hoped to fill the much narrower and neater crack in the corresponding joint on the entry side of the house, but it got too dark.  Did fill a break in the stone step to the side door.  It glares, rather, since the sealant is so much lighter than the old stone, but it'll keep the water out and it'll dirty up eventually.

But if it doesn't firm up and it turns out that was a bad tube of sealant after all-- owwwwww gosh!!!

Wednesday, October 5, 2011

Once More into the Breach, Dear Friends, Once More!

Is there a such thing as a serial caulker?

I started this process with a couple of baseboards last Thursday.  Then late Monday afternoon I noticed how awful the gap looked between the surface-mounted conduit and the wall surface at the north end of the room.  And the rest of the baseboard under it.

And what about the yawning chasms between the painted door trim at the bottom of the stairs and the yellow walls perpendicular to them?

Yikes, nasty.

And there I was with a partly-used tube of white painter's caulk, and everyone knows what happens to that if you just stick it on the shelf of your workshop and forget about it.  So really quickly, just before time to change for choir practice, I ran beads of caulk along all the offended gaps and smoothed them down.

The next day, yesterday, after I'd touched up the dark yellow paint, I got a good look at it without the bright work light on.  Of course then I saw the ridges of caulk I sloppily left lying on the trim.  There was a particularly rough place next to the jamb of the doorway at the bottom of the stairs.  I endeavored to use my thumbnail to scrape it off.  I miscalculated the force needed and ran my thumb into the space between the trim and the wall.  Now I had a big hole in the caulk there, and I was all out.

Well, I needed to run up to the stores near the Lowe's this morning, anyway . . .

In progress
But who's going to open a new tube of caulk just for an inch and a quarter hole?  Not I.  Besides, there were several other areas that really did need filling.  Like the gaps along the sides, top, and bottom of the woodwork cover to the vent stack.  Actually, I'd bought the first tube of caulk to take care of that.  I'd been thinking I should get the new boot on the stack and let the plaster and so on dry out, but here I was with a tube in my gun, and hey, it'll dry out through the wood and the plaster, right?  Won't it?

So this evening that got caulked.  As did the crack between the window trim and the wall on the north end.  And the open ends of the tongue-and-grove flooring that shows above the head of the stairway door.  Et cetera, et cetera.

All this caulking has necessarily been followed with touch-ups in three colors (if you count white as a color).  And scraping caulk off of where it doesn't belong.  Tomorrow I still have to do the touch-ups from what I caulked tonight.  I think I'm going to keep finding gaps and cracks in this room that need to be filled till the end of time.  It will never, ever end.

Thursday, September 29, 2011

Getting There: Caulk

While doing these various repair and painting tasks around my study the past few days, I've continued to listen to episodes of Holmes on Homes and Holmes Inspection on YouTube.  And it definitely gets into your head. 

So this afternoon when I'd peeled off the plastic dropcloth I'd taped to the baseboard to make it easier to prime the repair on the west wall, I seemed to notice for the first time in eight years the messy, gaping gap between the baseboard and the plaster.  And in my mind's ear sounded the voice of Mike Holmes saying, "It only would have taken them a minute to run a bead of caulk along that!  Messy, sloppy, shoddy!"

And here I'd bought a tube of caulk for this project, but had thought I could get away without using it.  Oh, all right. Yessir, yessir!

I proceeded to caulk that baseboard (what I could do without moving heavy furniture-- sorry).  I caulked along the top of the baseboard at the ledge by the attic hatch door.  And along the top of the base on the wall perpendicular to that.  I don't think I did a particularly artistic job of smoothing it.  And whether or no, I'm going to have to come back with the light yellow paint and touch it all up.

But I admit it looks better, and piddling as it is, it does count as progress.

Getting There: Repainting the Bookcases

Today I also completed the repainting of the two built-in bookcases.  Originally, I'd only planned to repaint the back walls of them in the darker yellow.  But a week ago when I took the books out to begin, I was confronted with the black marks left on the latex paint where the volumes had stuck to the shelves.  I decided I'd do better with oil base paint tinted to match, and I'd give it at least a week to cure before I put anything back.

Got the quart of oil-base last Saturday on my way to the Green Festival.  Found out that due to the difference in the base, I couldn't get it tinted in exactly the same shade.  And I had to settle for gloss, where all the rest of the woodwork is semi-gloss.  Never mind, the durability is the thing.

But these differences led me to conclude that I'd best repaint all parts of the bookcases, inside and out.  Before, I was only going to do the top surfaces of the shelves.  And maybe the side walls, where book jackets would stick, too.

So early this past Tuesday afternoon I started in with the oil base primer, formulated to go over latex or oil.  It's thicker than latex and takes a lot longer to brush on.  Thus as I started on the lefthand case I was dismayed to see that it was already 2:40.  Oh-oh.  I really needed to be cleaned up, changed, and on the road by 3:00 in order to make it over to the next county for the meeting of my presbytery by 4:00 PM.  But I really needed to finish the primer in one go.  I'm short of mineral spirits and I had only one clean 2" chip brush, the one I was using, and intended to throw it away when I was done.  So I kept working, debating within myself as to whether I would go to the meeting or not.  As it was, I did finish priming and I did go, pulling primer out of my hair all the way there and arriving over forty-five minutes late.  I'm glad I went, in a grim sort of way, but that'd be a story for different blog.


Anyway, late last evening yesterday and into the wee hours I got the "Decisive Yellow" latex onto the back wall of the lefthand bookcase, a second coat of same onto the righthand one, and the first coat of the oil base white onto both.  Today saw me getting the second coat of the yellow onto the left, and a second go at the white oil-base on both bookcases, though this time I only did the shelves and top.

Oh, yeah, I also used the oil base paint on the ledge that runs in front of the attic hatch door.  Actually, that's why I didn't start this process till Tuesday:  I didn't want the roof inspector to come tramping over it while it was still wet.

Now it's all shiny and smelly and off-gassing delightfully.  And hopefully it'.ll look better longer than the latex did.

Getting There: Wall Crack Repair

I am getting work done on my 3rd floor study, and maybe by Christmas I can bring all the paint pots downstairs and say it's completed.

No, really, I started the repairs on the wall crack Sunday evening.  I'd at first envisioned enlarging it with the 5-in-1 and depositing a little spackle in there, but whom am I kidding?  Any thing that's that deep means plaster that's coming loose, and that means redoing it the Big Wally Way.


So, adhesive and anchors in late on Sunday, anchors out and first coat of joint compound applied after midnight Monday night, second coat joint compound went on midday Tuesday, and it got the third coat early afternoon and the fourth later in the evening yesterday. 

Earlier today, I got the final coat wet sanded and laid on a load of latex primer, and a couple of hours ago, I painted the repaired wall with the light yellow.  It's neat not being able to tell where the cracks were.

So that part is finished.  More or less.  Mostly.  More on this presently.

Tuesday, September 27, 2011

Diagnosis

The roof inspector has come and gone. The attic crawl space, first.  There's no evidence of mold or moisture on the underside of my roof sheathing.  Which is, as I observed when he pulled back some of the moldy insulation is the original 1x board.  Obviously, my POs-1 didn't find it necessary to replace it with plywood when they replaced the slate with fiberglass shingles in the 1980s.  And, as it'd seemed to me, he saw no signs of liquid water infiltration in the attic itself.

He told me I'd need to get rid of the fiberglass batt insulation.  Yes, certainly, I was planning on that.  By taking up the T&G floorboards the electrician cut out a few years ago to install the bathroom ceiling fan, the inspector verified that I have no insulation in my bathroom ceiling/attic crawl space floor.  Yes, that's just as I'd remembered.  Then he told me I needed to add ventilation to attic space.  Well, actually, no.  I explained to him what I wanted to keep that area under the eaves as a semi-conditioned space, without wide swings of temperature from frigid winter to blazing summer.  That the 2007International Building Code allows unvented attics, as long as they're airtight to the exterior.  That I planned to achieve this with sprayed-on foam insulation.  He was adamant:  Even with that, he said, I needed to keep a 2" gap between the upper side of the insulation and the underside of the roof deck.  And extend it from soffit to ridge.  Impossible, with a cathedraled ceiling on 2x4 rafters like mine, but I refrained from arguing.

I asked him the critical question:  By any legitimate way of reasoning, might the damage I had be coverable by my homeowner's insurance?  No, this wasn't a catastrophe, it was a maintenance issue. 

Next, I showed him both a computer photo and the actual location of some water seepage I'd had in my study ceiling last May.  He'd been using his moisture meter and found that it'd dried to an acceptable level (I forget what it was), though some areas of the ceiling showed 0% saturation.

This wasn't the case for the wood cover and plaster around my vent stack at the rear of the room.  100%.  Soon as I told him what it enclosed, he pronounced, "You've got a leak around the stack.  The boot probably needs replaced."

After taking a few more readings and not finding anything else serious, we proceeded outside.  Because he was driving a different vehicle than the once he started out with on Saturday, he hadn't been able to bring his long ladder.  So he made me no close-up observation of the condition of the soffit in the back corner where I can see daylight from the inside and the birds get in and the cats want to get at them.  At first, he wasn't even inclined to believe me when I told him there was at least one hole in there big enough to allow this.  But standing in my back year, he couldn't help but notice the sparrows up there in their nest in the end of the gutter, and watch as they ducked in and out of the aluminum fasçia cladding.

He used his adjustable ladder (a Werner, not a Little Giant) to climb up to the back porch roof, pulled the ladder up, then set it on the porch roof and climbed up to the top.  Well, you're a better man than I am, Gunga Din.  I don't mind high places, even with only two or three or fewer inches of toehold, if I've got a nice rock face next to me.  Walking around on my high eight-in-twelve roof is beyond my balance and my nerves.  But the inspector walked it.  He verified the bad vent stack boot.  And proceeding to the area above last May's leak, he verified that I had a lot of popped nails and loose shingles up there.  They don't need replacement, he said, just readhered with some roofing tar.

His opinion is that all the work, excluding insulation tearout and replacement, should run me only around $250 to $300.  I hope he's right.

He'll send me the report in a day or so.  Meanwhile, I need to get the names of some roofing contractors and start getting bids.