These past few days I've been making increment progress towards completing the work in my 1st floor hall. Small but necessary stuff: Filling screw holes and touching up the faux finish on the upper wall because I've accepted that no, I can't have my wall-hung coat rack hanging over the new chair rail. Measuring for, cutting, sanding, and coping quarter round. Ordering flexible resin quarter round for the foot of the curved bottom step. Cutting (and sometimes recutting) the chair rail pieces I previously coped, now that the jamb trim is up and I know how long the rail pieces need to be. That sort of stuff.
Nothing exciting, nothing demanding daily posts, just stuff that's got to get done.
But from now on, I don't know how much is going to get done. Because I've taken an additional job, working half time, every weekday evening, at the Big Blue & Gray Box Store. I've been in for paid orientation and training already, but tonight I begin my regular shift. In about 25 minutes, to be exact.
Ironic, isn't it? There I'll be surrounded by all sorts of products I can use working on the house, but I'll have no time to do it!

Showing posts with label repairs. Show all posts
Showing posts with label repairs. Show all posts
Monday, April 1, 2013

Tuesday, July 31, 2012
Meanwhile, Down the Basement . . .
 | |
| The last of the wood filler. I hope. |
 |
| Paint stirrer to the rescue |
 |
| Note idiot clamp dent on near side. |
 | |
| A little steam should revive it. |
 |
| Good as new. (Under the circumstances) |
 |
| Note vet tape in lieu of clamps. Now I remember what I should use! |

(Hope I don't have to fiddle around with cutting them shorter. I mean, didn't I spend enough time drilling out those holes?)
Wednesday, May 9, 2012
Working on the 2nd Floor Hall Trim

I'm busy reattaching reshellacked trim to the walls of my 2nd floor hallway. Really. Been at it for the past, I don't know, do I really have to check the pictures and find out exactly? For the past week at least.
You'd think with a nail gun the work would go quickly, even though I'm doing it on my own. But in a world-- I mean, a house where nothing is plumb, it's not exactly a matter of slamming up the pieces and firing them in. Things have to be done to them.
Like with the baseboard that sits to the right of the bathroom door. Anybody remember this post from July 2007? It was past fiddling with the shoe mouldings and just lowering the baseboard was out of the question. No, I had to take a piece of old yellow pine floorboard (removed for the foam insulation job in the attic) and cut a piece the length of the baseboard that sloped from ¼" high at the outside wall to nearly 1½" at the righthand bathroom door trim plinth (all that in less than three feet), shellac it to match, then glue it to the existing baseboard. Here's what it looks like installed

(and please pardon the picture quality; I'm not having good luck with my new camera AT ALL), with no shoe moulding yet. In person it looks even more like it's running uphill to the left, despite the wallpaper pattern being straight, but what can you do? Run it cockeyed across the wallpaper? Don't align it to the adjacent base? Leave horrible gaps, as before? It is what it is. If the floor has settled, it has settled.
Then there's the makeshift white pine plinth the POs-1 made to go under the righthand trim at the opening to the 3rd floor stairs, the piece that fits around and under the curved bottom step. There was no use stripping it and I've always meant to make a new piece to replace it. That's been the big project for today.
Yeah, a pieca wood 9" high by 2½" wide with a 1" by 7/8" notch cut out of it at the top left. Most of the day. This is what I get for forgetting how to adjust the blade tilt on my table saw. Because unlike the piece the previous owners made, mine was going to be coped back all along the left side edges to fit the curve of the stair riser and tread. And that's what I did. But not after spending more time online this afternoon than it really took to remind me how to set that blade . . .
OK, ok, no sympathy there. Happily, I got the piece cut and it's not too bad, if you overlook a little messiness in the notch. Never mind, it'll sit under the step nosing anyway. And it'll fit to the riser better than the old piece did.

Maybe it would be, if I hadn't used Big Wally's to stabilize that plaster. Rory B claims it changes and strengthens the composition of the plaster, and blasted it he isn't right. It now holds together like plastic, even against the onslaught of my mason's bolster. I still don't know exactly where the high point is.
But oh, well, I can report that after three tries, as of this past Sunday, my bedroom door frame is finally back up in such a way that the door closes-- without ridiculous gaps. And as of last night most of the face trim is remounted in the 2nd floor hallway, barring some pieces that have to be recut or augmented. So actual progress is being made.
I only wish I had decent pictures to show it.
And that I wasn't having very expensive and therefore futile second thoughts about hanging another William Morris wallpaper on the top part of the stairhall walls, instead of covering them with the faux finish paint . . .
Sunday, March 11, 2012
Off Hours
Remind me that I need to reset my body clock to normal human hours. Nothing to do with Daylight Saving Time coming on last night, just a reflection on the cockeyed hours I've been keeping this weekend. Up till 3:00 or 4:00 Friday night/Saturday morning, not out of bed till Saturday noon. Up till 5:00 AM DST this morning, not up and getting dressed till nearly 2:30.
My excuse is that I was getting things done on the house these past two nights/early mornings, I felt awake enough to keep going, shouldn't I take advantage of the opportunity? Whereas if I went to bed at a decent hour, there was no guarantee I'd lug myself out of bed the next day to correspond.
But this is ridiculous. Today by my mixed-up timing I missed the opportunity to make it to church anywhere, and I missed over half of a beautiful, bright, pleasant day. Shameful.
I did as much with it as I could. Got out and pruned all the roses (barring the groundcover ones) for the spring, as well as the crepe myrtles and the blueberry bush. Tied up the tall stem of the Don Juan rose so it'll climb, and cut back a lot of the English ivy that's overwhelming the clematis and the Sympathie rose in the back.
Got the first application of joint compound into the holes and gouges in the living room north wall, and around the two corners a yard or so to the west and east. That place I chiselled out at the upper right hand of the doorway casing is going to be really tricky to get right. The joint compound is really too loose for the job, but it's what I have on hand. The whole wall and the problem corner especially will need repeated applications before it's through.
After a late dinner, got the west dining room window lintel gooped up with wood filler where the big splinter came out Friday night. How long did I say it was? At least a foot in reality.
Was planning to do something else on the living room tonight, but I guess not. What it is, either my POs or the POs-1 (I think it was the former), when they repainted the ceilings, got ceiling paint on the cornice moulding. The cornice is dinky enough as it is, but the white paint along the top of it reduces its effective height by about a quarter inch. I don't have the time or money right now to replace it with the more robust moulding the living room and dining room, if not the front room, should have. So for the time being I've planned to paint over that white with the same cooked mushroom brown color (the can is downstairs in the paint locker), then go over it with shellac so it'll more or less match the rest of the trim.
But as it turned out, the remaining quart or so of the mushroom brown is covered with mold. OK, Plan B! There's an unused quart of a warmer medium brown down there, and I think I'll repaint the cornice entirely with it, with the shellac over. But it's been sitting so long it's badly separated. No point in me trying to stir it up myself tonight. After work tomorrow I'll take the can to Lowe's, where it's from, and get them to put it on the shaker. And maybe I can remember to ask if they can order the kind of wallpaper paste I need while I'm there (Roman's "Golden Harvest" GH34. Wheat paste. "For English wallpapers." Well, there ya go.)
Thinking about the cornice again. If I actually have some money for frivolities someday, I want to get cornice moulding of a more appropriate size and nail it up using the existing as blocking. What's there is 2" high if it's lucky, so it shouldn't get in the way.
Thursday, March 8, 2012
Oh, Fudge

The only problem with the plaster, as I originally perceived it, was up at the righthand corner of the cased opening between the living room and dining room, where the doorway jamb and head casings come together. When I pulled off the trim to strip it, lo these many years ago, I found that the plaster protruded beyond the room face of the casing a good half inch. Meaning that the face trim gapped more than a little. Previous owners had fudged that over with spackle and paint, but I'm going back to natural wood.
When I learned about Rory Brennan's Big Wally's PlasterMagic® system, I knew it was just the thing to take care of that protruding area and make the plaster nice and flat to receive the newly-shellacked trim.
But things have not been that simple. Back on the 9th of February when I started drilling the holes for the conditioner and adhesive, I noticed, for the first time in eight and a half years of living here, that the entire top fourth of the south living room wall bulges outward. On the righthand side, especially, the protuberance was a half inch and more. Clearly, I was going to need more Big Wally's adhesive than I had on hand.
Insert interval while I got around to ordering more tubes, while it shipped, and while it sat in the box in my dump of a living room waiting to be used. All right. So this past Sunday, I got to work. And noticed two odd things:
First, that the plaster bulge on the righthand side, where I started my operations, went in a little with the washers and screws, but not as much as I expected. Only a quarter inch at the most. But the plaster wasn't flexible and it didn't give, and the wall developed no cracks as I drilled the washers in, though that's what you might expect if the keys where pressing against the lath.
 Second, that up at the crucial corner the plaster wouldn't move in hardly at all. At this point I did have cracking before and the washers caused more yet. It wasn't salvageable. So I pulled some goodish-sized chunks of it out, and saw-- And saw that up there the lath sits at the most an 1/8"back from the room face of the wood casing. Seriously. I poked the lath and it's in there solid. It has no place to go. Around that area the plaster thickness ranges from 3/8" to 1", and it's no wonder the door trim needed some fudging before! It's going to need some fudging again when it's time to fill in the holes--but I'll describe that when I get to it.
But what did this mean? That maybe the plaster at the top of the wall is thicker and the old wallpaper concealed the problem? No idea. The plaster I'd treated seemed well-secured enough, and I let it go because I was out of washers anyway.
Well, now. Give it a few days for the adhesive to try and for me to take care of other business. So Monday night I'm up there on the ladder snugging up the areas above the doorway and on the lefthand side.

Not to mention that where I power-screwed the anchors in too hard, the plaster just crumbled. But the surface of the wall looks fine! What's up with this?
Oh, fudge. Aggrieved, aggravation, frustrated, crabby. Last night I tried the conditioner and adhesive in a few more places on the upper righthand part of the wall, trying to pull that bulge in a little farther. Drill penetrated more than an inch, inch and an eighth even, but the pull-in when I tightened the washers was a fraction of that. Maybe the plaster is extra-thick at the top of the wall. Or maybe the big hairy plaster/lath gap is there-- full of keys cushioned by all the Big Wally's I pumped in. However it is, I can't do anything more to true it up-- and no, demolition and drywall is not an option.
This is not what I had in mind nearly five years ago. I'm holding my breath that a lot of joint compound and the new wallpaper will disguise the mess. I even have visions that the wallpaper will end up holding the wall together. But I have no call to throw rocks-- or chunks of plaster-- at my fudging previous owners. It's a pot we're all in together.
Saturday, January 7, 2012
Getting Sorted

I've been down the basement till just a little bit ago, sorting out trim. I needed to dig out every piece that goes back into the stairhall on both floors, so they can be shellacked prior to remounting. While I was at it, I filled holes and cracks and gouges with Zar wood filler.
I'd likely still be at it, except I was so clever Wednesday afternoon when I went to the hardware store in New Brighton and bought only a 4 ounce container of the filler. I didn't want it to dry out like my pint pot of it did. Well, that plan worked. It didn't dry out in the plastic pot. No. I ran out first. And way before I'd gone through all the trim pieces, I can tell you. And lot of those big nail holes will need a second application. So I know what I'm going to be doing before the hardware store closes at 2:00 PM.

The biggest problem with sanding is removing too much of the patina. The final finish comes up so much better if it's left on. with it. But it'll help if I give every last piece a sealer coat of untinted buttonlac first. Unlike what I forgot to do on the hallway floor.


Like after I run up to New Brighton tomorrow-- I mean, later today-- for more wood filler.
Saturday, October 15, 2011
Ow Gosh


But here's Mike Holmes holding forth on the gospel of caulk and Keeping the Water Out, and bless me if I am unable merely to be a hearer of the word, I am goaded into being a doer of it as well.
But, oh, gosh! the path of virtue in not smooth, nor is it narrow. Actually, it's wide and it's deep; it's thick and arduous and very, very tacky.


The little ½" backer rod I had on hand wasn't going to make it. Hoping the clear weather held, I jumped in the car and ran up to Lowe's, where I bought 20' of 3/4" backer foam backer rod. And a second tube of the masonry crack caulk just in case I ran out.


Called Lowe's. Is this stuff supposed to be like this? Guy in the paint department says that yeah, because it's for masonry and it's like mortar, it is thicker than regular caulk. OK, but this thick? He said if I couldn't get it to flow, to bring it back and they'd take a look at it.


Thursday, September 29, 2011
Getting There: Wall Crack Repair

No, really, I started the repairs on the wall crack Sunday evening. I'd at first envisioned enlarging it with the 5-in-1 and depositing a little spackle in there, but whom am I kidding? Any thing that's that deep means plaster that's coming loose, and that means redoing it the Big Wally Way.

 | ||||||||||||
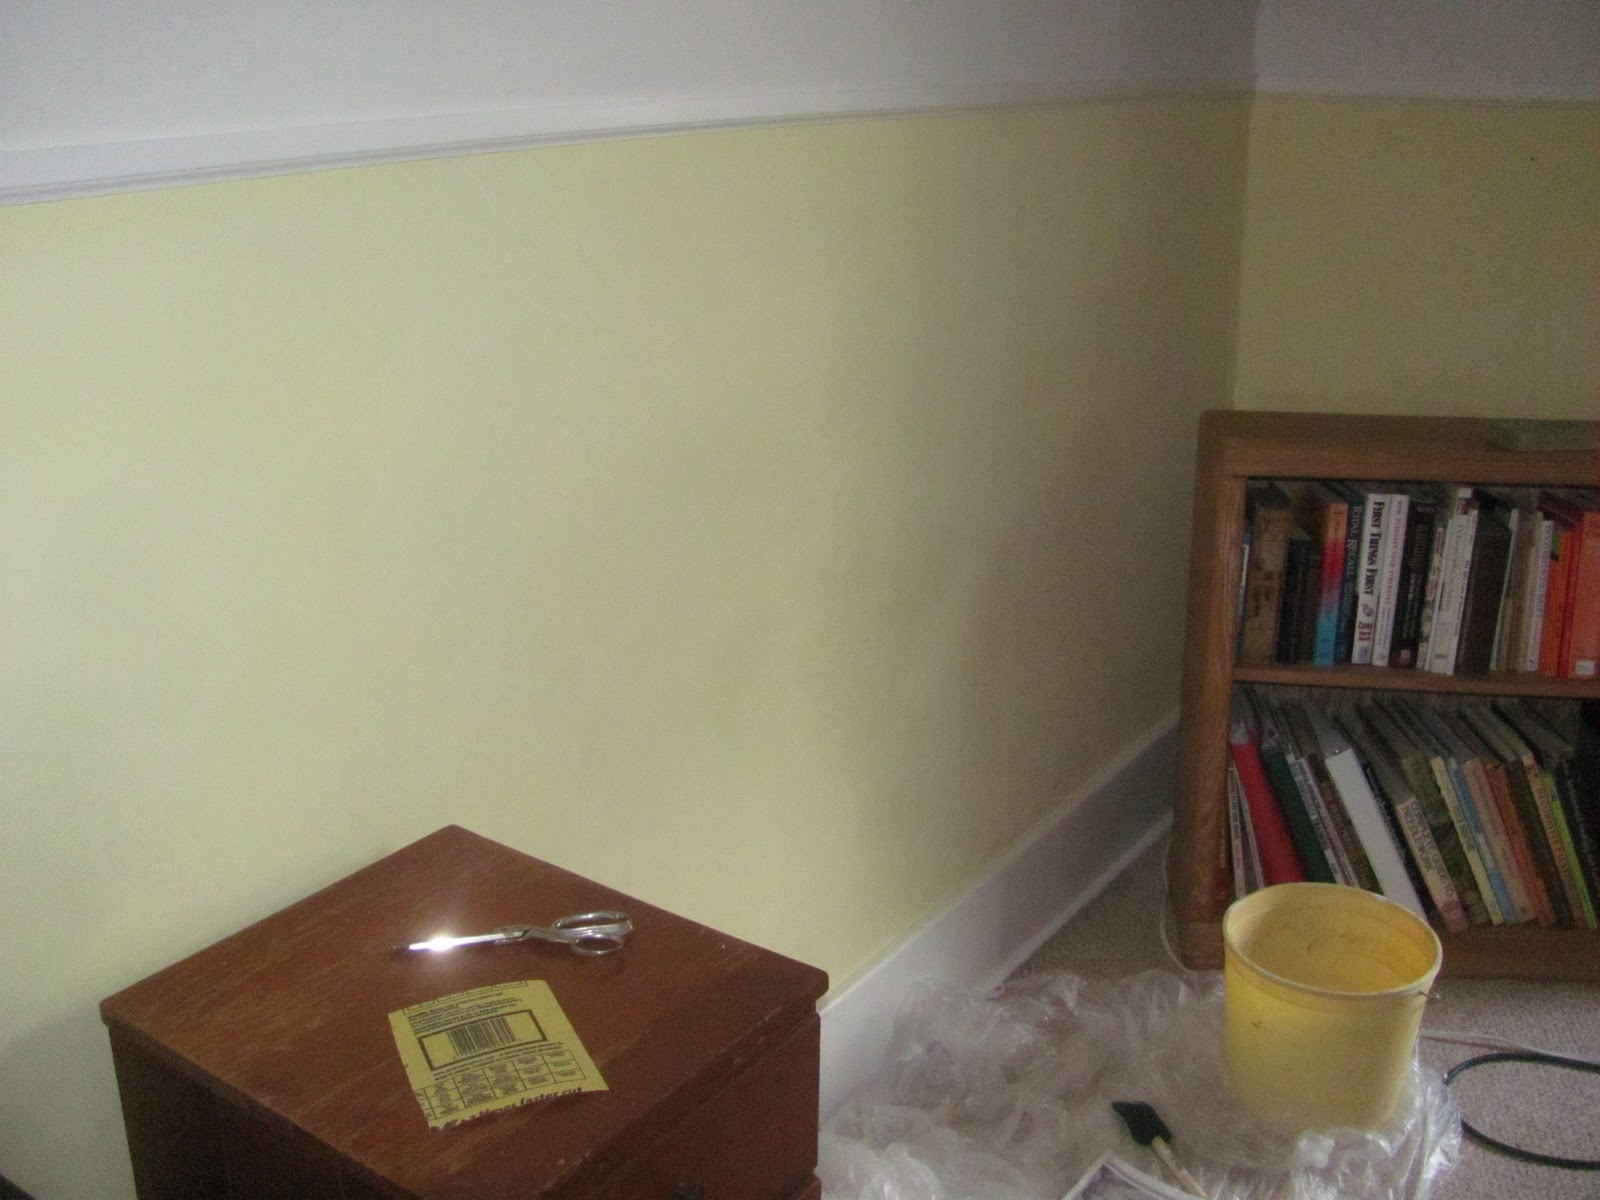
So that part is finished. More or less. Mostly. More on this presently.
Saturday, August 20, 2011
"A Stitch in Time . . . " . . . or Overkill?

Why? you ask.
Because earlier this evening (Friday) I was taking out the washers from the plaster repair I did on Wednesday, and I noticed three things:
- The screws were still a little sticky. Oh-oh. The adhesive I used in those was from the tube I'd cut open two years ago. Does it go bad? Maybe I'd better leave the rest of those washers in awhile longer, to make sure the glue is really cured.
- Yes, that crack was a paper tape repair that was coming loose. No telling why it chose to delaminate now, but I should be grateful it did. Could've popped off after I'd repainted the whole ceiling. At any rate, once I get the tape fragments and the loose paint layer and skim coat off, it's going to take a few coats of spackle/joint compound to smooth off. At least. And . . .
- I was pushing on the plaster in that area. Guess what. Yeah, it gave. Obviously, I didn't get it all secured on Wednesday. The gap wasn't much, maybe an eighth of an inch of so, but enough to make me want to stop it now.
Couple of hours later, I'm doing the push test again. Did I just feel some give in the area around where I just did the previous repair? Yes. Guess I needed closer coverage. So I went through the process again.

So let's do the calculations: Allowing the full 48 hours for the newest ones to cure (and I think I'd better, this being a ceiling), that puts me to after midnight Sunday night. Maybe I might get two coats of spackle in the holes applied, dried, and smoothed down on Monday. Maybe. And a last coat over the messy spot Monday night.
Which brings me to Tuesday.
But nothing's getting done on the 3rd floor on Tuesday, because that's the day my friend Hannah's* husband Steve* has said he's going to come over and help me install my water softener and filter.†
Wednesday, maybe?
_______________________________
†My friend Frieda's* son Mike*, who incidentally is Hannah and Steve's nephew, called me last Saturday and told me his schedule wouldn't allow him to get to it till next winter. So Steve's going to tackle it, and I hope he doesn't do it all, but teaches me how to solder.
Wednesday, August 17, 2011
Two Steps Forward, One Step Back

No priming got done in the 3rd floor Study today, and none will till sometime on Friday.
Or not.
It's not so much that I've gotten perfectionistic about the ceiling patches I've been working on. It's true that I've wet sanded and reapplied at least two more coats of spackle today, but that's because in the stark light of day I was able to see a lot of irregularities I missed last night.
No, something else is causing the slowdown.
Ever since the Great Plaster Disaster of 2007-2009, I've had the nervous habit of pushing on the sloped plaster ceiling of my Study wherever I notice a hairline crack. I've had enough of crashing plaster for one house, and while I enjoy the pillowy, organic effect of my 3rd floor ceiling, I need to know, and know right away, if any curve or bow actually means key failure and imminent doom.
 |
| Enlarge to see cracks. Sort of. |
Oh, dear. That gave. That plaster definitely gave.
All right, I know what to do. Time to call in Big Wally.
Downstairs I go. Plastic dropcloths from the back porch. Painter's tape and the unopened box of PlasterMagic adhesive from the living room. Drill, drill bit, caulking gun, Big Wally's conditioner and anchors (with screws) from the basement workshop.
But wait a minute. Where was the 3/16" masonry bit? It should be in the top drawer next to the workbench. And where, o where did I put the rest of my Big Wally's supplies?
Eventually I found the latter in their box underneath the workbench, safely out of the way. But I could not find that drill bit anywhere.
O well. I needed to go to Home Depot anyway to exchange that 10' length of copper tubing (that's another story). So off I went, and while standing in the tool aisle consulting with the clerk, I realized that, Idiot! I'd been suffering from some sort of brain glitch and visualizing a three-eighths inch bit when I'd searched that drawer. My 3/16" bit had been in plain sight all along.
No matter. It was probably dull anyway. It certainly is dirty. And there was that copper to take care of.
Once I got home, I had the target area of the Study ceiling drilled and conditioned in good time (something to do while the oven was preheating for my supper pizza). Earlier, I'd been happy to find one full tube and one partial tube of Big Wally's adhesive in the box under the workbench, the latter still in the spare caulking gun. When it came time to inject it into the holes, I gave the handle a good hard squeeze to clear out the dried stuff from the tip, asking myself, "I wonder if this adhesive is still good and liquid?"
 |
| Gray smudges are on the camera lens, alas! |
But that didn't take long to clean up, and I had the adhesive injected and the anchors screwed in in time for me to go down and eat my pizza. And for my boikitteh Huw to get the oven door fully open and steal a piece, but that's another another story.

But now that looks doubtful, doubtful indeed. For later this evening, I was doing the push test again. And even though I indulged in what surely is overkill in the spacing of my holes and anchors, I was still detecting some give. And then I let my nosy fingers range to the left, especially around another, vertical, hairline crack. Push, push. Oh, dear. Let's put the drill bit back in and check. Oh, dear, oh, dear. That bit was going in way too far. In a lot of places. Definitely some significant plaster-lath separation along that crack, and in the field between it and my earlier repair.

I can always amuse myself teaching myself how to sweat copper pipe in the meantime.
________________________
*Not the word I actually used.
Yeah, I Know, I Know!

In the first place, it's hot up there these summer days. Even if I ran the air conditioning in my house-- which I don't-- it wouldn't adequately cool the third floor. Last month sometime I went at the problem area to some extent with the 5-in-1, but that's where it's remained.
But all right, it's been cooler lately. But there are so many other, more fun, things to do downstairs. And sometimes I'm actually working. For money! So that doesn't get the ceiling patched.
Last Friday, however, I finished clearing the papers, magazines, files, tchotchkes, and so forth off the horizontal surfaces and stashed them down in the guest bedroom. And yesterday, armed with the dull-razor-blade scraper, I took the long walk up the two flights and went to work removing anything else that was still loose.

Finally convinced myself it'd actually be a good thing if the joint compound could seep under the raw edge of the old paint a little. And headed down the basement for the joint compound.
Ah. There we have it. Another big reason for my procrastination. I knew it, I knew it, that big five gallon tub of joint compound was moldy. OK, so it was two and a half years old. But the lid was on so tight I could hardly pry it off. So why should it be moldy? But it was, I wasn't about to put any of it on my ceiling, so it was off to Lowe's last evening for a less-ambitious quart of vinyl spackle.

(Grumble-grumble-rumble)
But hey, once that's done, it's time for primer! And paint!
Once some very heavy pieces of furniture get moved. And the trim to be repainted gets washed. And everything gets festooned in drop cloths and painter's tape.
(Grumble-grumble-rumble)
Thursday, June 9, 2011
Amendments to the List


Like washing down the walls and floor with TSP then rinsing it off. (Yeah, duh, simply spraying on the mildewcide over the dead mildew would not get me a good paint job.)
That's done, not without a lot of slop and mess. Slop happens. Slop gets mopped.

Regardless of its history, the spalled place was there. "Was" being the operative term, because I patched it. Mixed up too much Sak-Crete; not sure how I miscalculated so badly, and too bad it was after dark and I couldn't use the leftovers for the holes in the sidewalk outside.

Add this item, too: Rooting around in the paint cupboard in the workshop. If I'm lucky, my previous owners will have left me a can of the basement wall white paint. If I'm even luckier, it'll be usable.
On the other hand, I'm deleting the items about cleaning up and repainting the whole laundry room floor at this juncture. Yes, it needs it. But it's not directly relevant to getting the new water treatment system installed. I'll just paint the bit of the floor where the new equipment will sit. That'll do for now.
Tuesday, April 26, 2011
Soft Water Is Hard

A couple months ago, I started noticing a little water on my basement laundry room floor. From the washing machine, I thought, and since it wasn't bad and dried fairly quickly, I ignored it.
About two weeks ago I observed that the wetness was really coming from around my Sear's Kenmore water softener, a few feet up the basement floor slope from the washer. I looked inside the tank, and it was full of water! I've never seen that before. Never, ever. I tried regenerating right away, but the water only crept higher. Not what one wants, right?
So I unplugged it, found out from the manual (which was hanging there in its plastic envelope) how to activate the bypass valve (good job for a rubber mallet), and went upstairs and called Sears. Oh. $65.00 just to come out and look, before parts and labor. Not in the budget.
I sent out a veiled SOS to my friends on Facebook. Too veiled, obviously, because I got no response, not even one word of useless advice. Oh, well, there's always the Internet. So I Googled "Kenmore water softener full of water leaking." And got advice there, yes, I did. There were at least four different things various posters recommended be tried, each one of them looked complicated, and each one of them seemingly had to be done first.
Please understand: My water softener is in a dark corner of the basement, my eyesight is not very good, I never can see that stupid gray-on-gray display, and I couldn't find the place in the manual to show me where to find the venturi or the resin bed or anything else that needed to be cleaned or adjusted or whatever it was. So I put it off.
On the weekend, at the customary front porch gathering, I asked some of my neighbors if they'd ever serviced their water softeners. No, they hadn't. In fact, the guy across the street said they didn't even have one.
Well, if they can get along with hard water with a family of seven, I supposed I could for awhile, too. And I left the softener on bypass the next ten days.
But yesterday I think I spent a half hour or more rewashing supposedly clean dishes from the dishwasher. I folded some white laundry last night and it looked yellow and dingy. I can't get my shampoo to lather, and the water tastes funny. Still I was putting off doing anything about it, until this afternoon after work.
I have lots of laundry to do. I'd really like it to come out clean. Oh, phooey, I had to try cleaning the venturi at least. I mean, come on, buck up. Found the diagram in the manual (I'd been looking at the installation guide before--oops). Found the venturi on the appliance. Took it apart. Barring a little red iron scum, it was clean. Put it back together and turned the softener on. Made no difference-- water level still high. Found the page with the Manual Regeneration Check. Put the softener through its paces: brining, brining rinse, backwash, fast rinse. Water level actually went down a little bit, out through the drain hose-- then started filling up, higher, higher, scarily higher. Oh, no, you don't! Unplugged it and hammered the bypass back in place.

Time for the hot water to melt it out.
Hot water, hot water, hot water. Ram it with the mop handle to break it up. Ram, ram, ram.
Take a look to see if I'm making any progress. Poke the camera down in to document the event. Take a few pictures, using the flash.
Review the pictures to see what's going on, since I can't see down there very well.

Did I do that damage right then, myself, with my plastic mop handle? But no, the picture I took right after I got the water sucked out shows the crack already there. And I haven't gone after a salt bridge for several months. No, that resin tank cracked by itself.
I've been on the Internet (did I mention that before?). I've learned that a cracked resin tank is doom for a water softener. That if it ruptures, it can be doom for whatever's in your basement (especially if the water's still running through the WS). That the resin in a broken tank can go running throughout your whole plumbing system, and while I haven't delved into what that means, it sounds bad. And that replacing the resin tank and its contents can cost more than buying a new water softener.
My resin tank is toast. I am not going to experiment with running the WS with the tank in that condition. So what do I do? This is not in the budget. Do I stretch my credit even further and buy a new water softener? Do I run hard water for the foreseeable future and ruin my clothes and coat my plumbing with lime?
Blast it, what do I do?
Monday, February 7, 2011
Mortise Patching Exploits
Okay, here are the photos from January 11th and following I promised a few days ago. (Note to me: Don't load too many photos at once into Blogger. It's nigh-impossible to wrangle them into the correct order).
The job was to fill the old hinges and strike mortises in casings where doors had been removed. I don't know why I stressed over the job and put it off for so long. When it came down to it, it was really no big deal.
First I tackled the doorway between the 1st floor hall and the front room. This used to be the front door of the house, but the door was removed when the porch was converted to a front room, and the mortises were covered up with ¼" thick pieces of plywood, which my PO-2 shellacked to match the rest of the woodwork. I tried stripping one of those a couple years back and said, No more. The old door casing was good enough for me.
I started with the mortises, with pieces of original yellow pine cut from an old disused floorboard, glued in proud:
Then I did the same for the strike. Here's what it looked like Before. (I knocked out the piece at the upper right to avoid having to make any fancy cuts.)
Same again, with the rough patch for the strike mortise glued in. Note how shallow the mortise is. No way I'm risking my fingers to cut a patch that thin on the table saw.
Then I moved operations upstairs. This is the doorway to the third floor stairs. Evidence shows that there was no door there when the house was first built (they had to hack away the bullnose on one of the treads to accommodate it), but it's also apparent that a door had been there for a very long time. Not sure if it was the same owner who took it down and filled the mortises with pieces of characterless white pine, but I knew they'd glare if I let them remain. So they'd been out ever since I stripped that doorway (mumble, mumble) years ago, and if I had a ton of money, I would have had a true-divided-lite, tempered-glass door custom made and rehung there. But that ain't the way things are, so these mortises were dealt with next.
(When I'm rich-- HA!!-- I can always knock out the patches and put my dream door up then.)
On the hinge side you can see where the POs marked the wood to position the hinge.
I really wish I could have found some old wood to match the existing grain, but I had to settle for what I had. Hopefully, the shellac will even everything out.
Here's the strike patch glued in, with some extra help until it dries.
But one more thing needed to be done before I could leave all the glue to dry. There was the matter of the holes left in the trim of the former entry door when the original screen door was relocated, sometime in the early 1930s. I'd had ideas of taking wood filling and sculpting it somehow to match the curves in the trim, but I wasn't quite sold on the idea. But wait a minute. Didn't I have some long pieces of old yellow pine the right thickness, left over from cutting strips to fill in the 2nd floor hall flooring? Yes!

That worked, and with a little wood filler daubed on to simulated the curves, I pronounced it Good Enough for one evening's work.
Next day, I took my grandpa's antique plane and smoothed the patches down. Really, the realization that I could use it was what got me past the brain-freeze and procrastination. Before, I'd been sure there was no way I could cut fiddling pieces of wood like that to any accurate thickness, but plane, plane, plane, and the difficulty (and the extra wood) was removed.
Then lay in wood filler to close up the gaps.
Day after, the downstairs doorway got sanded.
Then filled some more, and sanded again.
 If your eyesight is bad as mine, the patches can hardly be seen!
This still left the upstairs patches to fill and sand and finish off. That didn't happen till the evening of the18th and early on the19th.
When you tap on the piece over the old strike mortise, it definitely sounds hollow. Don't care to think how thin it is, now it's sanded down. But it's flush, and it'll do.
Here we are in the 2nd floor hall, with all the mortises filled and most of the tape off the stairs. And that's enough for now.

The job was to fill the old hinges and strike mortises in casings where doors had been removed. I don't know why I stressed over the job and put it off for so long. When it came down to it, it was really no big deal.
First I tackled the doorway between the 1st floor hall and the front room. This used to be the front door of the house, but the door was removed when the porch was converted to a front room, and the mortises were covered up with ¼" thick pieces of plywood, which my PO-2 shellacked to match the rest of the woodwork. I tried stripping one of those a couple years back and said, No more. The old door casing was good enough for me.
I started with the mortises, with pieces of original yellow pine cut from an old disused floorboard, glued in proud:
 |
| Top hinge mortise patched |
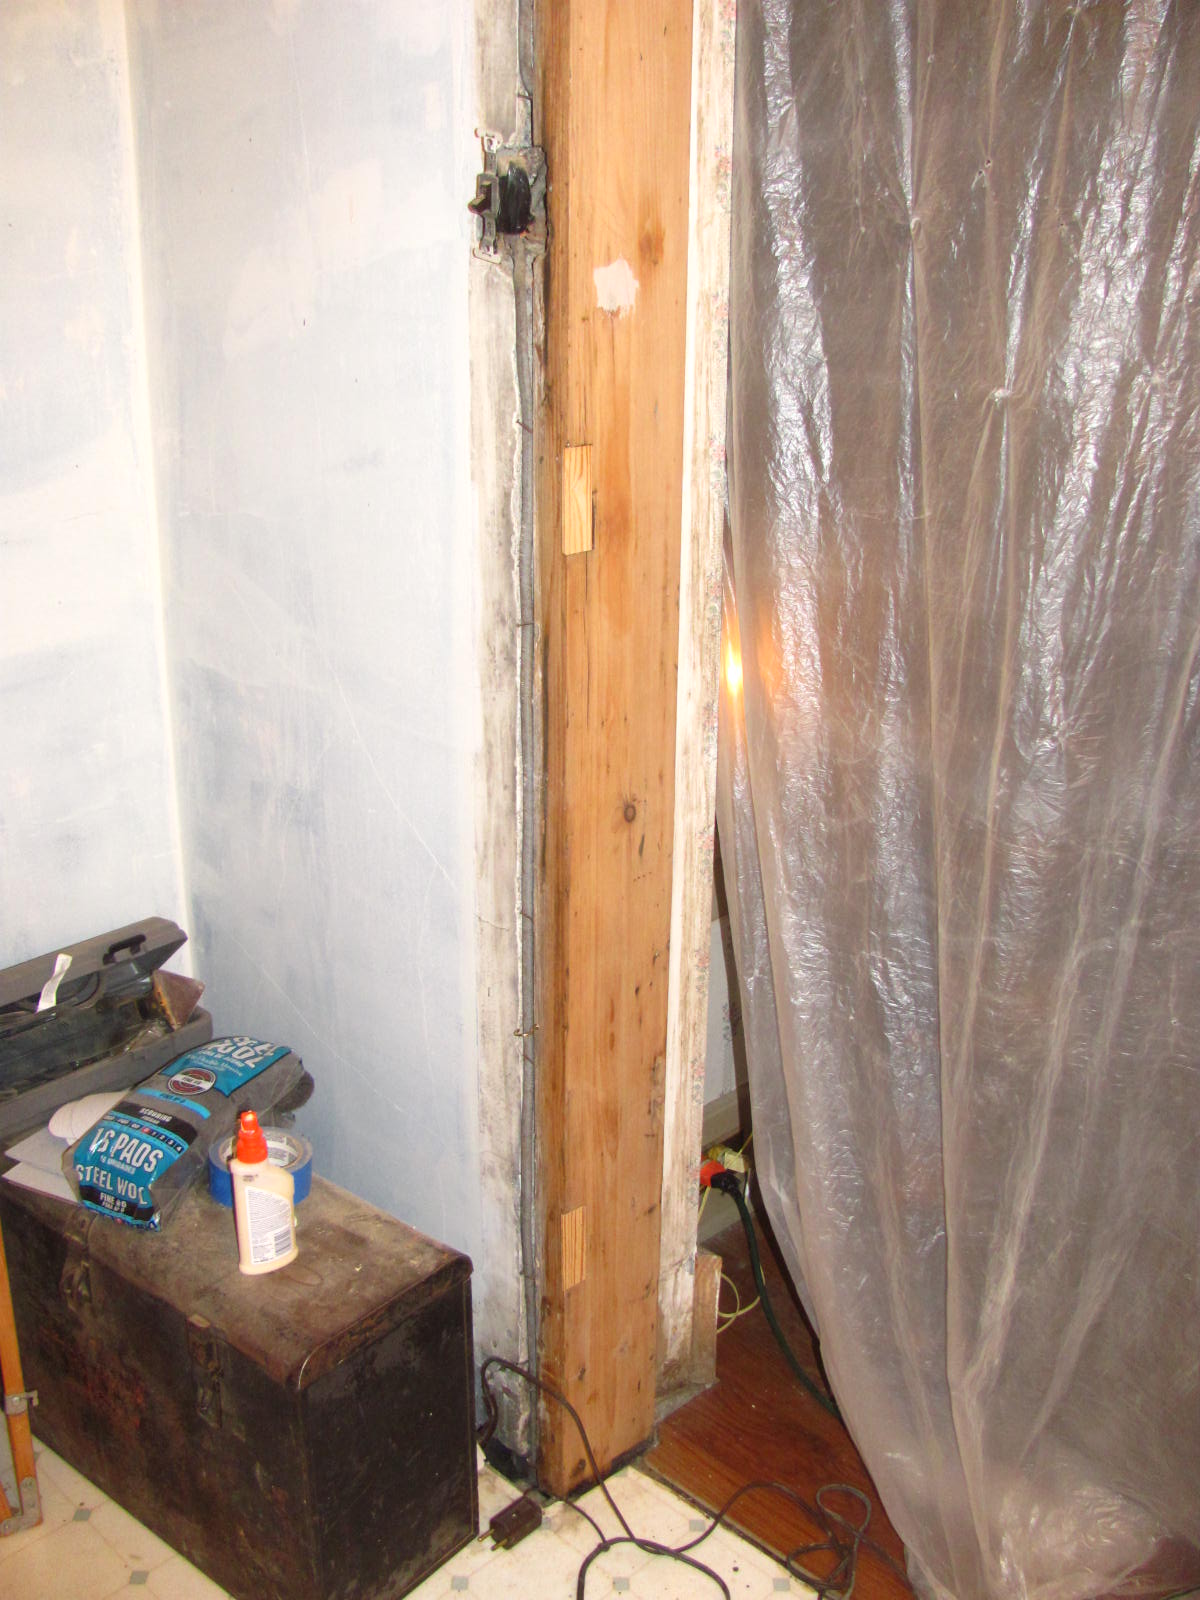 |
| Middle & bottom filled proud |
 |
| Bottom hinge-side patch. Almost right depth as-is |
 | |
| Old Entry Door Strike Mortise |
Then I did the same for the strike. Here's what it looked like Before. (I knocked out the piece at the upper right to avoid having to make any fancy cuts.)
 | |||
| Mortise Patch Glued In |
Same again, with the rough patch for the strike mortise glued in. Note how shallow the mortise is. No way I'm risking my fingers to cut a patch that thin on the table saw.
Then I moved operations upstairs. This is the doorway to the third floor stairs. Evidence shows that there was no door there when the house was first built (they had to hack away the bullnose on one of the treads to accommodate it), but it's also apparent that a door had been there for a very long time. Not sure if it was the same owner who took it down and filled the mortises with pieces of characterless white pine, but I knew they'd glare if I let them remain. So they'd been out ever since I stripped that doorway (mumble, mumble) years ago, and if I had a ton of money, I would have had a true-divided-lite, tempered-glass door custom made and rehung there. But that ain't the way things are, so these mortises were dealt with next.


(When I'm rich-- HA!!-- I can always knock out the patches and put my dream door up then.)
 |
| Strike mortise that needs filled |


 |
| Bottom mortise rough-filled |
I really wish I could have found some old wood to match the existing grain, but I had to settle for what I had. Hopefully, the shellac will even everything out.
Here's the strike patch glued in, with some extra help until it dries.
 |
| Door to 3rd floor, strike side |

 |
| Old screen door rabbet |

That worked, and with a little wood filler daubed on to simulated the curves, I pronounced it Good Enough for one evening's work.
 | |
| 3rd floor stairs, hinge side, planed |
 |
| Old entry doorway, hinge side, filled |
Then lay in wood filler to close up the gaps.
 |
| Old entry, strike patch sanded |
 |
| Old entry, hinge side sanded |
Day after, the downstairs doorway got sanded.
 |
| Old entry, hinge patch, fine-sanded |
 |
| Old entry, strike patch, fine-sanded |
Then filled some more, and sanded again.

 |
| Wood filler galore |
 |
| Nice and sanded |
 |
| Strike side |
When you tap on the piece over the old strike mortise, it definitely sounds hollow. Don't care to think how thin it is, now it's sanded down. But it's flush, and it'll do.
Here we are in the 2nd floor hall, with all the mortises filled and most of the tape off the stairs. And that's enough for now.

Subscribe to:
Posts (Atom)