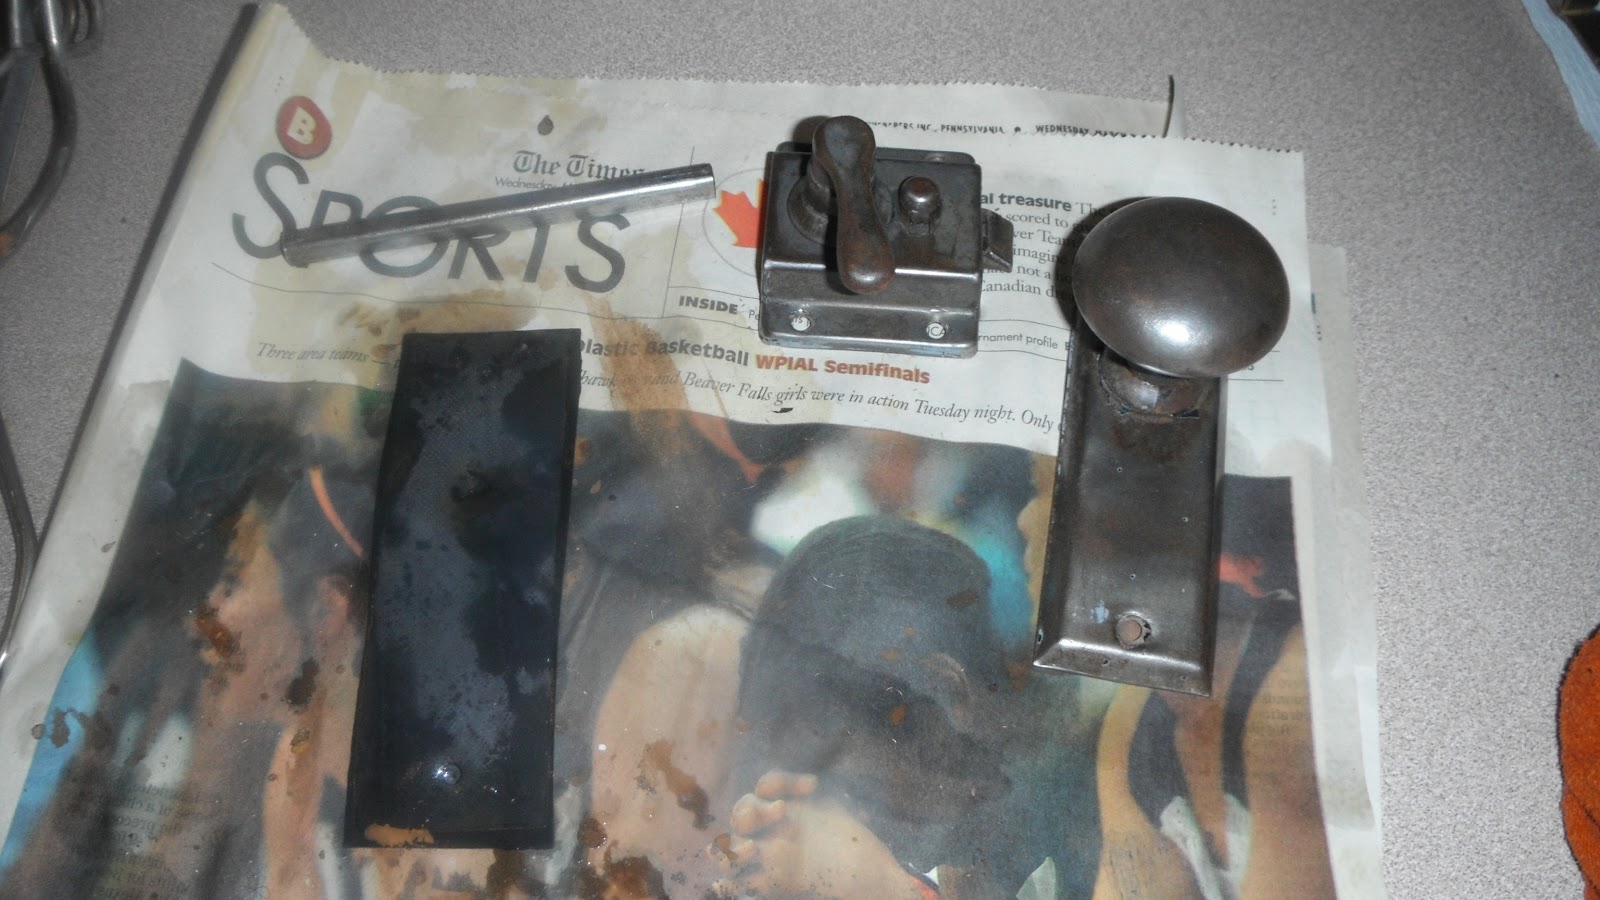
Friday, July 20, 2012

Transformation

If my DIY life were a piece of music, it'd be a Baroque fugue with two or three themes running in counterpoint to one another.

Upstairs we have the work on the living room walls-- scrubbing, sealing, patching, and all the rest.  Down the basement I'm still getting the last of the paint off the salvaged screen door.  But up in the kitchen the last few days there's been a variation on the screen door theme-- transforming its original hardware.

Please pardon rotation fail.  Technical difficulties.
I've mentioned before what a jolly hard time I had even getting the pieces off the door.  Then I struggled to free the hinges from the aluminum shims the door's previous owner for some reason had to use.  Bought a new drill bit at the hardware store a couple Saturdays ago to drill out the last four screws, and that worked great on exactly two of them.  Just drilled in to weaken the remaining screw from the top, then pivoted the aluminum pieces and hit them off with a hammer.  But the last two screws were stuck in one hinge, so that technique wouldn't work.  Oh, I tried the drilling part.  Bit went dull on me and gave up any pretense to removing any material.  Ditto with one I had lying around.  So it was back to the hardware store this past Saturday to buy another bit and see if they had any other ideas.

Hinges boiled once
Happily, they did.  One of the owners simply took the offending hinge into the shop and drilled the stuck screws out for me.  Thank you, thank you, thank you!  Bought a new 5/8" bit anyway, since I'd trashed the other two.

Curses, boiled again!
Now that all the hardware was off and ununcumbered, I could start having fun.  The hardware as I got it was a brown tone, and if I weren't too particular I could've claimed it was patina and left it as was.  But I knew better. Using the recipe from the StuccoHouse blog, I boiled the hinges and latchset (separately) in water laced with baking soda.  The first half-hour boil made a disgusting mess on the stove (because the pan leaks and the lid doesn't fit tight) and bubbled up the brown top coat of paint.  The pieces looked rather like melted chocolate, but not a particularly good or appetizing brand, if you catch my drift.  The second 30 minutes in the pot loosened the black underlayer. 

The black may have been the finish as it came from the store, but it was compromised in many places and had to go.  Scraped and steel-wooled it off, just as I had the brown.
Yummy!

So by last Sunday night I had a set of nice,
Hinge parts, clean and draining
Latchset, clean
clean (if a little rusty) screen door hardware draining on my kitchen counter.  And the rust mattered, because even though this door isn't going to be directly exposed to the elements, it'll still be on the exterior and subject to humidity and moisture.  I didn't want to paint it again; what could I do to protect it?  I kept thinking "oil-rubbed," but that usually applies to bronze.  Can you have oil-rubbed steel?

A little research online unearthed a promising but alarming article on oil-rubbing, replete with instructions about heating up your metal pieces to burning-hot and melting your oil, wax, whatever, into them.  No thanks, don't want to destroy my kitchen counters or burn the house down.  The promising part came when it told me I could apply tung oil cold.  And that it was especially effective on metal that was pitted.  You want pitted metal?  I got your pits right here.

One coat of tung oil. Getting there.

Two coats of tung oil.  Much better
I found my bottle of tung oil in the workshop, but believe it or not, it took me a day or two to figure out how to get the safety cap off.  But after the ViseGrips came to the rescue, I applied two coats of the oil to all the pieces except the screws, waiting 24 hours between coats as recommended.

Finished yesterday and I think they look really neat, almost as if they were bronze.  All they need now is a coat of paste wax-- once I remember where the dickens I put the can.

Monday, July 16, 2012

Weeds and Woodwork

    I've really neglected my garden this summer.  Simply have to make progress inside the house.  But when I took Llewellyn out I was confronted with the horrible state of the garden beds, especially how the crab grass was taking over the Brussels sprouts.  So since it was nice outside, I spent the morning weeding and mulching instead.

    I'd planned to mulch up old bagged leaves and spread them around the Brussels sprouts plants, but gave that up after the first bag took nearly an hour to do.  They're so wet they weren't going through the leaf vac grinder and into to catcher bag, they were being turned into dirt and clogging up the grinder wheel chamber.  I was constantly having to take the machine apart to clean it out.  So most of the bed is now covered with whole, if wet and decaying, maple leaves.  Not ideal, but I couldn't afford six or seven more hours at it.  Tired, and the sun was getting hot.

    Nice to have that much done, though.  Makes it look a little like I have a real garden this year.

    Progress continues on the south wall of the living room.  Got the last two coats of  shellac onto the cornice moulding.


    That was four coats and that's enough.  I'd contemplated going on today and priming the south wall and the adjacent west corner.  But I don't like the way I got primer on the lower edge of the cornice on the east wall when I tackled it in April-- it'd be a good idea to tape that surface to prevent it happening on this side.  So I'm giving the shellac overnight to harden up before I apply the tape.

    So instead I went downstairs and wielded my new Dremel and my new 7/16" Forstner bit on the broken and stuck pegs in the salvaged screen door.  Shocking how most of them just flew into powder-- no wonder the door fell apart.  The strange thing is that as they were being drilled out those pegs smelled like sweet corn!

    The old pegs were 1/2" diam., but I started drilling with the smaller bit in case I didn't hit the hole on center first time.  First knocked down any that protruded with the Dremel multipurpose cutting bit.  Probed around with the dental picks trying to work the loose pieces out, then finished it off with a 1/2" Forstner.

    Ironically, the last peg I tackled looked like it might come out with a little wiggling.  But I couldn't get a grip on it and had to drill it out anyway.  But because the wood was in better shape, it held together and my battery-operated drill wasn't making much headway.  Thankfully, my old corded drill is still working, and gave me better results.

    Tested the cleared holes with a 1/2" dowel I have sitting around.  I guess I'll cut it up to make the new pegs.

    Around 10 o'clock I thought I was almost done with all the drilling out I needed to do, just two more to go at the top of the hinge-side stile.  But the attachment of the bottom panel to that stile is a little wobbly, and considering how easily the other joints fell apart, maybe I should take my rubber mallet and separate those pieces and replace those pegs, too.

    Which would have given me up to eight more holes to clear, depending on how many pegs I could keep intact.  Nope, I've had enough for the night.

Saturday, July 14, 2012

Living Room Wall Progress

The wood of the flat moulding has weathered gray--it is stripped
Wednesday morning I used up the last of the Western Wood Doctor on the plain side of the screen door insert.  I ordered more Monday night, but it has to come by truck all the way from Oregon and the ETA is Tuesday the 17th.  That's given me the excuse to come back upstairs and work on the south wall of my living room.

Old filler plaster
Haven't touched it since just before my English friend Janet* visited in April.  Mental block.  See, on either side of the cased opening to the front room is a two to three inch strip of scratch coat plaster.  At least, that's what I have on the righthand side.  On the left there's broken blocks of scratch coat plaster, miscellaneous broken bricks set up on end, and other flotsam and jetsam filling in the space between the 2x6 support member and the proper mortared-in brick of the wall.  I know because some of those rectangular chunks of plaster were loose and protruding, and I pulled them out and laid them aside when I first got around to that wall.  Question was, what was I going to do with them?  More to the point, what was I going to do about the 1½" deep by 2½" wide by 18" tall cavity left once the plaster blocks were out?  Would the face trim be enough to hide it?  What if it showed?  I had some idea of using Liquid Nails to glue them back in, but how could I hold them tight to the back of the cavity while it was drying?  And how could I shave enough off the backs of the blocks so they'd go in flush, without breaking them to pieces?

Styrofoam blocking
Needed to be doing something on the house Wednesday morning, and all of a sudden it hit me that I was going too far with the authenticity.  The point is to fill the cavity, right?  So who cares what it's filled with, as long as it's a legitimate building material (e.g., not Kleenex) and it doesn't show?  So with a mingled sense of cleverness and shame, I cut the Gordian knot and trimmed down some old packing Styrofoam.  I mean, it's like insulation, even if it is on an interior wall, right?  Shoved the foam to try it and the pieces fit perfectly.  Glued it in with construction adhesive on Thursday (once I'd scrubbed the wall above it), and there it reposes and dares anyone to make something out of it.  (The old plaster went out with the trash Thursday night).

Gardz is shiny
Two coats mud &/or patching plaster
With that settled, I could go on to scrub down the south wall and the part of the west wall around the corner (the idea being to remove any loose or soft size from the previous owners' wallpaper job) and coat it with Gardz primer (to seal in all the remaining size).  Had that done by Wednesday evening, and the mornings up to today saw me patching the cracks and old nail holes in the plaster and wet-sanding them down.  One bad area above the lefthand corner of the opening needed taped and mudded; I've controlled myself and kept it to two coats of joint compound (24 hours drying time after each).  Typically I have a hard time trowelling it on; I keep leaving ridges.  I've found the more coats I apply and the more sanding I do the worse it gets.  The crack's not at eye level; get the paper tape well covered, wipe it down a little, and let it alone!

Finish plaster at bottom
Being in an intimate relation, as it were, with this wall the past few days has given me a good-enough answer to a house history question that's been tugging for years at the skirts of my curiosity.  My front room used to be an open porch, of course.  And that cased doorway from the living room used to be a window, probably a three-gang from the width.  But why all that filler on either side of the "new" supports?  Did the window used to be wider than the doorway is now?  The finish plaster above the lintel seemed to say No, but all those loose bricks and crap bothered me.  But when I was down on the righthand side cleaning the wall just above the baseboard line, I noticed that the original gold-tinted finish plaster went all the way to the inside line of the support on that side.  Of course, when the front room was a porch, that finish plaster went all the way under the window.  Maybe this doesn't make total sense, but something about it tells me that the window rough opening was built as wide as I see it now, and the width of the doorway is the width of the former window.    I think they stopped the coursed brick well short of the window jamb supports to allow installation room and to account for variations in the width of the windows they might get.  Most of the filler that's in now would have been put in with the doorway, but it was meant to be there, I think.

Seems odd that I would chew this over so much, but I guess it bothered me to think that structural brick had been knocked out when the doorway was put in.  And the face trim was installed out of plumb which made me wonder what else had been done carelessly.  Not that the structure has been compromised-- I've found evidence that the work may have been done in the 1930s and it's been fine since then.

Well.  Next on the agenda is to continue the fake natural wood shellac job on the painted cornice moulding, which is too narrow and cheap-looking but is not coming down at this juncture.

Wednesday, July 11, 2012

Ta-Daaaahh!!

A better picture of the new chimney caps.  Pardon the bad quality-- my new camera is a piece of junk and it's my own fault for not getting back to the manufacturer to gripe about it.


Tuesday, July 10, 2012

"Peter Darling! the Sweep's Here!"

Old caps
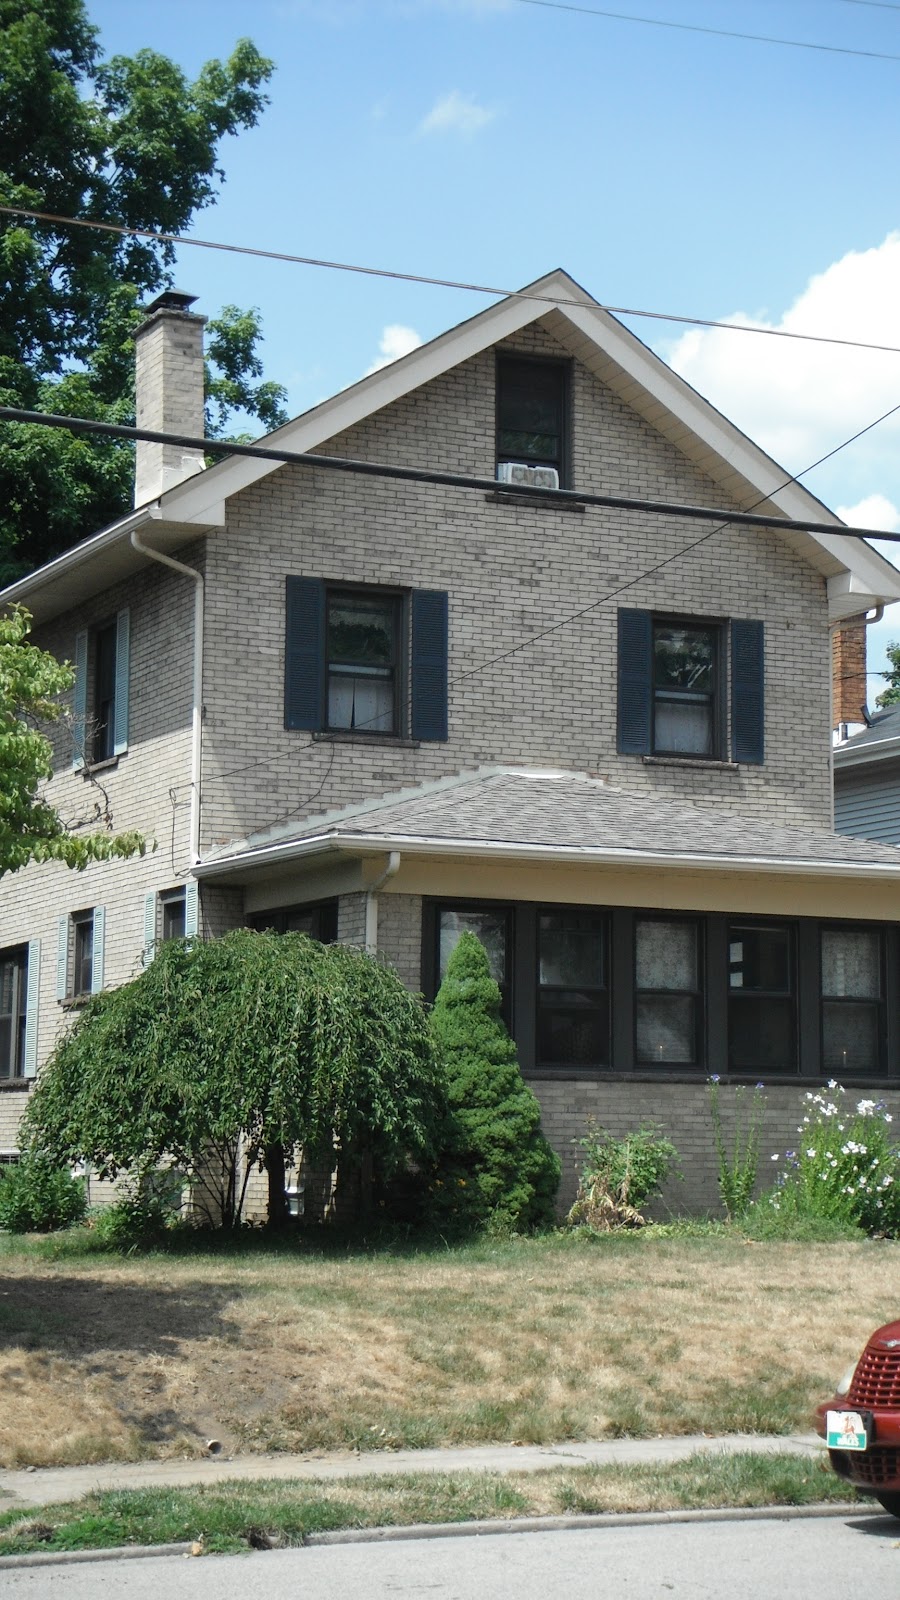
Thus in Dorothy L. Sayers' Busman's Honeymoon does the new bride Harriet Vane Wimsey announce to her husband Lord Peter the presence of the man who's going to solve the problem of the blocked sitting room chimney in their newly-purchased country house.  Peter and Harriet only found out they needed the sweep in the night before.  I've been gearing up to have something done about my water heater flue for months.

Still, when I could suppress the awareness of what the work was going to cost, I, too, could rejoice this morning at 9:30 when the truck drove up and John the chimney technician rang the bell.  Hurray, the sweep's here!

He certainly earned his money.  He was here for five hours, and made sure everything was done just right.

First thing, he went down the basement, put the water heater on pilot, removed the 3" flue between the appliance and the chimney, and enlarged the opening into the brickwork.

Old cap unit, on the ground
Note the rust on the lefthand side!
Then it was out to the side yard to raise the ladder.  He got the old double chimney cap down, what I feebly call the turbine-looking thing, and it was a lot bigger than I imagined.  And wide open to the birds.  And very rusty on the water heater side.  Not a big surprise, since the guys who did my roof repair a few months ago told me it was going.  That's why they painted it, but the extent of the rust was eye-opening.

Flue full of bird's nests


 John got out his rods and brushes and pushed the birds' nest material down into the basement where he plucked it out of the opening.  Two 5-gallon buckets worth, and some of it was packed so hard, he said, that for awhile he thought I had a brick stuck in there.

At work with the rods
My knowledge of chimney sweeping is mostly derived from Busman's Honeymoon (what did you think-- Mary Poppins?), so I knew about rods and brushes, but somehow I thought they were metal.  I asked John, and he said, no, in the old days they were mostly bamboo or rattan; now they mostly use fiberglass and other synthetics, depending on the offset of the chimney and the nature of the blockage.  And though he's heard of clearing a chimney with a shotgun (as employed by the vicar in Busman's Honeymoon), he's never actually known anybody who's done it!

New liner, with 2 buckets of blockage
A new cap.  Pardon rotation fail.
I didn't hang around watching the festivities the whole time; I kept busy inside sorting papers in the dining room or grooming my dog and my oldest kitteh on the back porch.  But I stepped out front in time to see my new stainless steel liner and its insulation coiled like a bright blue snake and the curb, and beheld the new chimney caps up close and personal, a chance I will likely never get again.  Made to order, stainless steel, powdercoated brown with hipped "roofs" without the standing seam.  Very Craftsman looking.

The liner is in


The animals needed more brushing and were enjoying it so much I missed the actual insertion of the liner into the flue.  He said there was no trouble getting it down.  Which is funny in a grim sort of way, because another chimney company came out in mid-June and got cold feet about "what they might find" in my chimney.  They were afraid they couldn't get the liner through, refused even to bid the job and told me to get an electric water heater instead!

Connecting the liner at the WH
But it went in sweetly, and soon as John had adjusted it at the top, it was back into the basement to get the new flue from the water heater connected in to the new tee at the bottom.  John told me the new flue from the heater is 4" diameter instead of the 3" I had, which will take a bigger tank if I or a subsequent owner ever need it.
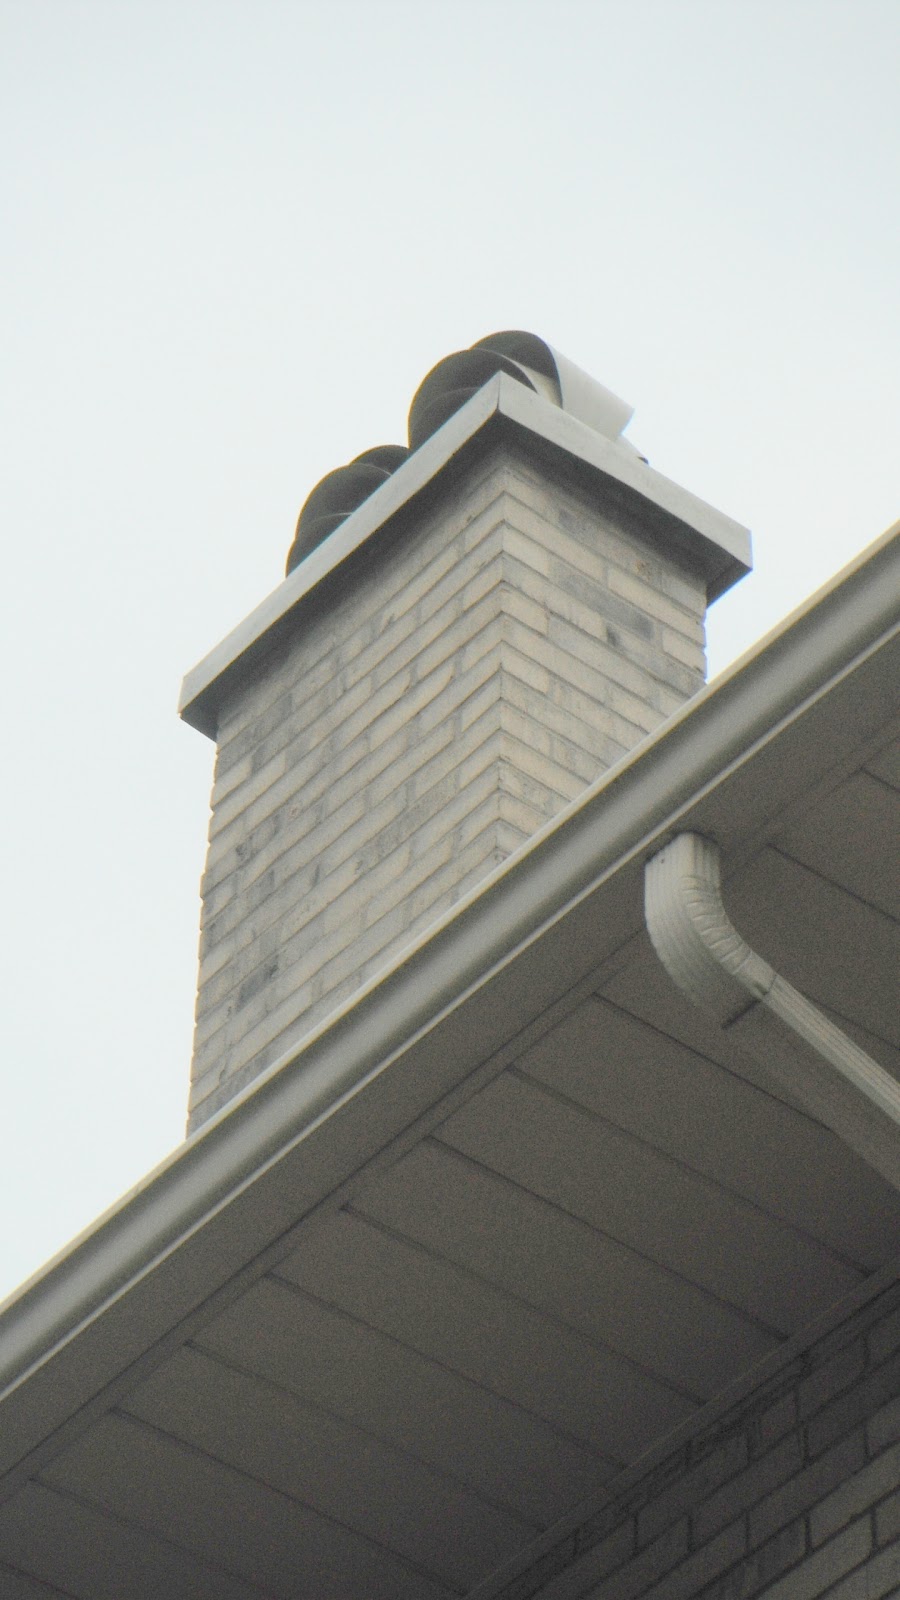
Setting the caps
Next was the exciting part, setting the new caps.  I keep hovering in my neighbors' yards across the street, where a bit of a rise gave me a better viewing angle, and I noticed that the front cap wasn't parallel with the stone dressing at the top of the chimney.  But John was already on it.  He was down at his truck cutting a couple of metal shims.  "I can't make the cap level," he said, "because the top of the chimney isn't level.  Does that make sense?"  "Absolutely."  "So we have to fool the eye so it looks parallel to the ground."

Careful adjustments
Time for sealant
And he did.  He worked at it until he got it right, got my okay, then used sealant to fasten the caps down. Standard way it's been done for decades, and no, he's never known a high wind to carry a cap away.  Then, sealant all around the bottom of the stone dressing, between it and the brick.

He noticed a bit of light-colored something on the stone and tried to scrape it off.  I'd noticed it, too, and when he came down he said it was sealant left from the old cap that had covered the whole top dressing.  He went back up with some solvent and soon, it was gone.

Done up top; time to lower the ladder
 The ladder came down after that, but John wasn't finished.  He headed back down the basement to mud the connector from the water heater into the brick flue so it was good and tight.  When I came down to watch he pointed out that I seem to have a leaky connection on the outgoing side of the appliance, judging from the corrosion.  It's not enough to melt the plastic collar yet, but it's something I need to watch.

New connector mudded in
This will need watching
As I'd requested, he hauled the two buckets of bird straw around back to my compost pile.  Once everything was put away out front, it was time for The Paperwork.  From comparing notes with other old house owners, I know that the price I got on this job was very reasonable, what with the sweeping, the top-quality stainless steel liner with insulation, and the two new caps.  I still wish it hadn't been necessary, but it helps that he accepted half now and equal payments at no interest over the next six months.  And there's a lifetime manufacturer's warranty on the flue-- if I get it professionally inspected every year.  But, John confided, even if I don't or can't, he's never known one of these to go out.

But I'll think about that next summer.  Right now, the work is done, hurray! and the damp spot over my mantelpiece can start drying.  It might take a week, John said, but then I can finish prepping my living room walls for finish.

All finished
I keep walking outside to gape at the new caps.  (You'd think I had this job done just to get them.)   I regret to admit it, but I kind of miss the old ones-- they were so distinctive.  But they didn't match the style of the house and they weren't working.

John hauled the old cap unit away, so I can't have a wake over it.  I was toying with taking it in for scrap myself, but I don't think I could lift it, nor did it look like I could fit it into my car, even with the back seat folded down.  So it's just as well I forgot to mention it and he made the decision for me.

Now, terra cotta chimney pots.  That'd be just the thing.  Oh, yeah.


Monday, July 9, 2012

Gerroff!

So I've been struggling to strip this salvaged screen door the past week and it's been an ordeal.  Not having fun not having fun not having fun!

I guess I was spoiled with the trim in the house.  Most of it you could flake the layers of paints off the old shellac surface, raise whatever was left over with the heat gun, then wipe it all down with Howard's Refinisher.  That's because nobody bothered to prime it first.

But somebody did prime this door, and the paint wasn't letting go.  It certainly wasn't yielding to chipping, heating, or the refinisher on a steel wool pad.  So I'm trying Citrus Strip for the initial removal.  I might have better luck with Kleen-Strip or Strip-Eeze or something like that, but I'm working in the basement and the ventilation could be better.

The Citrus Strip is supposed to raise all the layers between an half hour and twenty-four hours of the time you brush it on.  Ha.  It bubbles up the first layer of paint beautifully, but for the two or three under that, repeated applications only seems to make the wood soft so it feathers up whether you're using the metal stripping tool or the plastic scraper.

I guess I am making progress. Yesterday I figured the Citrus Strip had done all it could and I came back at the biggest piece of the door (one stile, plus the bottom panel with its rails) with the Howard's.  And it seems to be working.

I'm not enjoying myself, regardless.  Though I find I didn't need to dread tackling the screen insert, which I spread Citrus Strip on last night, as much as I had.  It did seem to have had a natural finish underneath, so the paint came up more easily.

For that matter, I observed that one side of the door (the side it's been hardest to strip), had orbital sander marks in it.  Which tells me that it's been stripped before.

I also noticed-- and this makes me laugh-- marks that tell me that once upon a time the hinges were properly surface-mounted-- on the opposite side from where they were when I found the door at the curb-- and the latchset was mounted on the opposite side, too.  The filler marks don't lie.  This is funny, for I've been debating with myself for weeks which face of the door is supposed to face outwards onto the back porch, and which side I want to face outwards.  I'm leaning towards having the more ornamental moulding be towards the exterior, even though that's not how my front screen hangs.  And judging by the black water stains on that side of the new-old door, I'd say it'd been done like that before.

I'm thinking that the biggest reason I couldn't get those screw cams to budge was all the paint in the slots.  It's out now, mostly.

Can't do anything more with it tonight.  The chimney tech's coming tomorrow and I had to clear out the sawhorses and door parts down the basement so he can get to the water heater flue to put the new liner in.  Excitement.

Monday, July 2, 2012

Side Trip

My find, as of September 2009
Haven't done a lot on the house this past month or so.  Life's realities have intruded and needed attention.  But what little I have done has had nothing to do with shellacking trim or prepping the living room for paper or cleaning up the 1st floor hallway floor for paint.

No.  I've been off on a side trip, seeing what I can make out of my new-old back screen door.

The existing door is a bog-standard aluminum convertible number that some previous owner forced into the opening.  For the past three, maybe four years it's been hanging by one hinge on the bottom and the door closer at the top.  The screw holes in the top and middle hinges are stripped, and try as I might I couldn't get the screws to stay in or hold.

So it was nice three years ago on the eve of the Borough's semi-annual large-item trash pickup that I spotted the perfect screen door dumped at the curb the next street over.  It fit the style of the Sow's Ear perfectly, had all its original hardware, and it was in one piece when I rescued it.  Well, two.  The screen insert was separate.  But though the stiles and rails and panel were all sound, by the time I got it off the porch and down the basement the dowels gave way in several places and the door fell apart.

Never mind.  I could replace the dowels and put it back together.

But with that and it's needing stripped and, oh, look, the hinges and latchset are on the opposite sides from what I need, oh, yeah-- dealing with the salvaged door has taken a back seat.

But this spring I got tired of hearing the aluminum door bang.  I figured the neighbors were tired of it, too.  It won't be long before the last hinge gives out and then were will I be?  I don't run the AC in the summer if I can help it, my kitchen door would be standing open, and the flies would be in and the dog would be out-- out eating dropped rose of Sharon blooms and getting the runs.

So before this summer is out, I'm determined to fix up and install that salvaged screen door.

Mortised into the door edge!!
Front screen door
Slow process.  First thing, I needed to remove the hardware.  Rotten difficult, as the screws were rusted in or painted in in most cases.  After three or four weeks of coming back and coming back and working at it, I finally got the hinges and latchset off, but I'm not home free.  The hinges are the half-surface kind, where one leaf is supposed to mortise into the jamb and the other, which is broader, is screwed to the surface of the door.  My front screen door is hung just that way.  But the previous owners of the new door had to get creative.  They mortised the narrower leaf into the edge of the door (patching work to do there), and the wider leaf they must have attached to the jamb in some way.  I'm not sure how, because all three have two 1/8" thick aluminum shims attached to them.

Aluminum shims.  I wonder why.
And that's where the difficulty lies.  A lot of the Philips head screws that replaced the originals in those leaves are stuck, broken off, and plain won't cooperate.  I've tried everything with sprays and oils and clamps and pliers, but there's still four of them I can't get out.  Grrrrrr!!

On top of that there's the jolly screw-cams that hold the screen insert in.  Oh, those were nasty.  Worked at them literally for weeks.  But I finally realized that it was doing no good to pump loosening solvent over the heads of the screws on the face of the door, the thing to do was to squirt it into the grooves in the sides to get to the rotating tongue part.

Washed
That, and get the pieces outside into the light where I could actually see what I was working with.  Had to do that anyway this afternoon, to wash the dirt off the surfaces.  Finally, finally, I was able to work the screws around so I could get hold of the tongues with my Vise-Grips.

The cam rotates!
So now they're free, and all I have to worry about is the fact that the tongues look a little bent.  And about stripping the pieces, redowelling them, getting those stupid shims off the hinges, getting the insert rescreened, etc., etc., etc. . . .