(Can I get a dish of applesauce here?)
This is the first week I've had evenings off since the end of January, when I started working front desk at Dick & Harry's Tax Service.* Initially I was merely going to wipe everything down and do the shellacking Later. But it hits me that dust has a tendency to resettle, especially with four furry animals in the house. So some finish application was in order.
Started with a clear coat of Kusmi #2 on the doorway to the 3rd floor and to the former entryway downstairs. I'd noticed on samples I'd made that the tinted shellac shows up better when it goes on over a clear coat instead of wood that's clean sanded.
 |
| Doorway to Study stairs, 2nd floor |
On this 2nd floor doorway you can see where the paint soaked in behind where the old stop moulding used to be. I tried sanding it out, but it was too deep. Will the tinted shellac cover that? I hope so.
Here's the doorway between the 1st floor hall and the front room partly clearcoated. The camera makes the color look more intense and orange than it was.
 |
| Old entry door, 1st floor |
 |
| Cased opening sill |
My initial idea was that I'd let these coats dry overnight and do the tinted shellac today. But I'd forgotten how quickly shellac dries. So what the heck, why not?
Started at the top, with the risers of the stairs to the 3rd floor. These still have patina on them, and didn't need an initial clear coat.
 |
| 3rd floor stair risers, partially done |
Then the rest of the risers, the casing, and the bottom end of the stringer.
 |
| 1st coat shellac, 2nd floor hall |
Then the hall side of the door casings to the guest bedroom, the bathroom, and the hall closet.
And the curved baseboard and the 2x frame around the 2nd floor hall window.
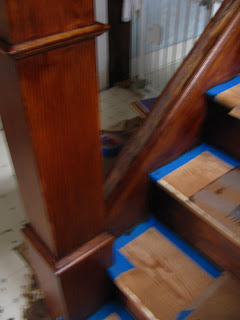
Since I was rolling with it, I proceeded to do the upstairs newel post, the oak stair bannister and shoe, the 1st floor newel, the frame around the downstairs hall window, the doorway between the hallway and the front room, the sill between the hall and the living room, and the moulding that sits on the wall over the hall bench, under the bannister shoe. Then I came back up and laid a coat on the main stair tread and on the pine stringers either side of the main stairs. Drew the line at shellacking the hall bench, since it still had the protective paper on it and I hadn't cleaned underneath it.
 |
| Looking down from the 2nd floor |
I don't have pictures of all this wondrousness, because my stoopy camera eats batteries like I should drink water, the ones I had in were dying, and I had no more in the house to replace them. (Last time I'll buy a camera that takes AAs, believe you me.) But maybe that's just as well, since I was shellacking without a worklight, deliberately. The plan was that if I worked by natural light only I wouldn't get too fussy about making the first coat perfectly even, but leave it to the next coats to blend it all in.
 |
| Blotchy mess! |
The saving grace is that the successive coats of shellac should blend it in, though it'll probably take a clear coat or two to accomplish that.
The color isn't as dark as it shows up in the photos. But I doubt I'll make it as walnutty-dark as it was originally. I want the reddish warmth and the grain to come through.
